

.svg)
CS2 (CSGO) Cache [Map Guide & Callouts]


Discover the best tactics, nades, smokes, and callouts on Cache. This large but compact CS2 (CSGO) map has lots to learn.
![CS2 (CSGO) Cache [Map Guide & Callouts]](https://theglobalgaming.com/assets/images/_generated/thumbnails/60950/61a89b172ff6046321412925_Cache-Map-Guide-CSGO_94948129f3d674eb46f0eebb5e6b8018.jpeg)
Cache is a big map with a lot of areas to learn and understand. There are around 52 callouts for this map with the overall design being rather compact, making “large” seem odd to describe it.
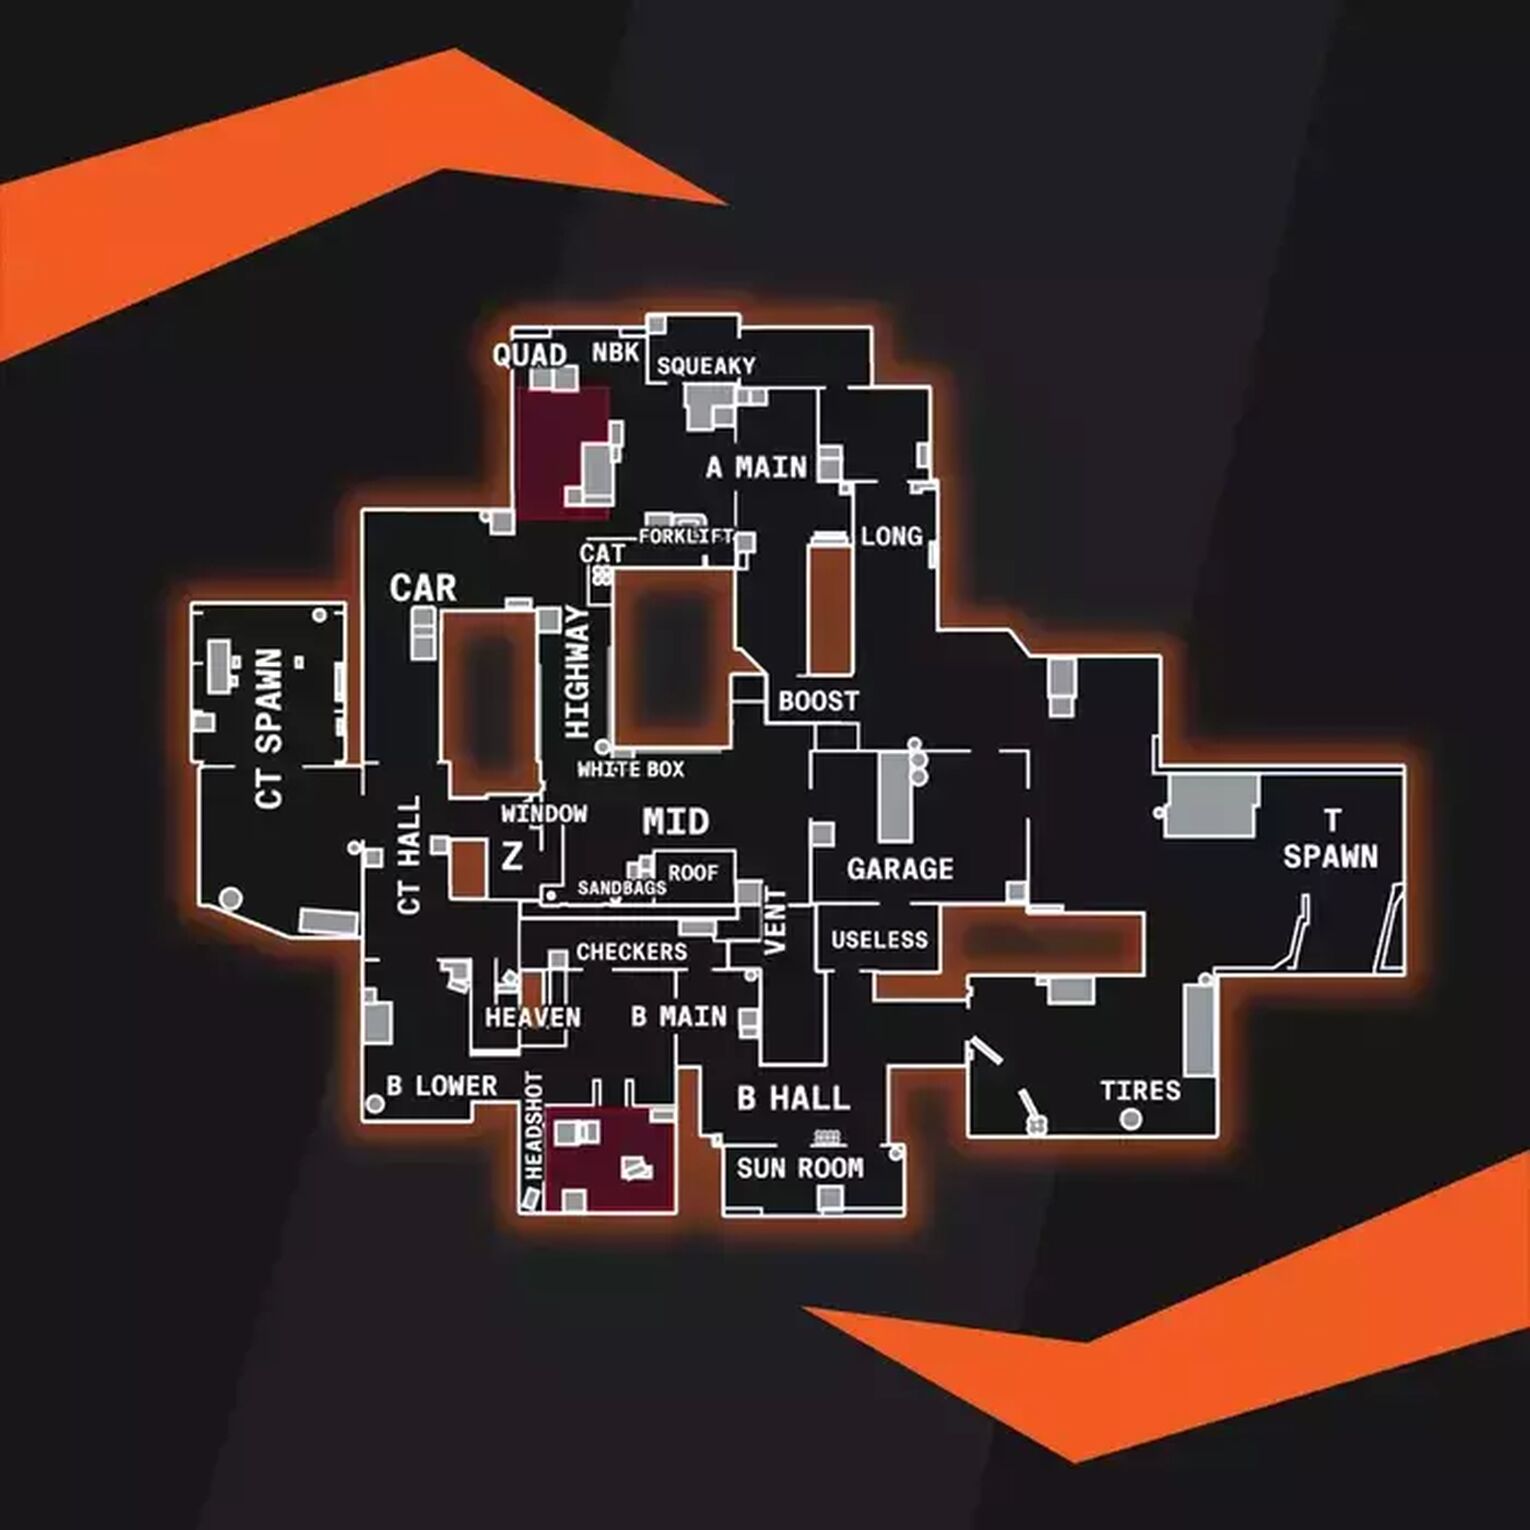
But still, let’s go through all of them! And if you need more CS2 (CSGO) map callouts, you’ve found yourself in the right place:
- All Inferno Callouts
- All Overpass Callouts
- All Vertigo Callouts
- All Mirage Callouts
- All Dust 2 Callouts
- All Nuke Callouts
- All Train Callouts
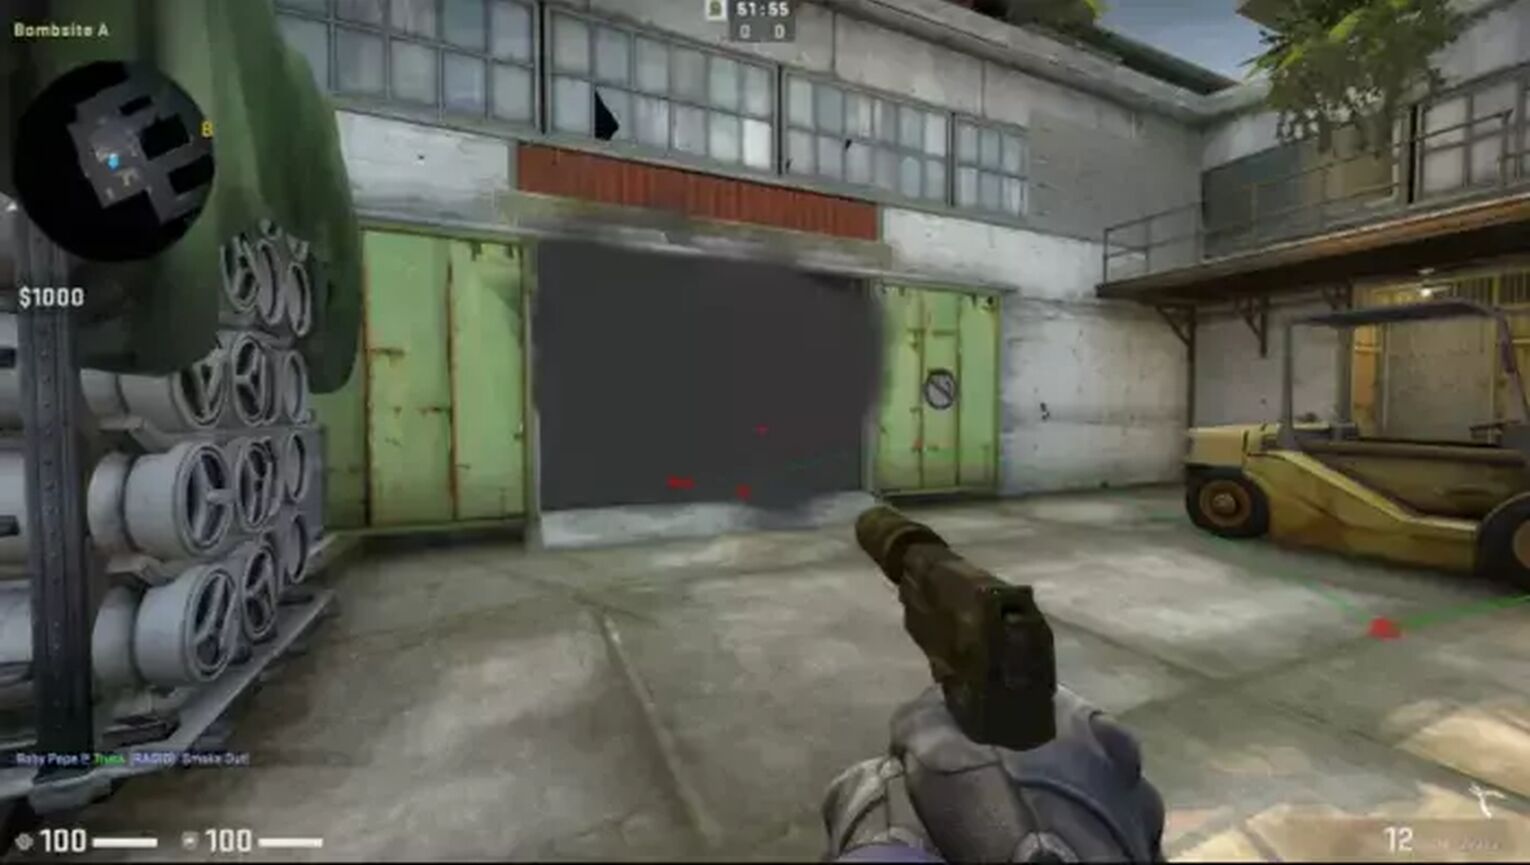
Bombsite A
Set at the top left of Cache, Site A is in a large room with a line of sight into multiple hallways. Bombsite A can is visible from the narrow Highway area that connects Site A and Mid.
You can also see it from a large doorway to A Main which connects to the other side of Mid, and standing on the Truck at CT Halls allows players to look over the walls into Site A.
The doorway from the Squeaky Room can see into the Site A room but doesn't provide a clear view of the Bombsite.

This is an area of high contention which is not surprising considering it's a Bombsite but the room has many lines of sight and hiding areas to allow for longer duels. The variety of hiding areas also forces players to be more strategic when approaching due to the potential for enemies to hide in various places.
How to defend A Site
The most typical way gamers try to play Cache is with two Defenders on Site A and two others at Mid. There are a lot of strategies that can be used on this map only needing two players per site, but other combinations can work.
Rotating is key for this map, and keeping players in Mid helps keep control while allowing for fast support if the enemies try to rush on site.
How to attack A Site
There are two prime entry points for Bombsite A; through the Mid and into the Highway or through A Main. While the Squeaky Room can be an option, it's bit as good as the other two. Ideally, you could block off the Truck by the CT Spawn as well, using a smoke grenade to keep your team safe as you all rush in.
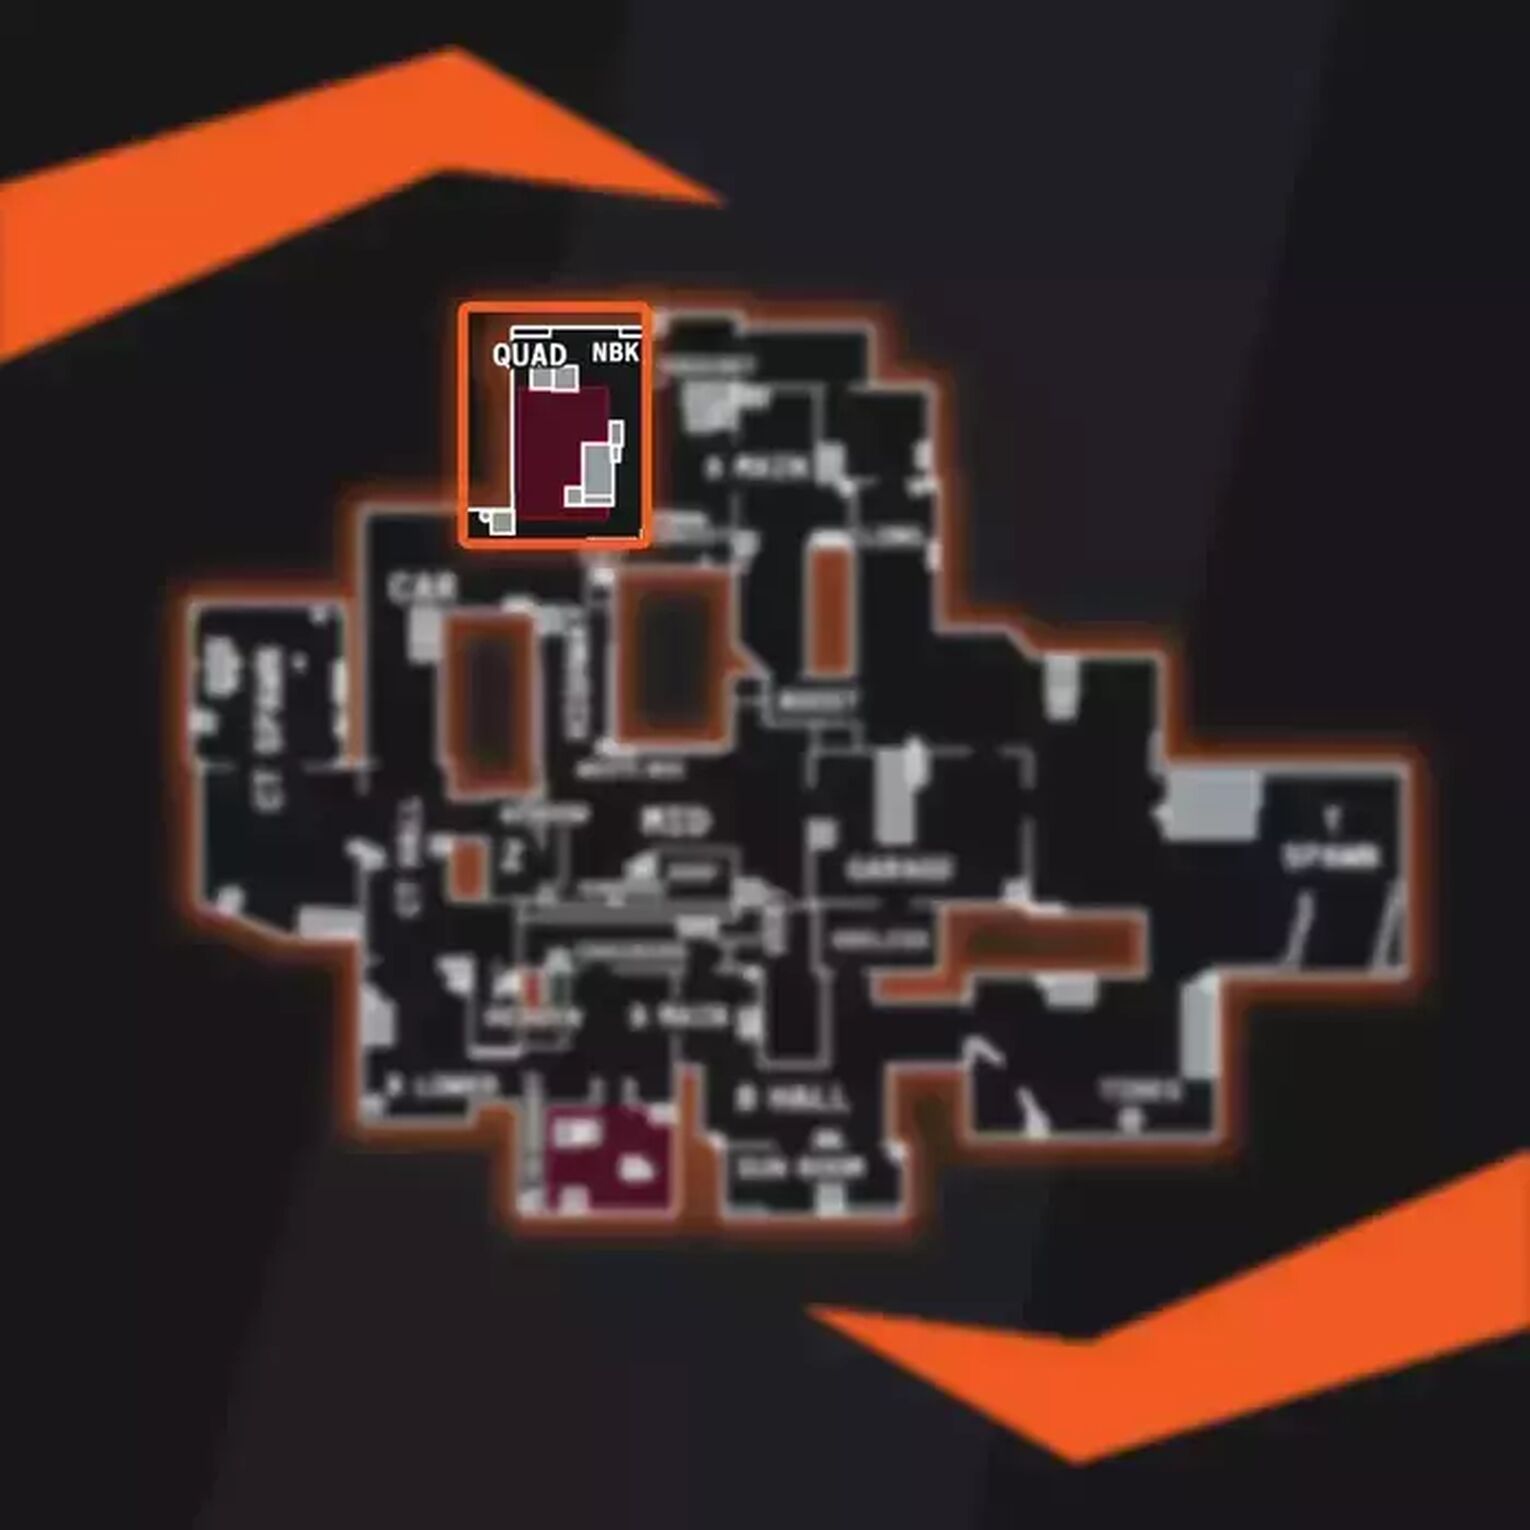
Once the Attackers can gain access to the room, they need to check and kill any player that might be at the Forklift. After this, it's possible someone has set up a position at the Quad area in the back, so nades such as Molotovs are great for clearing it.
If the team goes through the Mid instead, then they must smoke grenade the Connector area, which is one of the potential doors into Mid for the CT. After this, they need to hurry to the Highway and smoke both Truck and corner before trying to push into Site A.
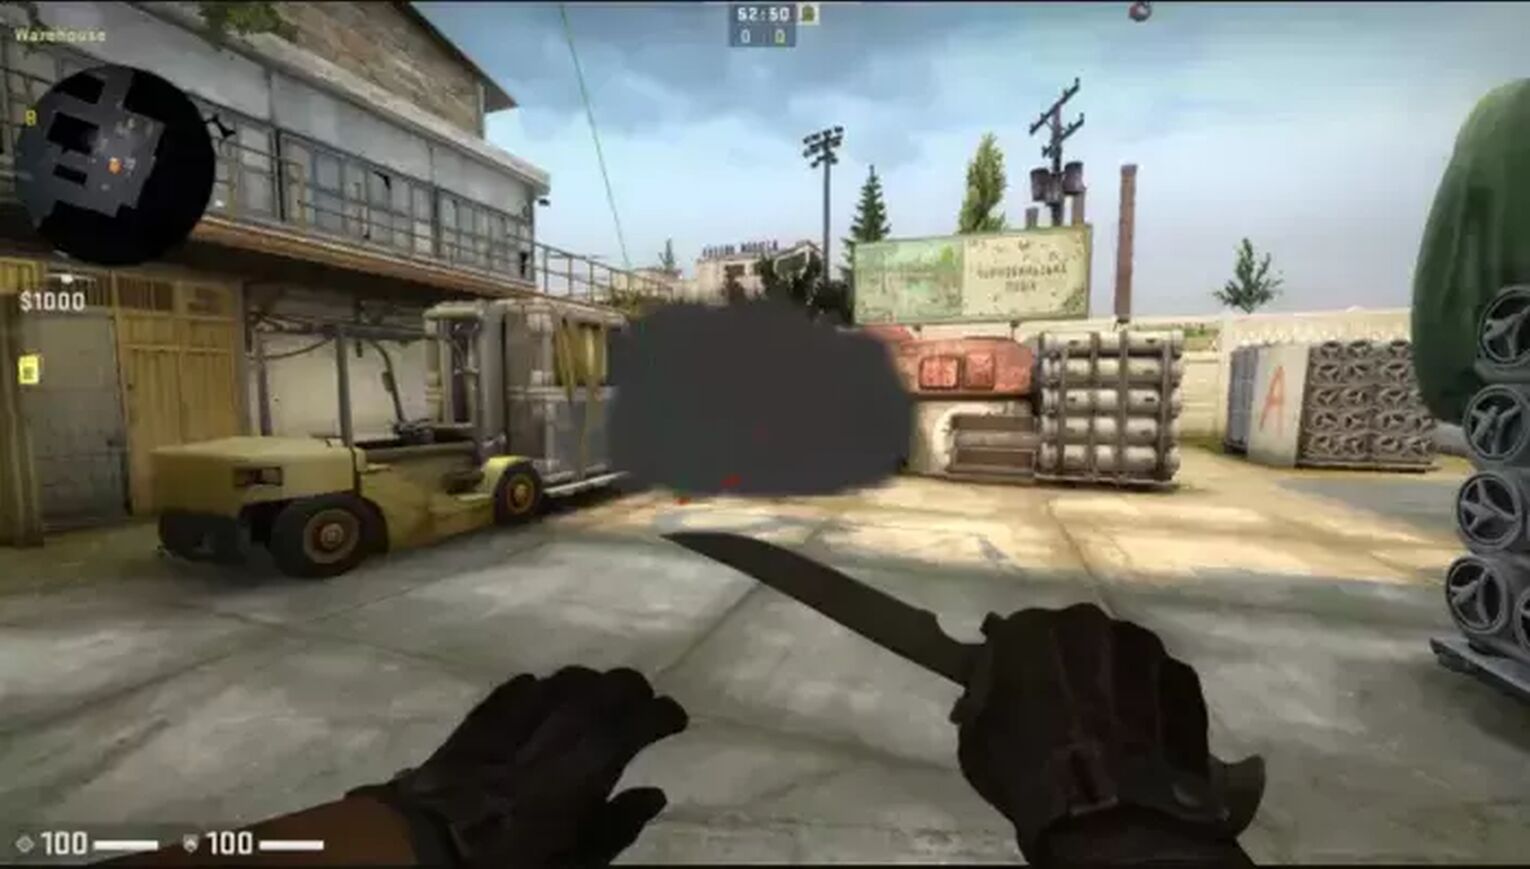
T Spawn
Attackers spawn on the far right of Cache, opposite the Garage, and towards the back of Mid. The distance is about the same to reach Site A and Site B where Mid plays an important role for the Attackers.
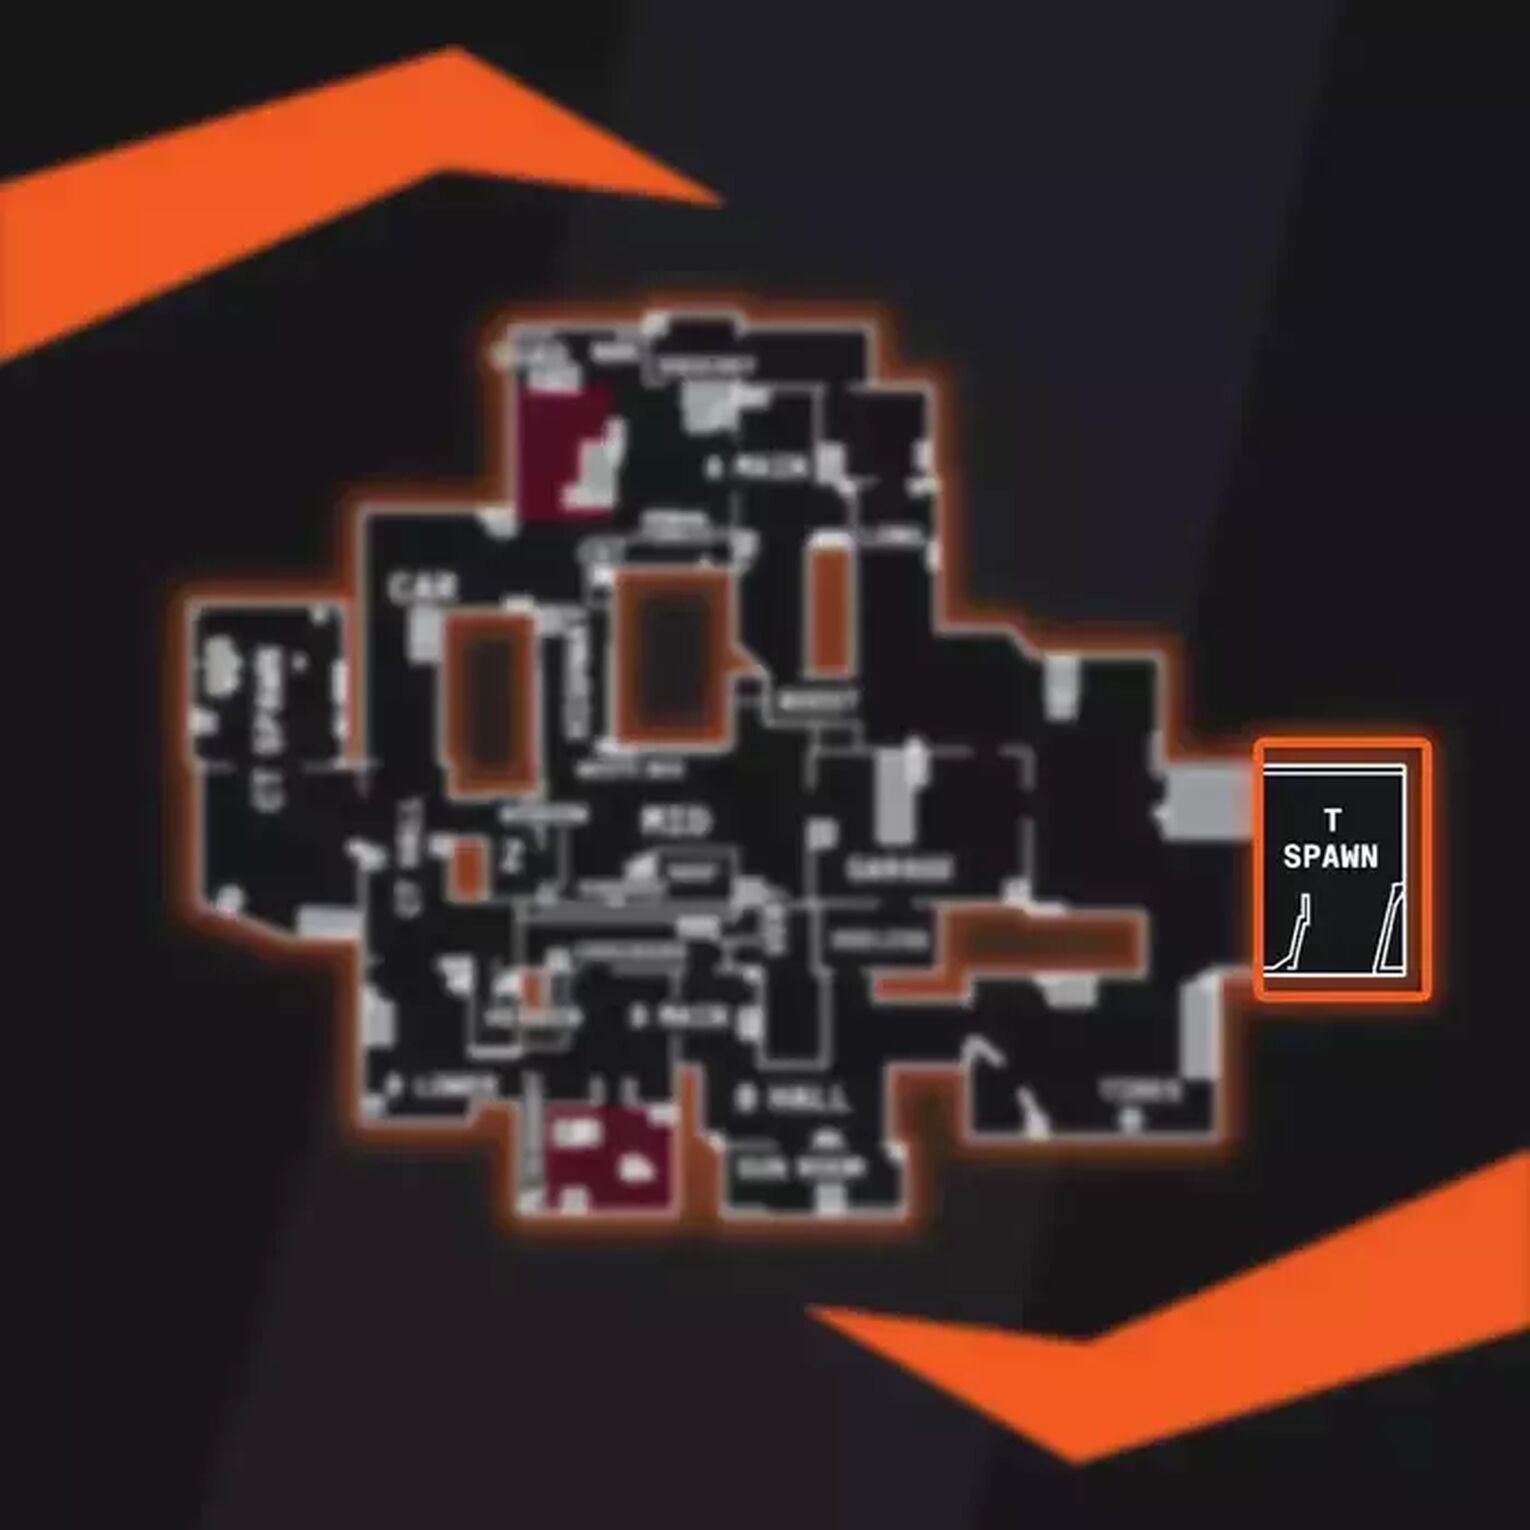
On the left side of T Spawn, the corner leads into the T Boxes and through there it leads along to Site B and also Checkers with the Vents into Mid. From the front, there's the Garage that leads into Mid with the Vents and to the Highway corridor for Site A.
Going along the side of the Garage to the A Main or A Long corridor also gives access to Site A.
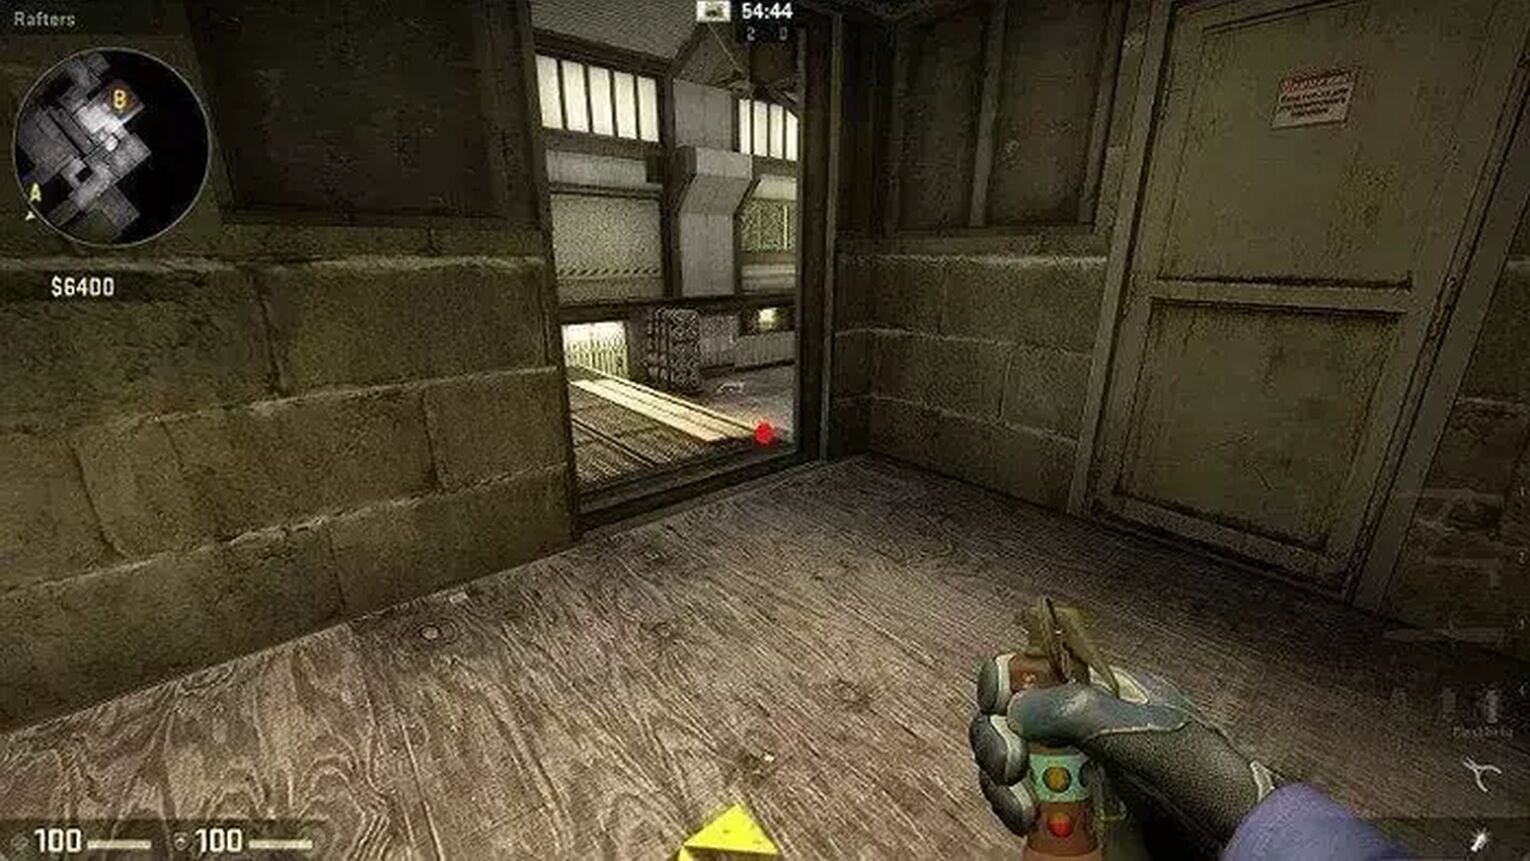
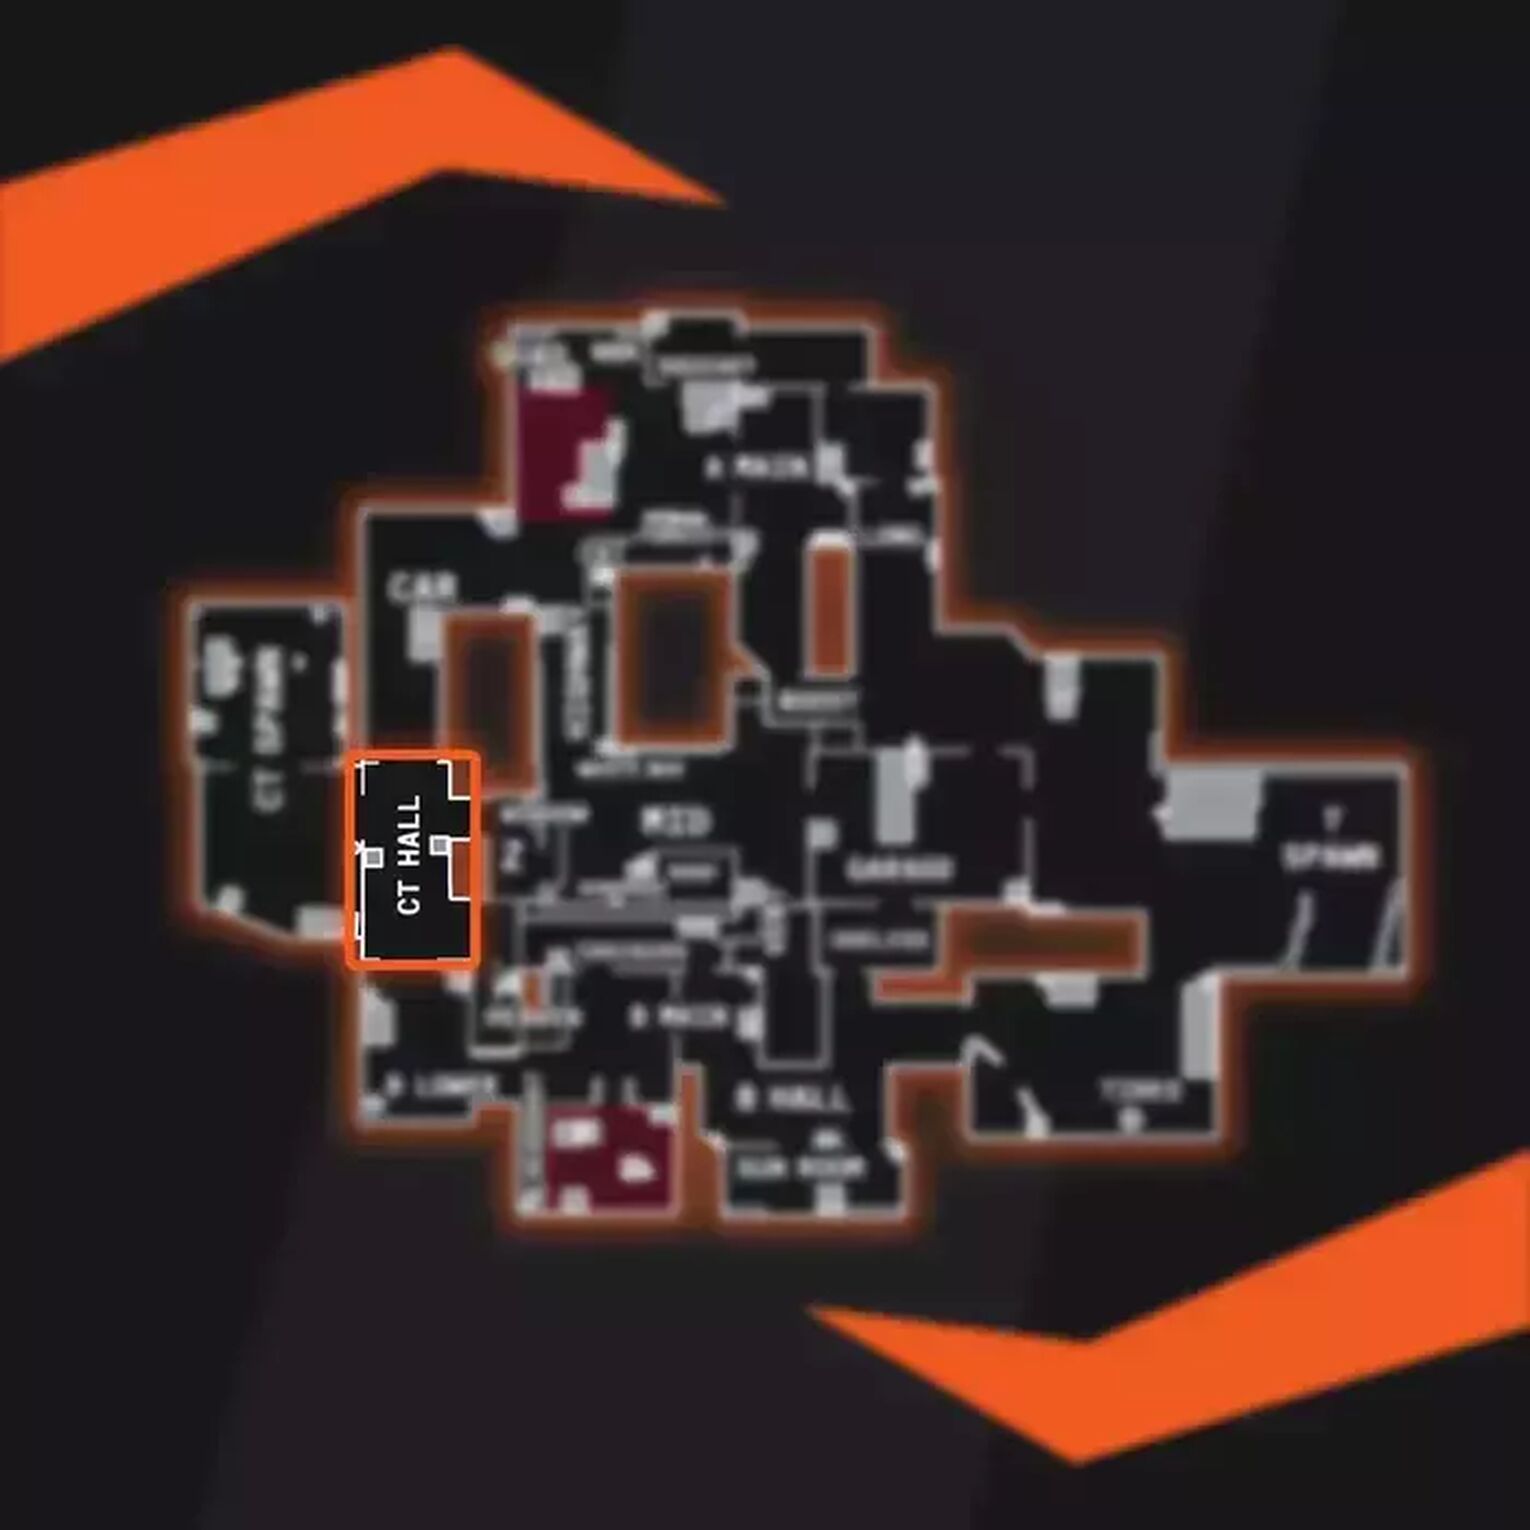
CT Spawn
Defenders spawn on the opposite side of the map in an enormous room that leads towards the CT Halls. From there, it's quick and easy to access both Site A and Site B using the CT Halls.
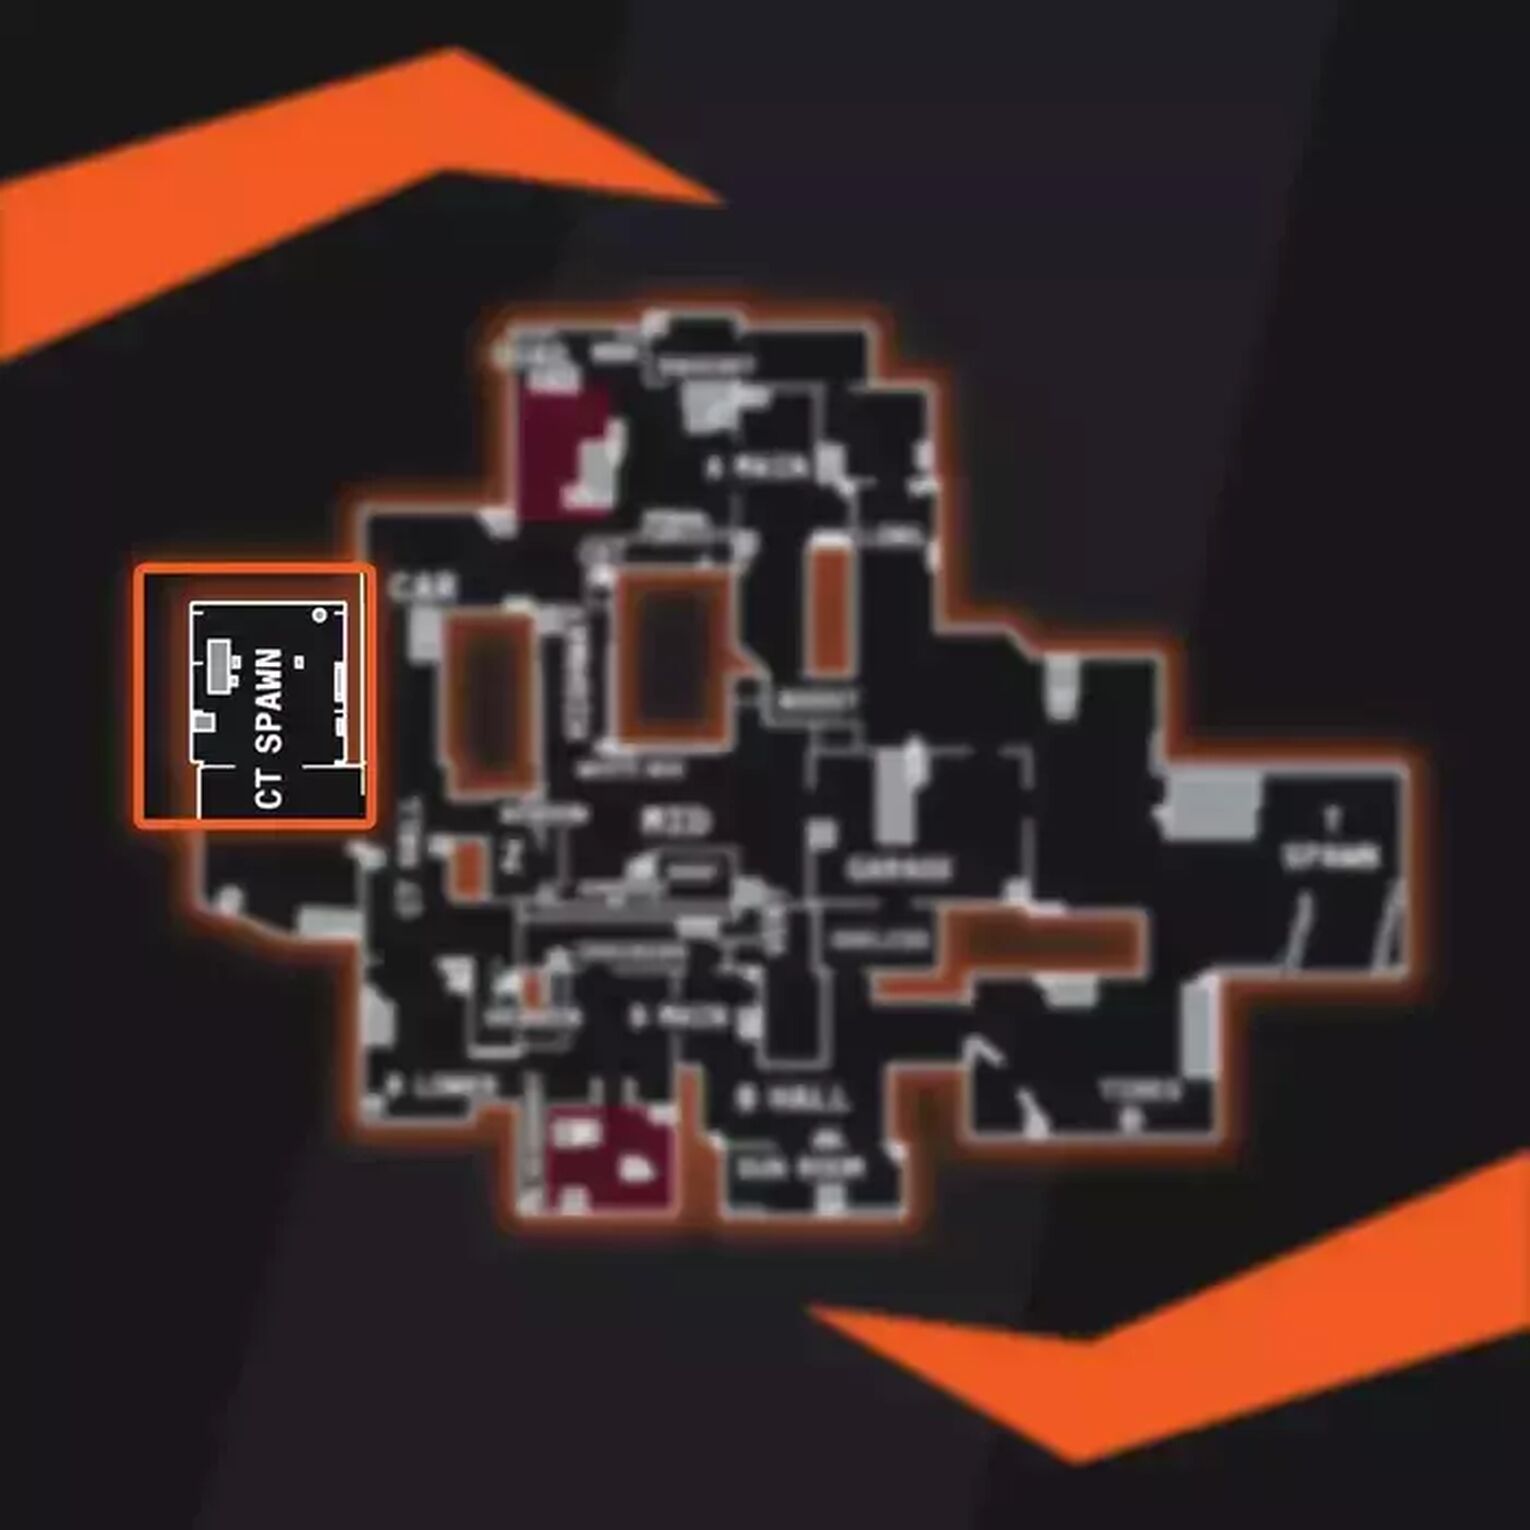
It also leaves to Heaven with Rafters looking over Site B and also the Truck that looks into Site A. This area provides a lot of visual information for the Defending team.
There is also a Connector into Mid to defend this area too.
MID
Mid is an area of high conflict since holding this area gives total control of the map. If the Attackers hold this area, then Defenders need to go around the entire map to reach either Bombsites and likewise for the Attackers if the Defenders are holding it.
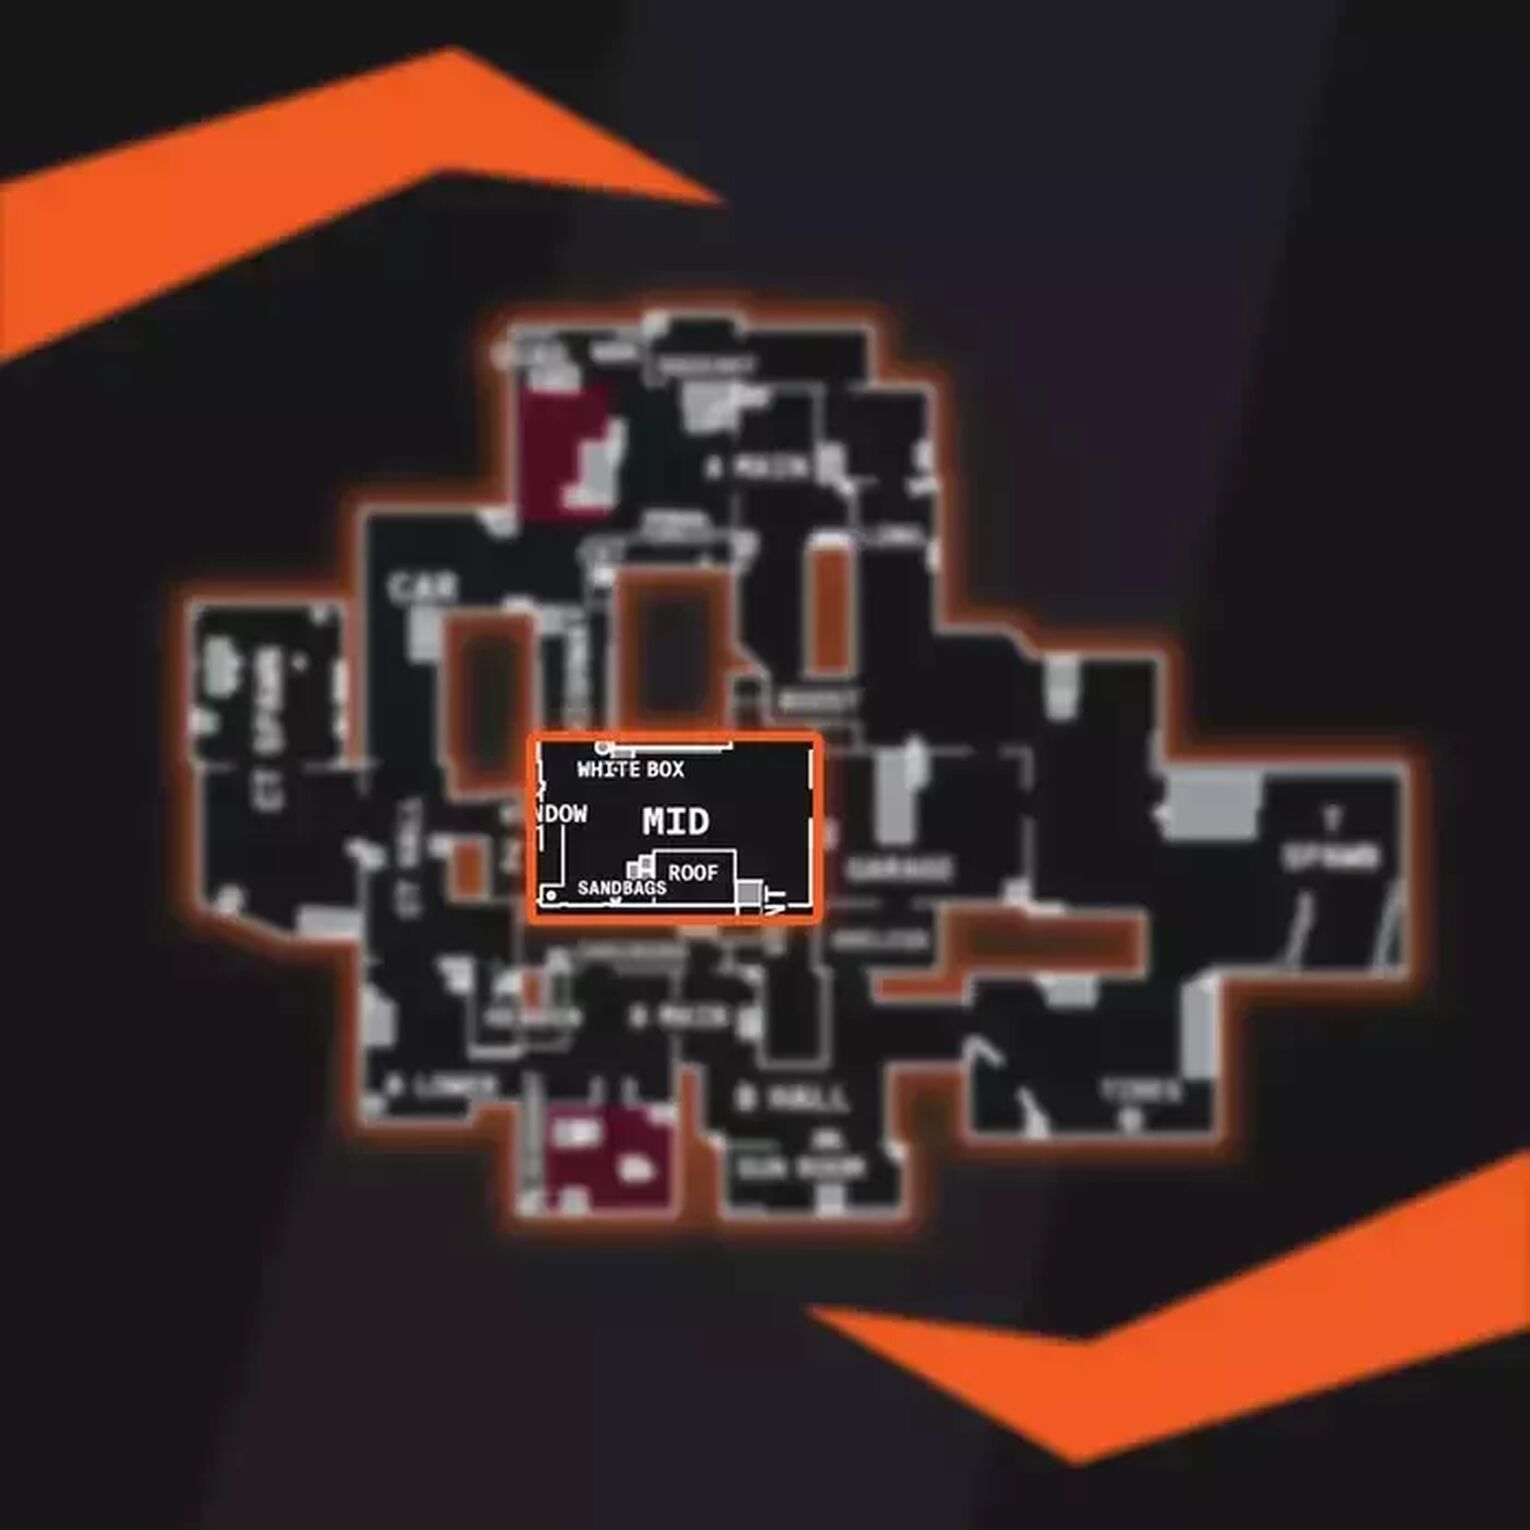
However, if the Defenders hold this area, then it blocks potential attack routes for the Terrorists as well, making their approach more limited.
Mid also has Vents leading into Checkers by Site B allowing for fast movement between the areas for the team that controls it. It also has a clear visible sight line to the Site A area. This is key for Defenders to monitor the zones.
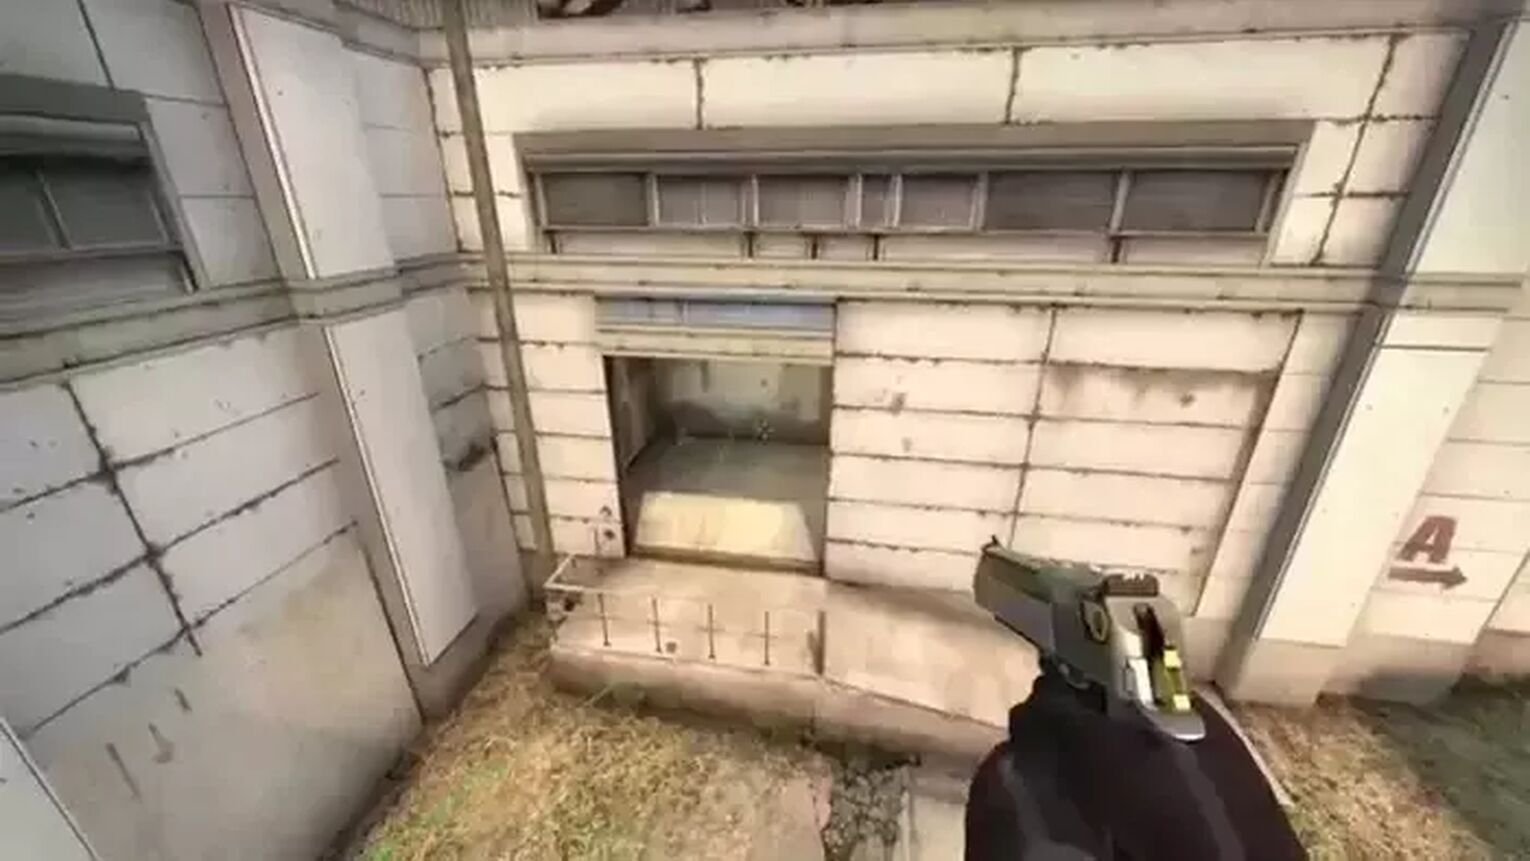
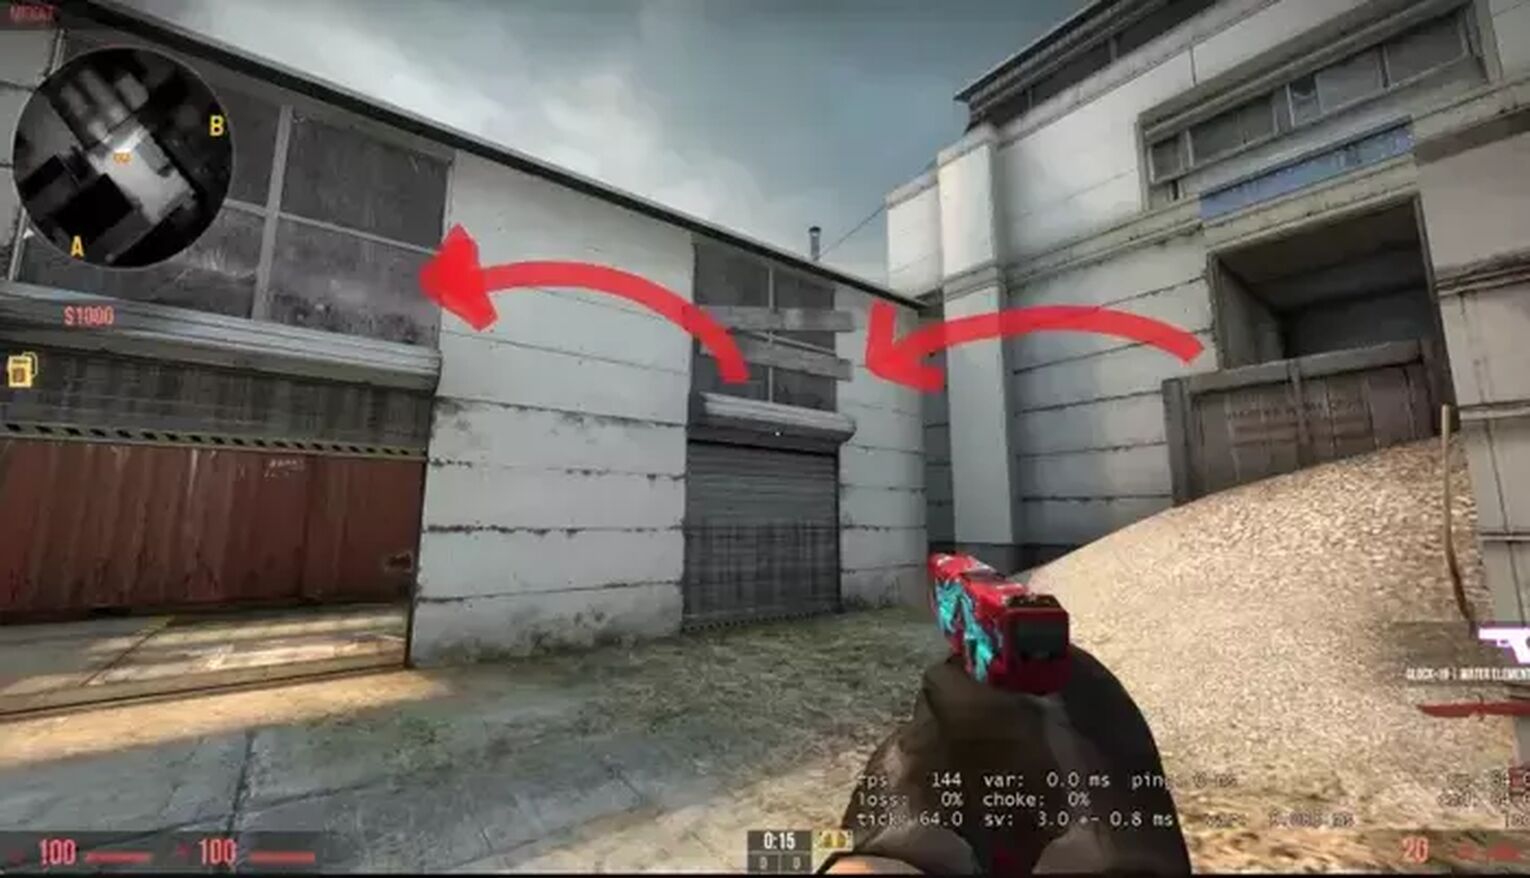
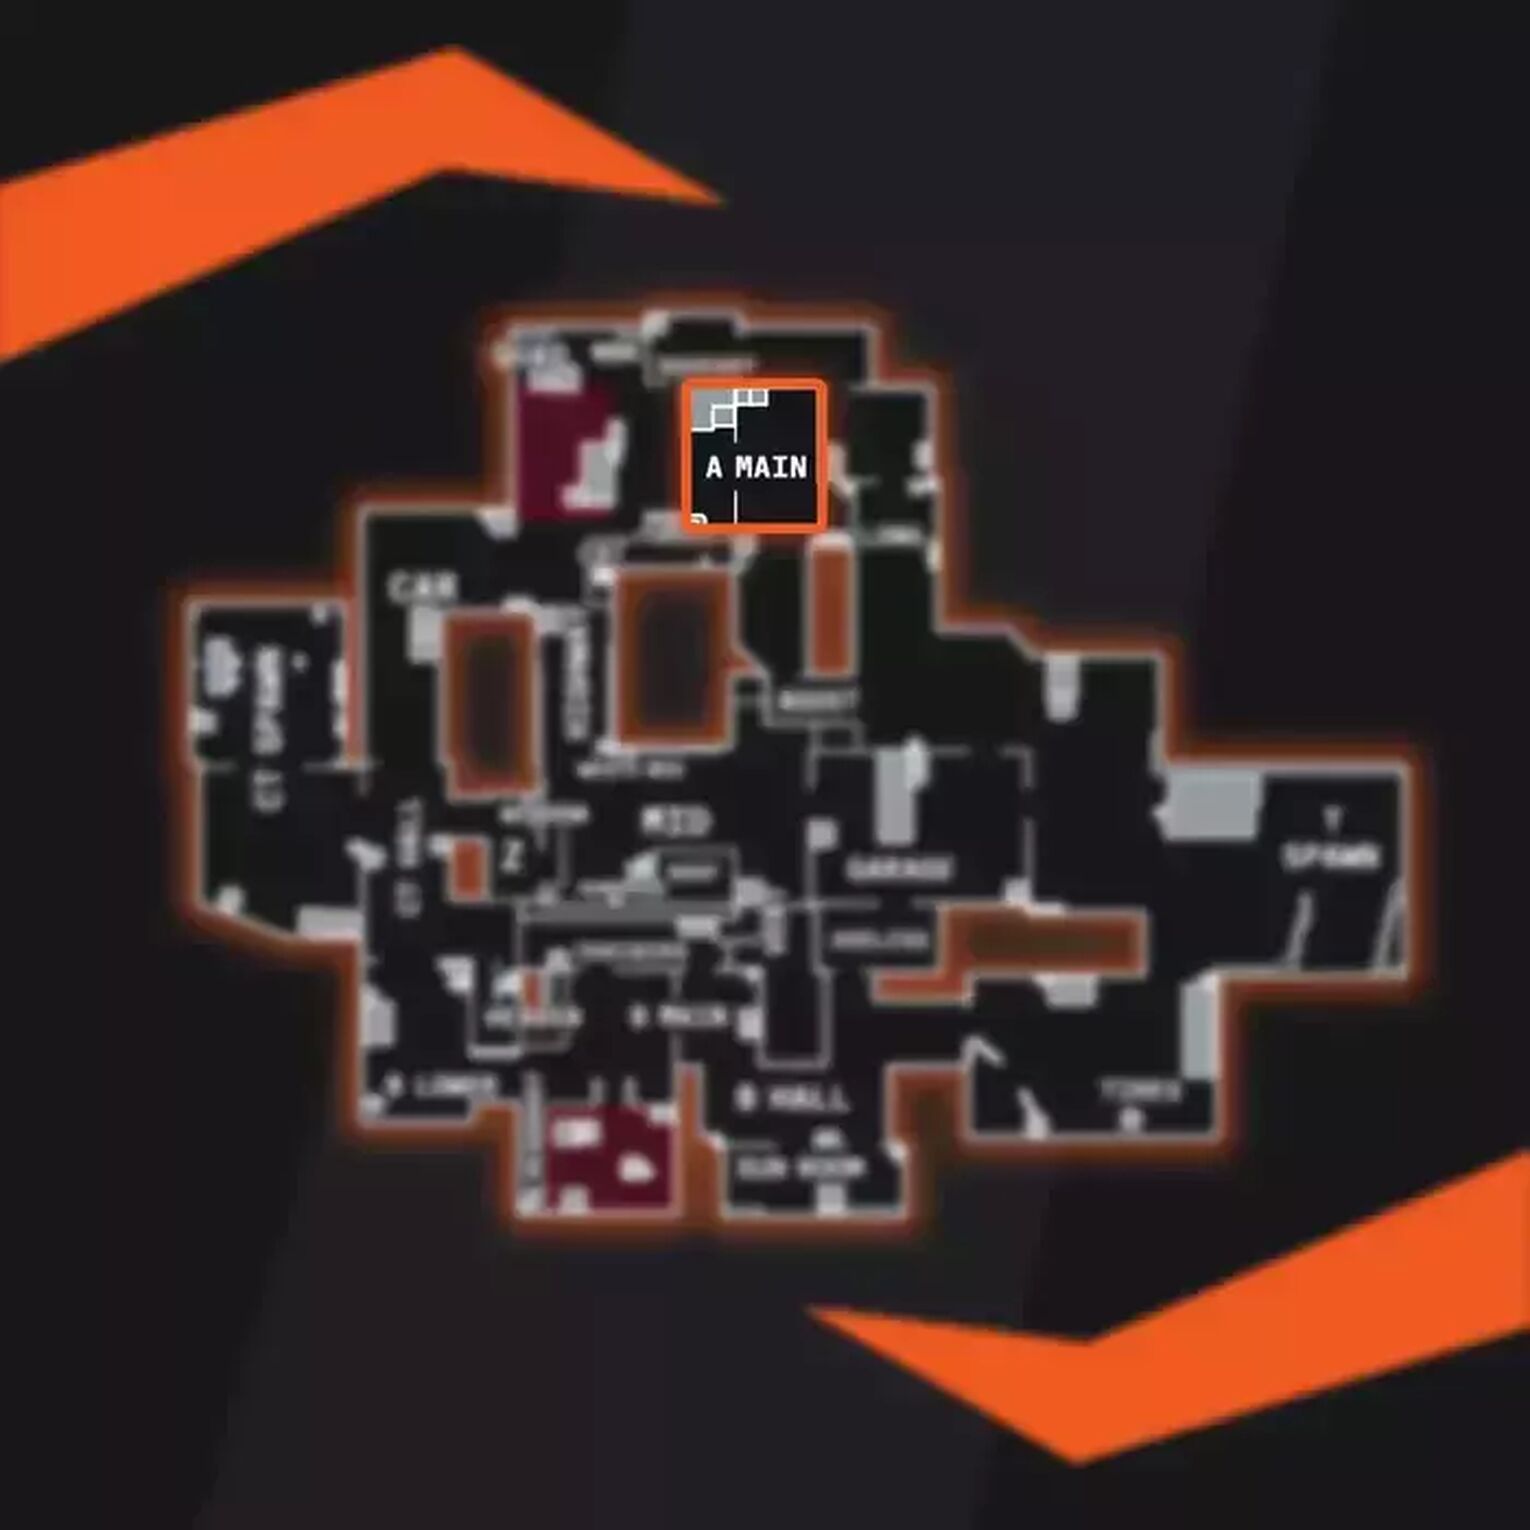
A Main
This is an important connecting area that is a relatively wide hallway that the Attackers mostly use to enter Site A with. It's the fastest route coming from that direction, and access is easier here than through the Squeaky Room.
Some fighting will take place here as the Defenders hold the Attacking team back and as the Attackers push forwards through the wide doorway.
As a result, there is usually a Defender at the Forklift in the corner, as they can hear the approaching Attackers use nades to block them off.
When Attackers come through the doorway and into Site A, they must be sure to check the Forklift area.
Bombsite B
On the opposite side of the map to Site A, this zone is set in the back of a large room that has several access points. Site B is close to the CT Spawn and is quick for them to rotate from, while the Terrorists would need to move through several areas to reach it.
While there are four doorways into the room, there is a lack of visibility into Site B which can make this a tricky room to deal with. Coming from CT Halls and into Hell, that corridor leads straight onto Site B, but it's difficult to be an unobstructed view of the site.
While there is a better viewpoint from Checkers via B Main or the Vents, it's also an open position, making that player an easy target while Defenders at Site B can hide behind boxes. Coming from the CT Halls, going up into Heaven and the Rafters provides an unrestricted view of the area.
How to defend B Site
Due to the focus on Mid and Site A, this usually means one player is left to defend site B alone. With defending alone, the player needs to spot the incoming attack and survive long enough for their team to rotate into the area. Typically, this is done by using the boxes on the site with a lot of running around them from both the solo player and the Attackers. Smoke grenades and flashbangs are very useful here as they block enemy paths and allows a player to rush from Mid through the Vents and assist quickly.
When defending Site B alone, it's best to stay there until the Attackers attack Site A. Having two players on Site B is the best option, but one player can also do the job.
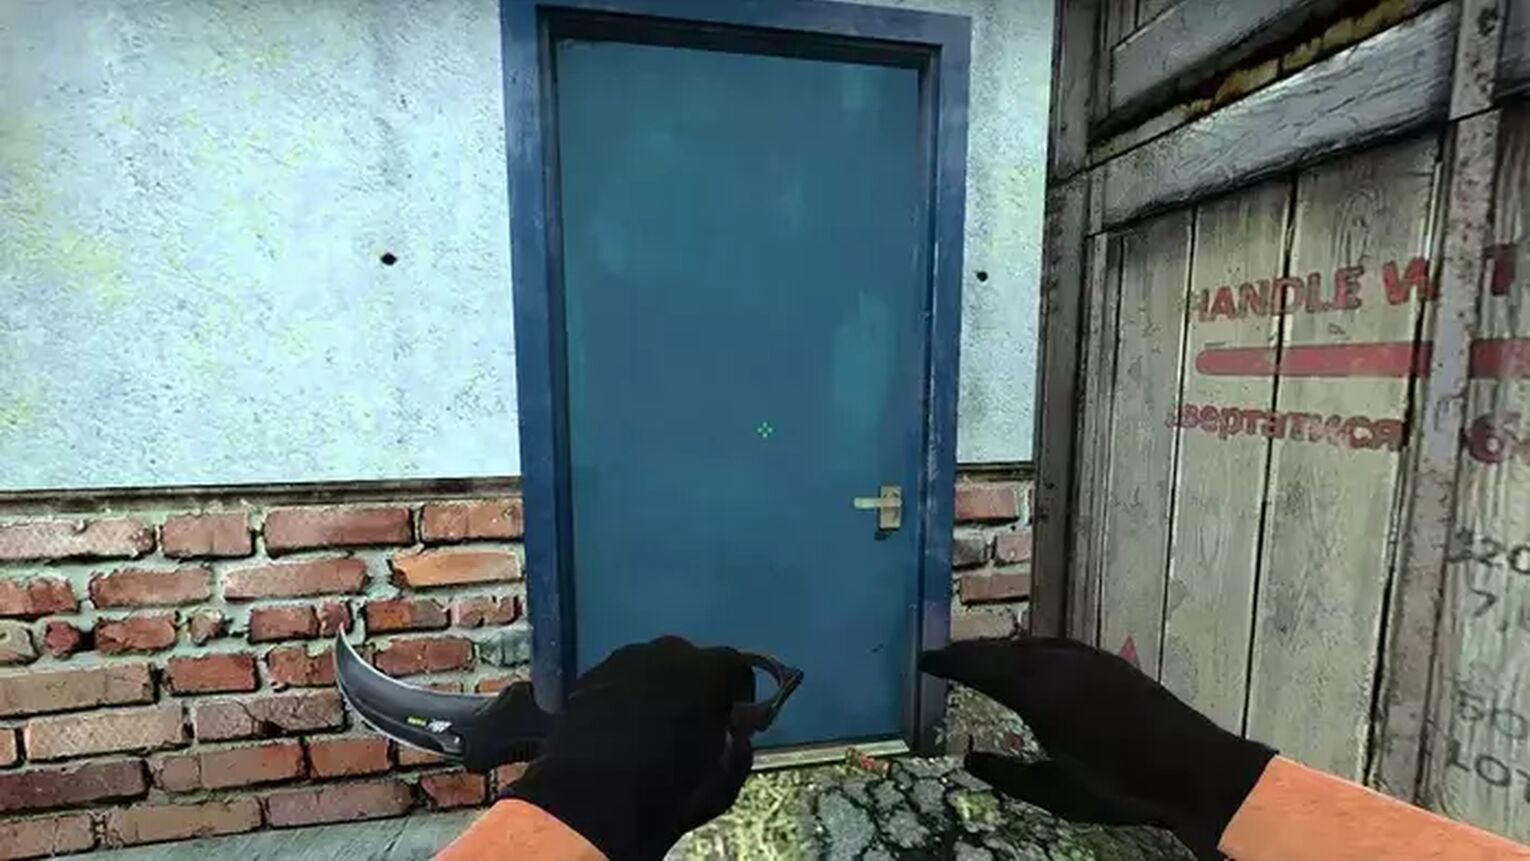
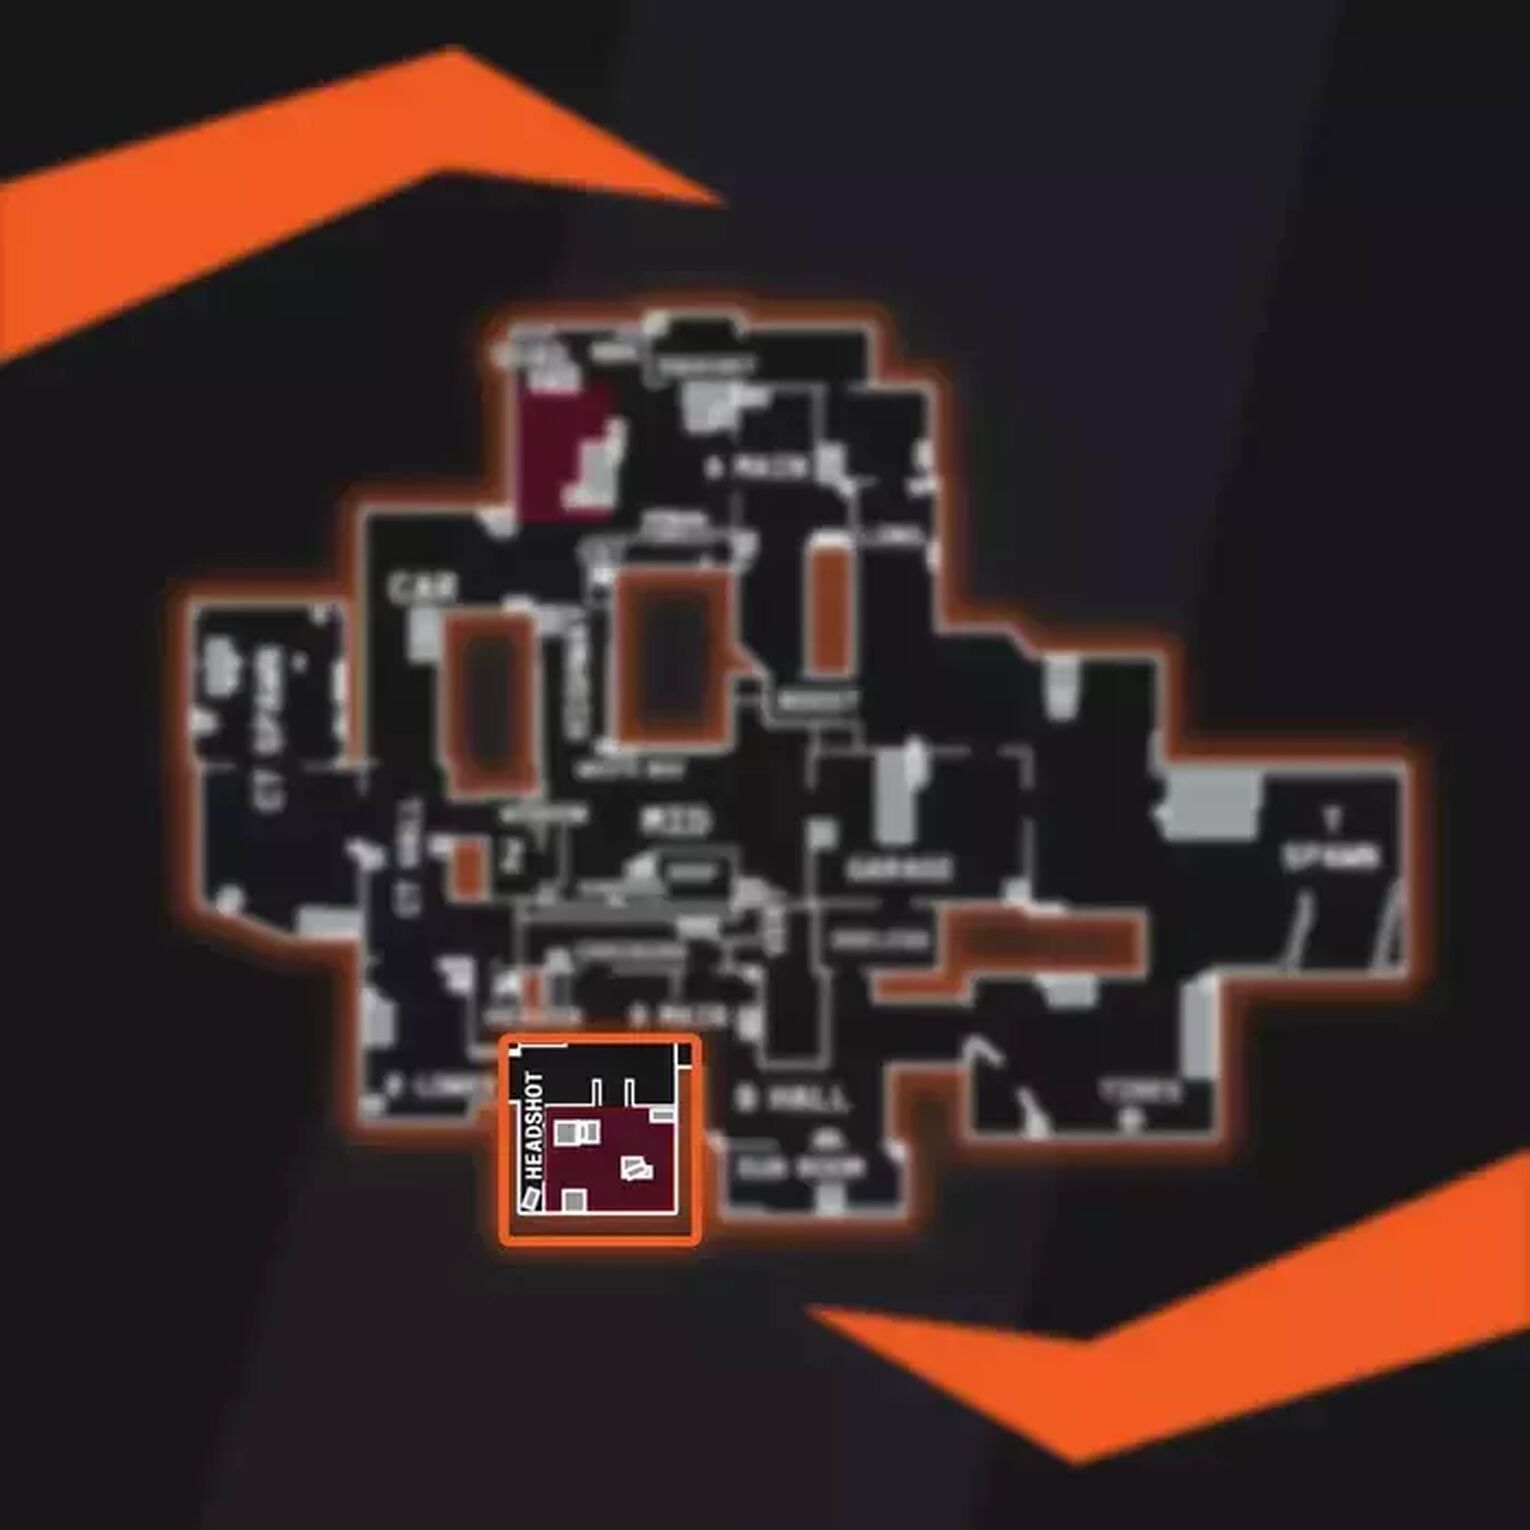
How to attack B Site
There are different attack options here as well, depending on how much of the map the Terrorists control. Controlling the Vents allows easy access to Checkers for a double doorway strategy, though it can also be possible to throw a smoke grenade, which also lets you pass through this area safely.
It's a great idea to go into the Sun Room and throw a smoke to block off the entrance to Hell, which limits the Defenders' options and makes it easier to kill any Defending players. Once the room has been smoked, a few Molotovs will force Defenders out from behind the boxes and help gain control of the area.
While planting the bomb in the open may sound like a dangerous move, it can be useful for Site B on Cache. It allows your team to defend it even if they kill the players in the room. Smoke grenades and other nades will help keep the Defenders out of the room once the bomb is planted.
CT Halls
While not usually fighting zone, the CT Halls are critical as a connecting area for the Defenders and also as a 'hub' for gathering information. The Truck provides sight into Bombsite A and partly into the Highway as well which is crucial for those protecting Site A.
Moving towards Site B however, it also has the Connector between the CT Spawn and Mid along with Heaven which leads to the Rafters overlooking Site B.
Keeping control of this area is not something Defenders usually worry about, but it's important to ensure Attackers cannot flank you through this area.
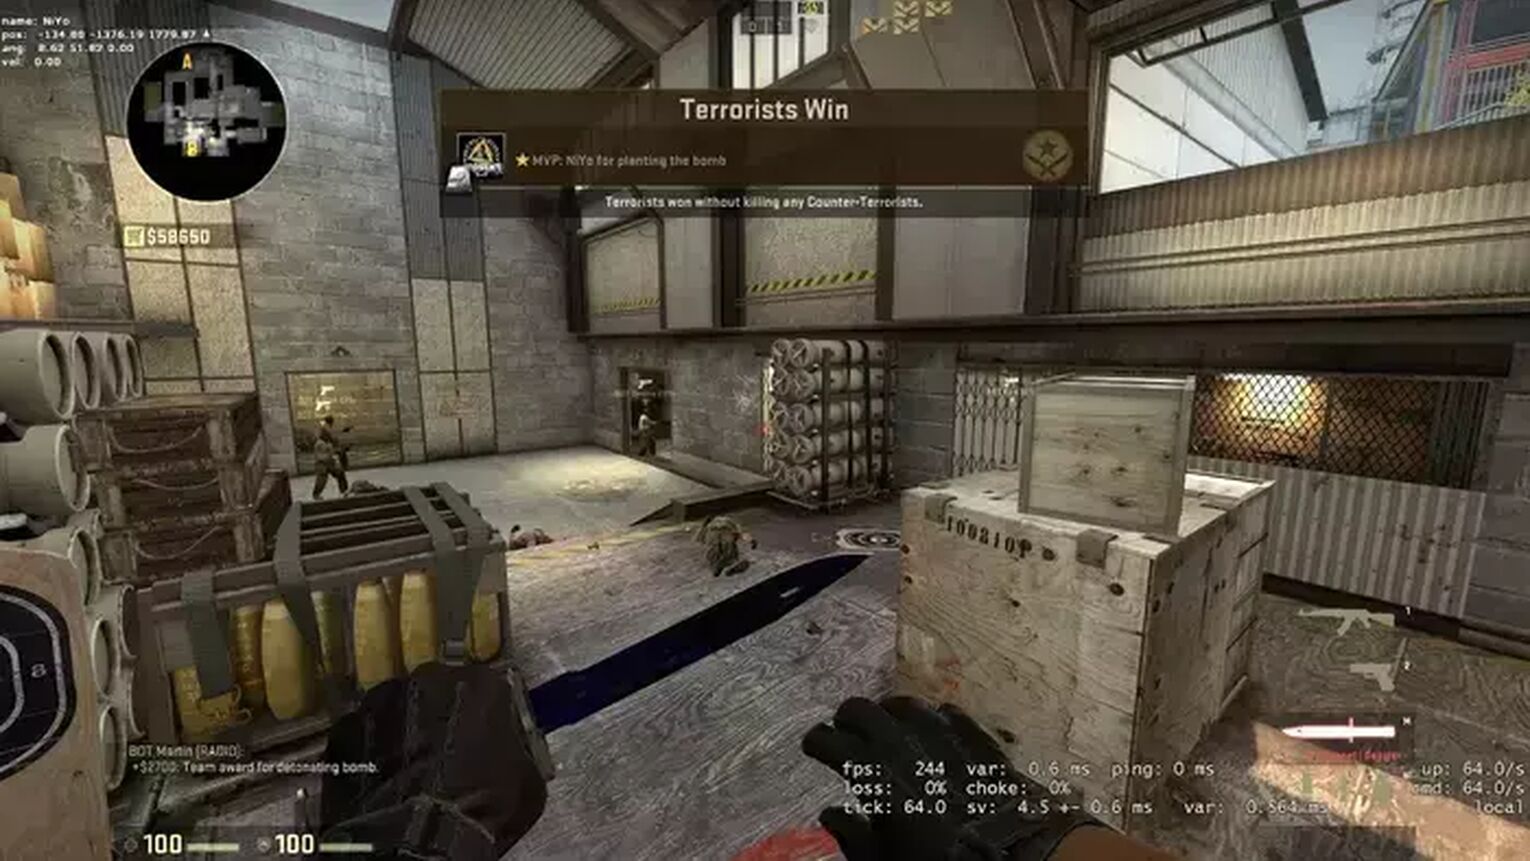
Garage
This is often an area for fighting since the Garage can provide a line of sight into the Mid. If unprotected, the Attackers can use the doorways to shoot at the Defenders and potentially grab a free kill. They often smoke the doorways here to prevent this from happening and to stop the Attackers from reaching the Vents.
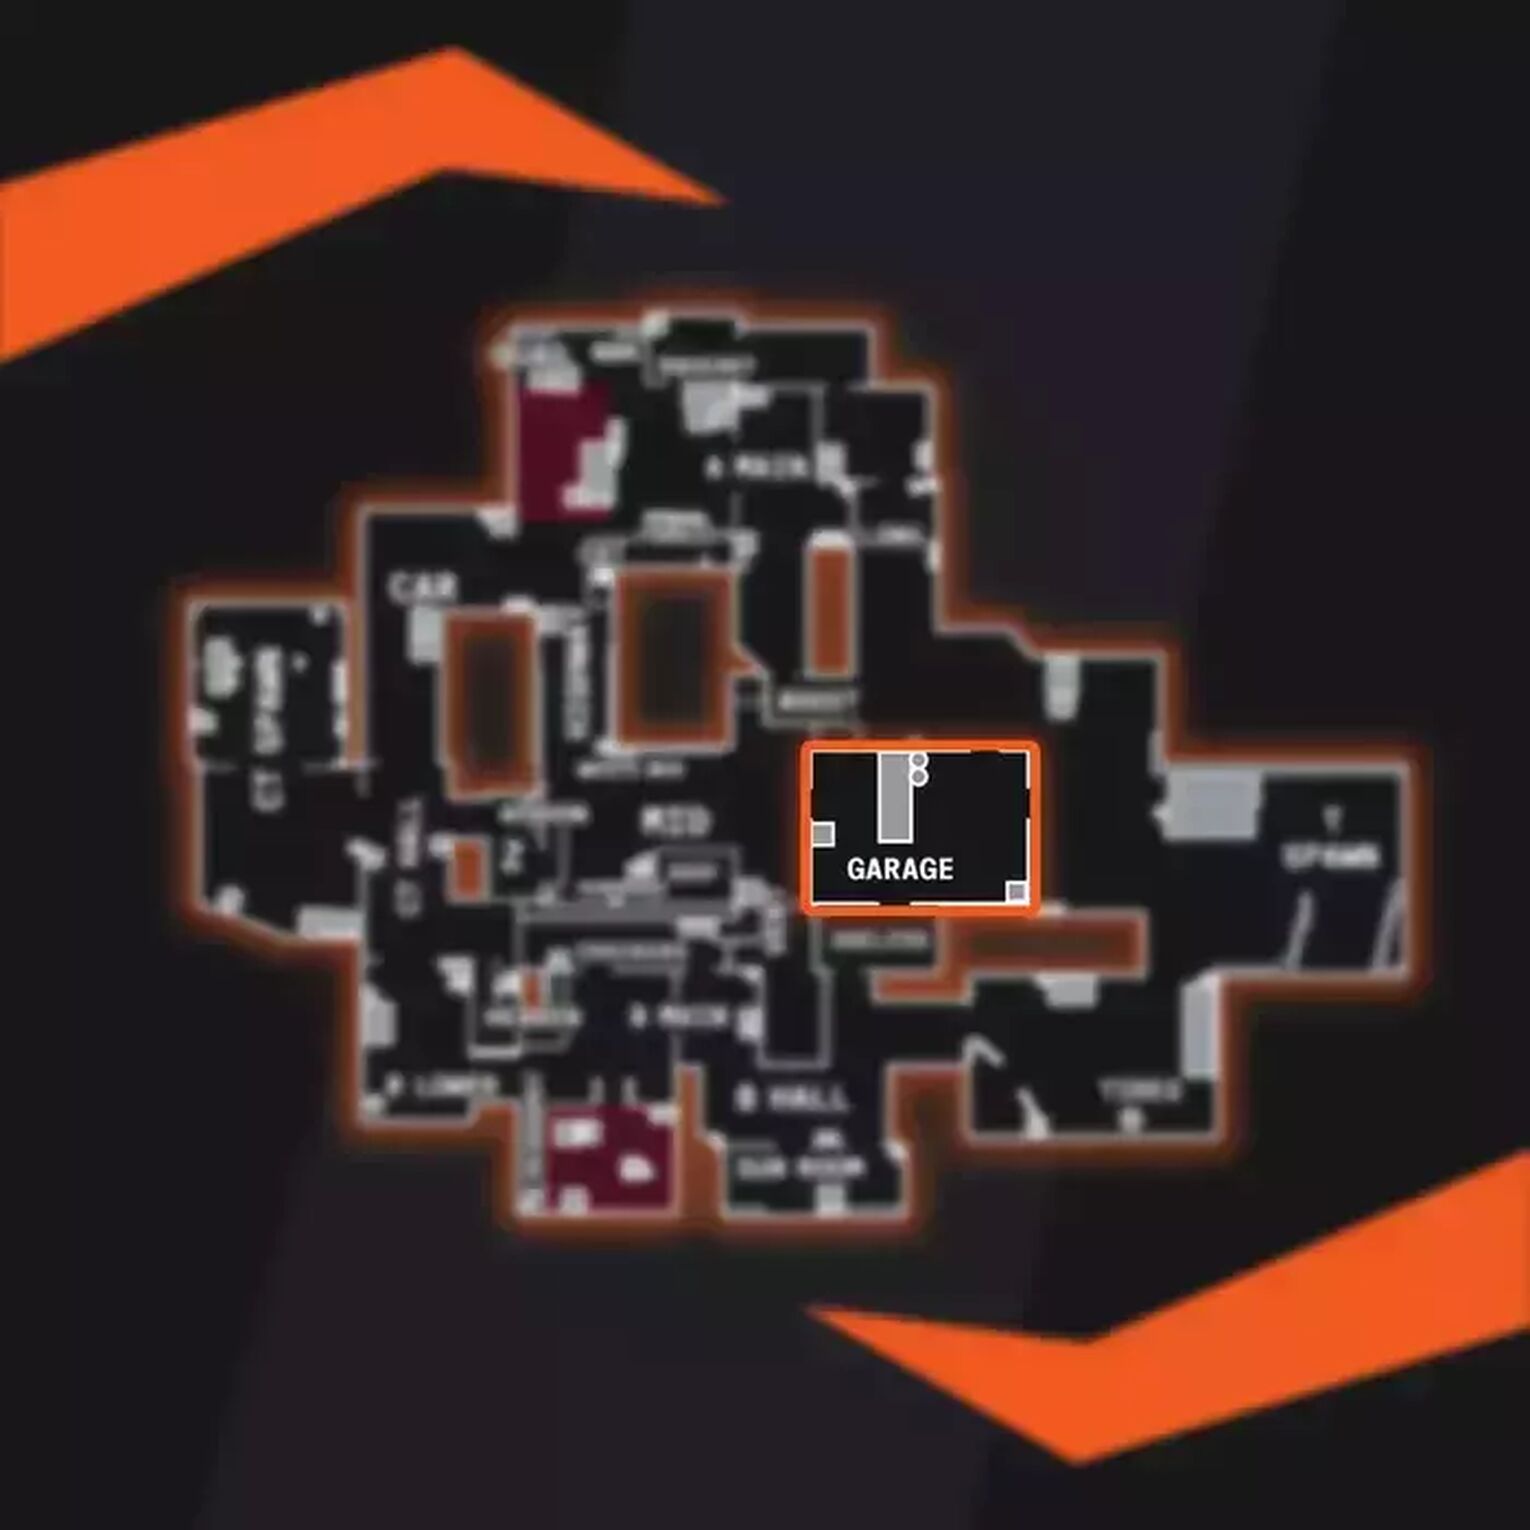
The Attackers need to use the areas around the Garage for travel as well, so Defenders can sometimes push into the Garage as well to kill enemies.
Best nades, smokes, and Molotovs
For Cache, smoke grenades are the best nades for the map. They're critical for moving into rooms safely, limiting and slowing attacks, allowing the Attackers to rush into Bombsites, and much more.
Attackers will also find Molotovs useful for Cache as it lets them clear out potentially risky areas such as the boxes at Site B. However, Defenders may prefer to use Flashbangs when they hear the other team approaching doorways.
Cache encourages players to move and think quickly. There's a lot to consider on this map when it coming to hiding spots as well thanks to the ledges across the map and the cubby holes. Cache is a popular map, and it's easy to see why it's so loved by players, no matter what their skill group is.
![Best Sites to Buy Skins in CS [All Tested] + Discounts](https://theglobalgaming.com/assets/images/_generated/thumbnails/4092904/61a89a7d2ad69acdabef3deb_Best-CSGO-Buying-sites_03b5a9d7fb07984fa16e839d57c21b54.jpeg)
![CS2 Weekly Care Package System Explained [With Reset Time]](https://theglobalgaming.com/assets/images/_generated/thumbnails/4084023/cs2-weekly-drop-system_03b5a9d7fb07984fa16e839d57c21b54.jpeg)