The default Minecraft texture pack/resource pack is good, but we’ve been playing on it for more than a decade at this point, and frankly, there is a lot of Minecraft texture packs out there.
So you can always spice things up by downloading one of these Minecraft texture packs. Or you can go one step beyond and make a custom Minecraft texture pack/resource pack!
So we will be showing how to do just that, once you're finished with this guide, you'll know in Minecraft how to make a texture pack
Step #1: Opening the app data folder
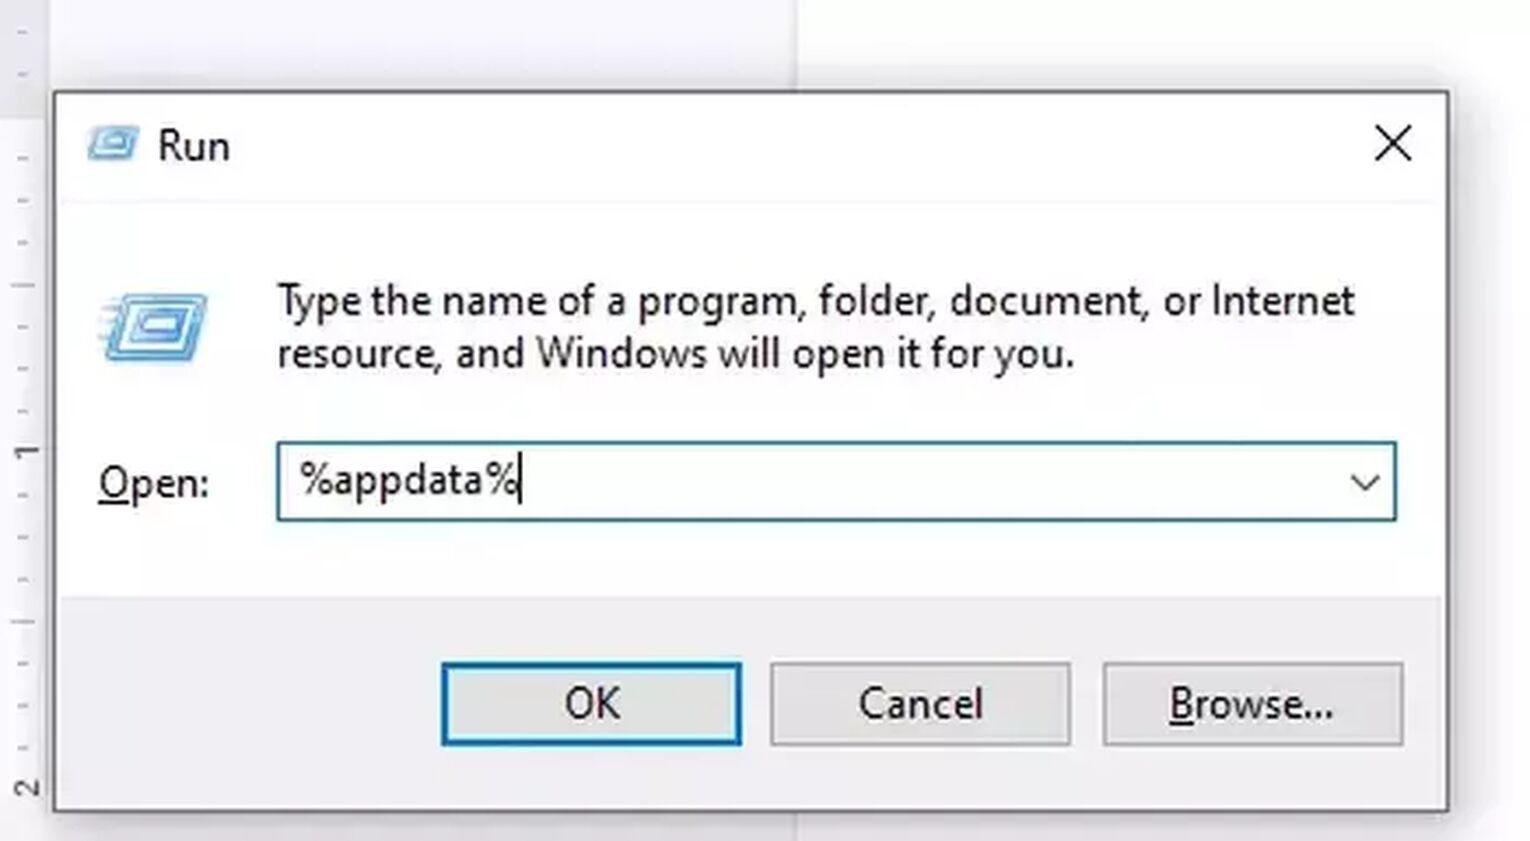
The first step in creating a Minecraft texture pack/resource pack is pretty simple; while on your home screen on your desktop, press the Windows key and R together.
When you do so, the above-given UI window will pop up in that type %appdata%.
Step #2: Choose Minecraft in the folder.
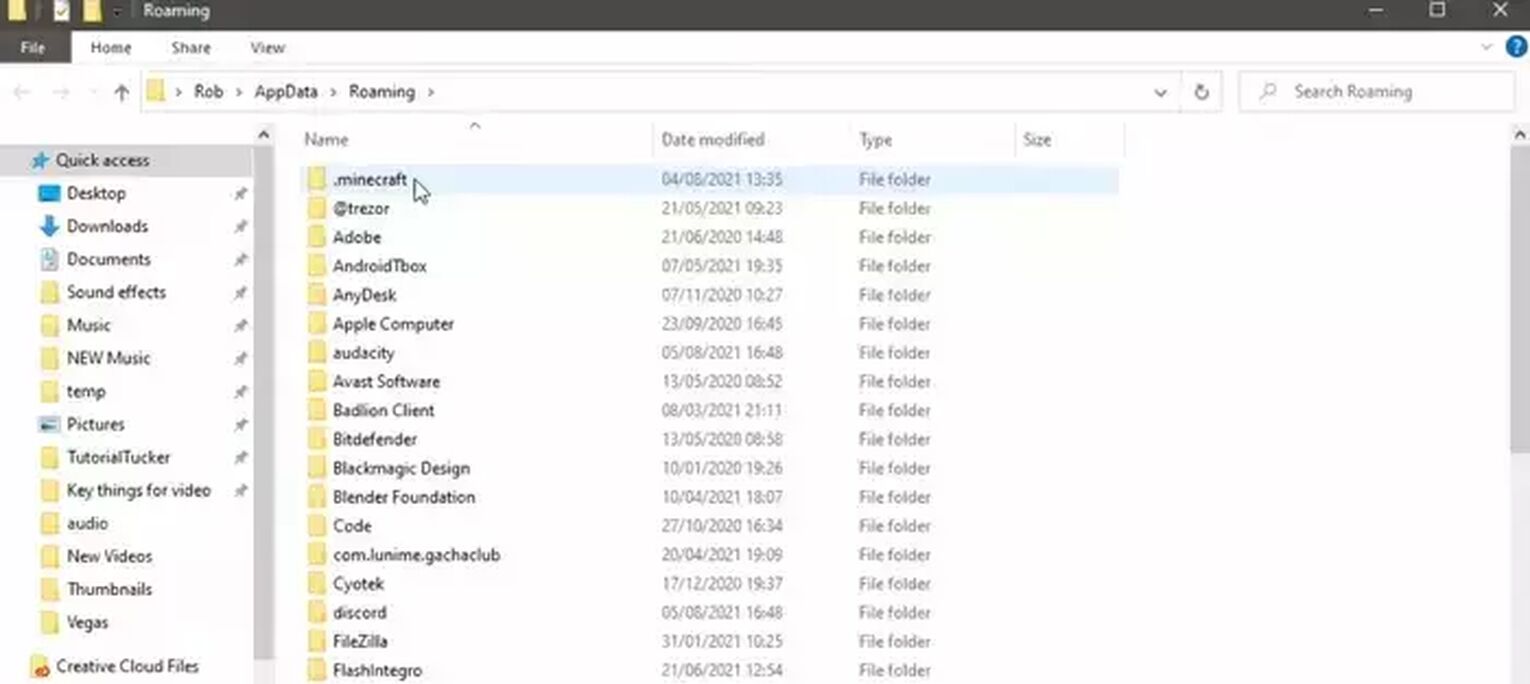
When you run the %appdata% command in the Run window, this folder will open up.
Inside the folder, you have to locate a Minecraft folder and then open it. This is where the texture pack/resource pack folder is located, and where we will be editing our new custom texture pack.
Step #3: Locate the version you want to edit
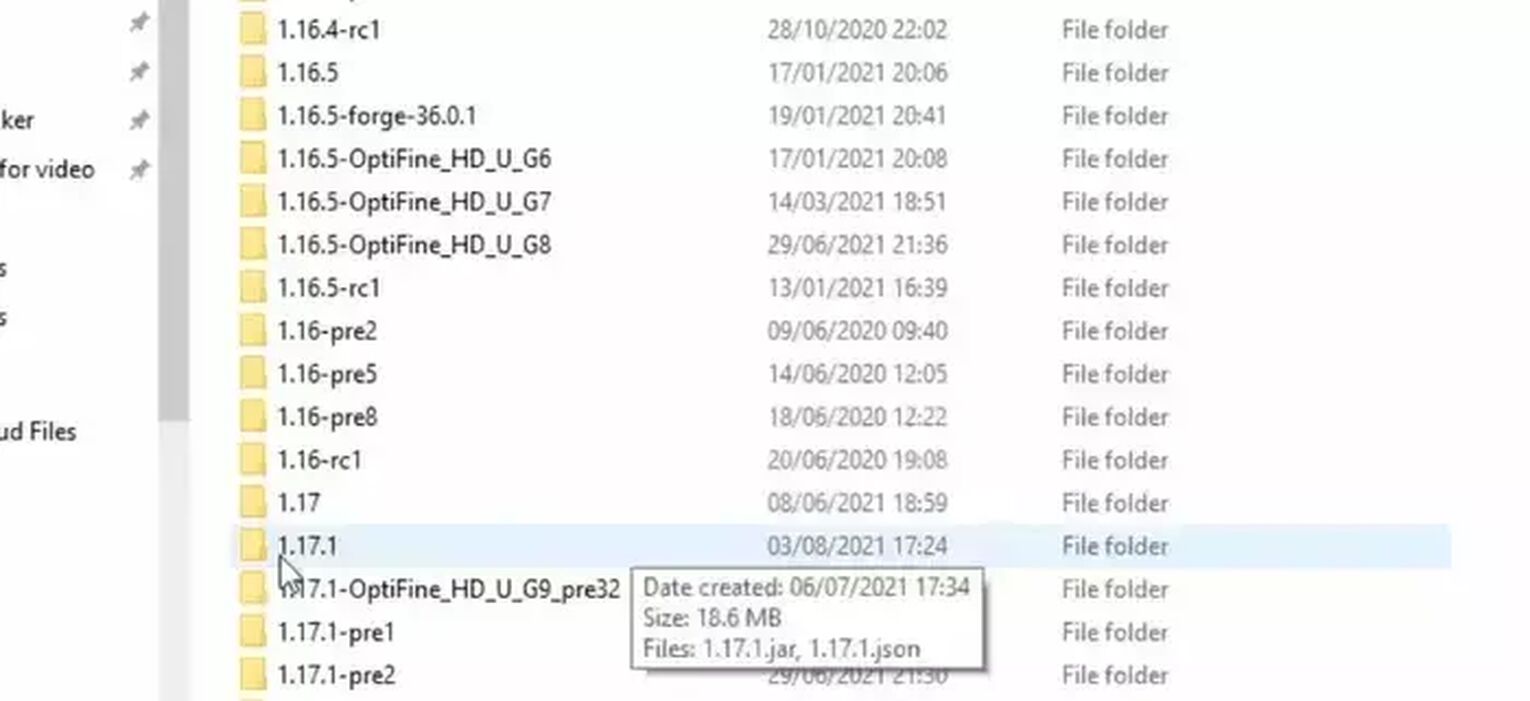
When you open the Minecraft folder, you’ll see a list of the various Minecraft versions you’ve had on your PC.
Here you’ll have to locate the game's version for which you want to create the Texture Pack. For this guide, we’re choosing the 1.17.1 version of the game.
For you, it might be something else. But make sure you select the version for which you want to make the texture pack/resource pack.
Step #4: Get the .jar file

When you open the folder you’ll see two different files, we’re only concerned with the one which has the .jar extension in the folder. So make sure you choose the file with the .jar extension only.

Then simply take that .jar file and paste it on the desktop; it’ll be easier to manage the further steps to create a texture pack easily.
Also, if you don’t see a .jar file in the folder, try changing your folder settings; sometimes, people turn off the extension names, so the extension isn’t visible. So make sure you switch to the folder settings, so the .jar file extension is visible.
And if you see the .jar file extension, but don’t see the Java logo, then you’ll haven't installed the latest version of Java.
So just download and install JAVA on your PC, you'll finally get the .jar file extension on the file, and you should be back on track to make a texture pack/resource pack.
Step #5: Convert the .jar file into a .zip file and extract
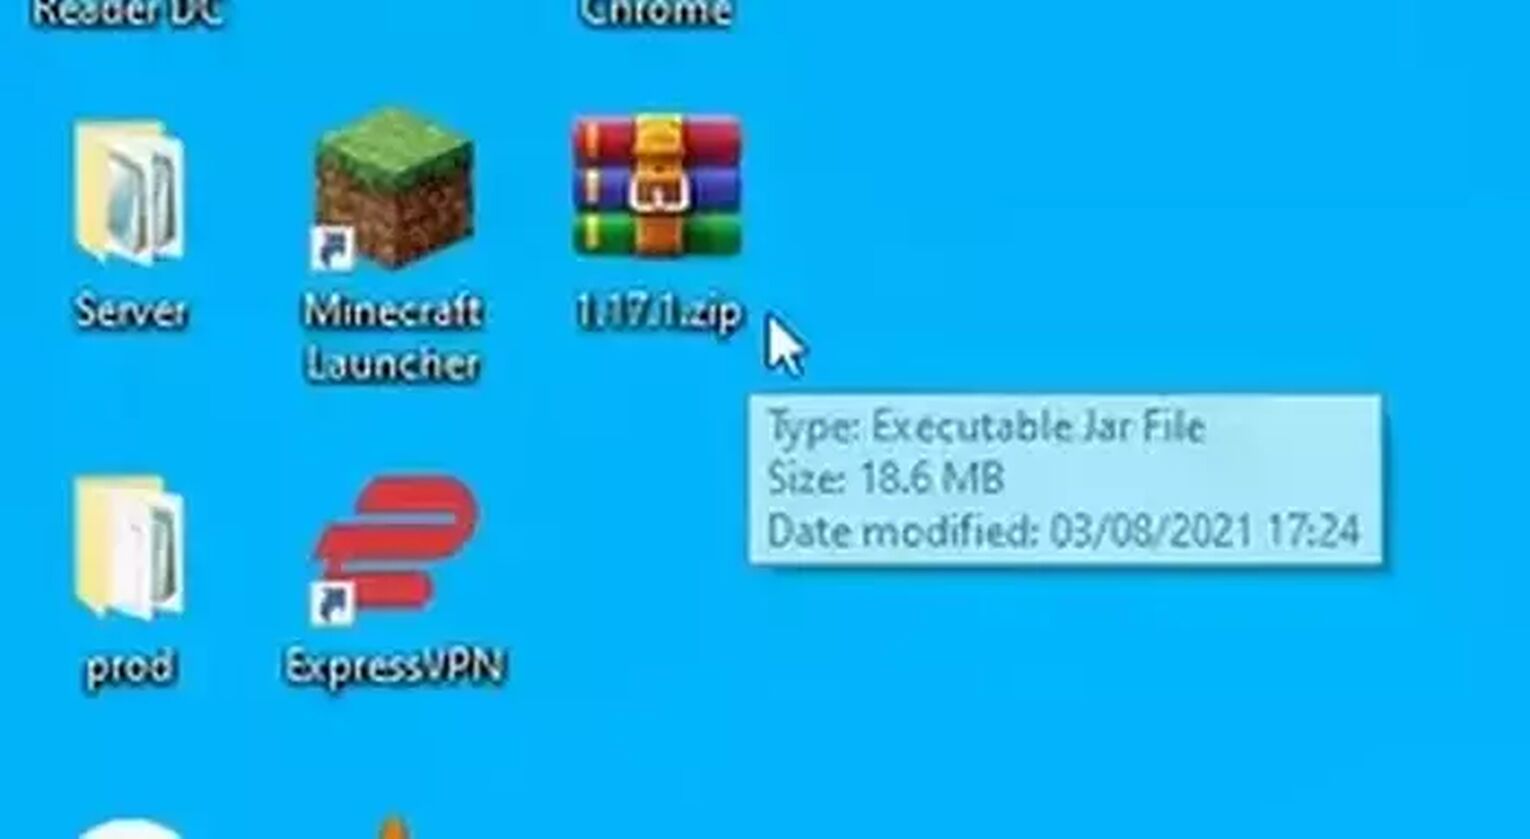
The title is self-explanatory; simply rename the file, and change the extension to .zip, and you’ll get a zip file on your PC.
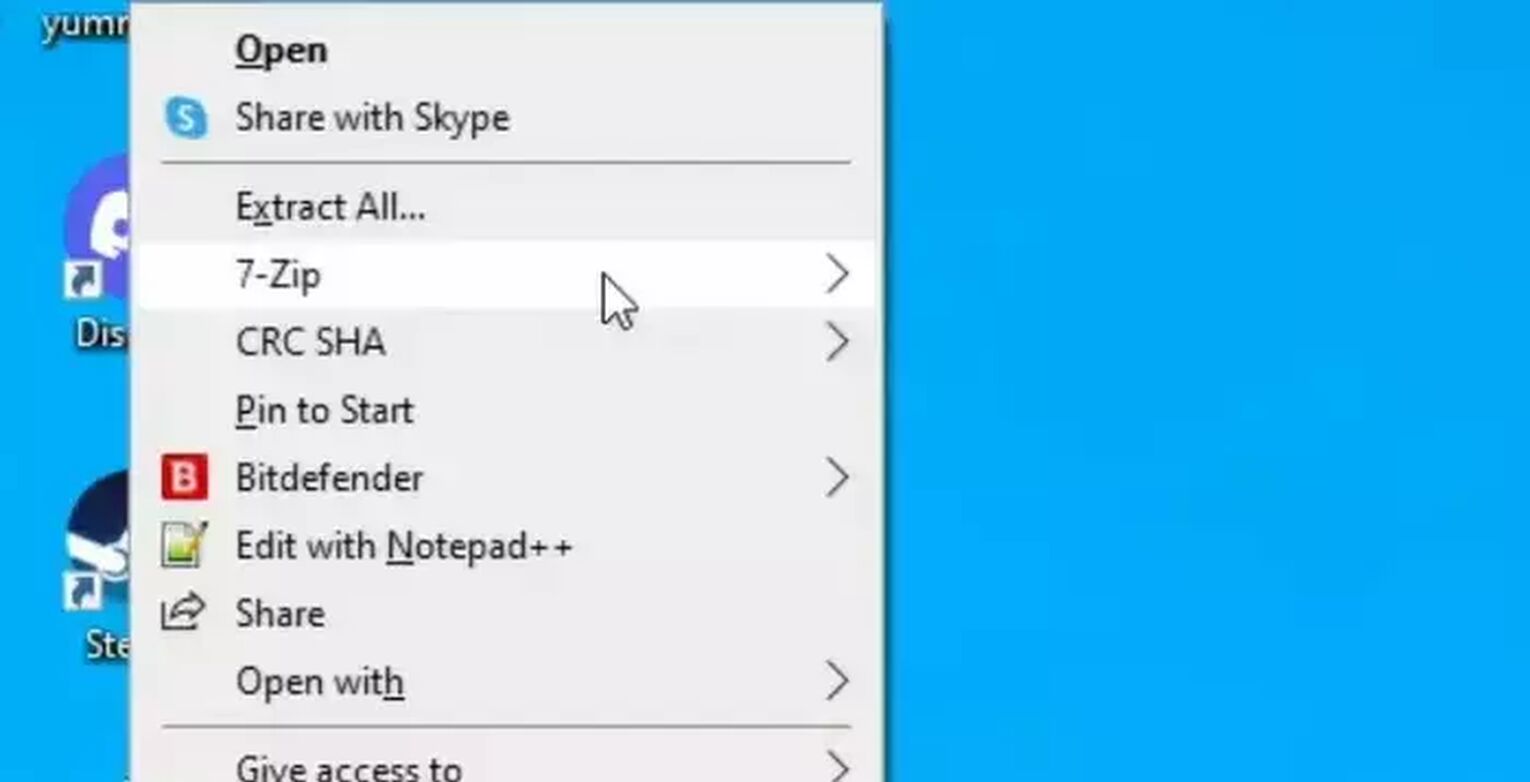
Once you create the zip file, simply extract the file on the desktop by using the option you get after right-clicking.

Once you finish the extraction process, a new folder will pop up like the one shown in the image above. Obviously, the name will differ based on the version you're using and the name your zip file had. So just keep that in mind as many players get stuck on this step.
Step #6: Accessing the textures
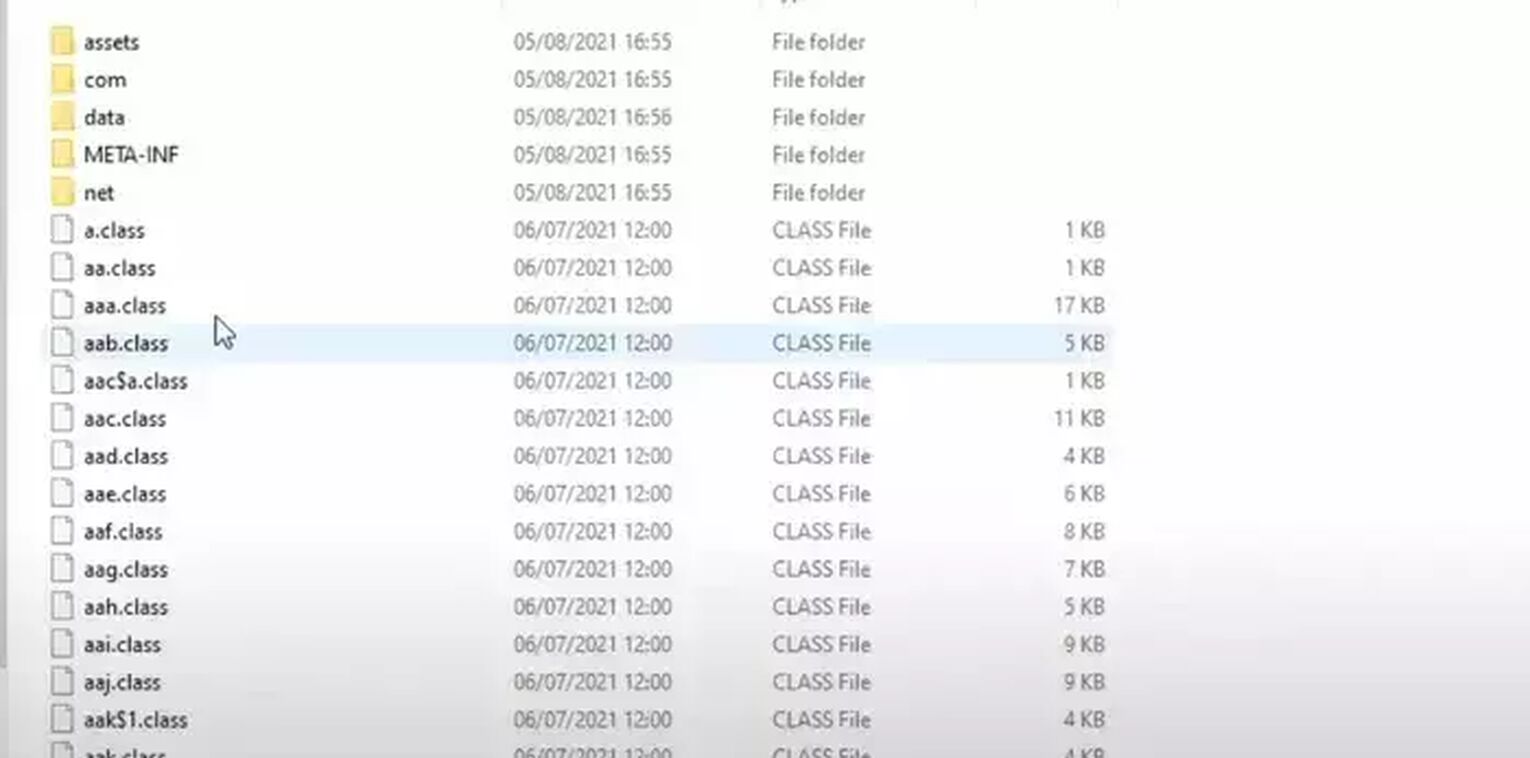
When you open the newly extracted folder, you’ll have to delete everything that is in it except for the folder called assets. This is the folder where the texture pack/resource pack will be stored.
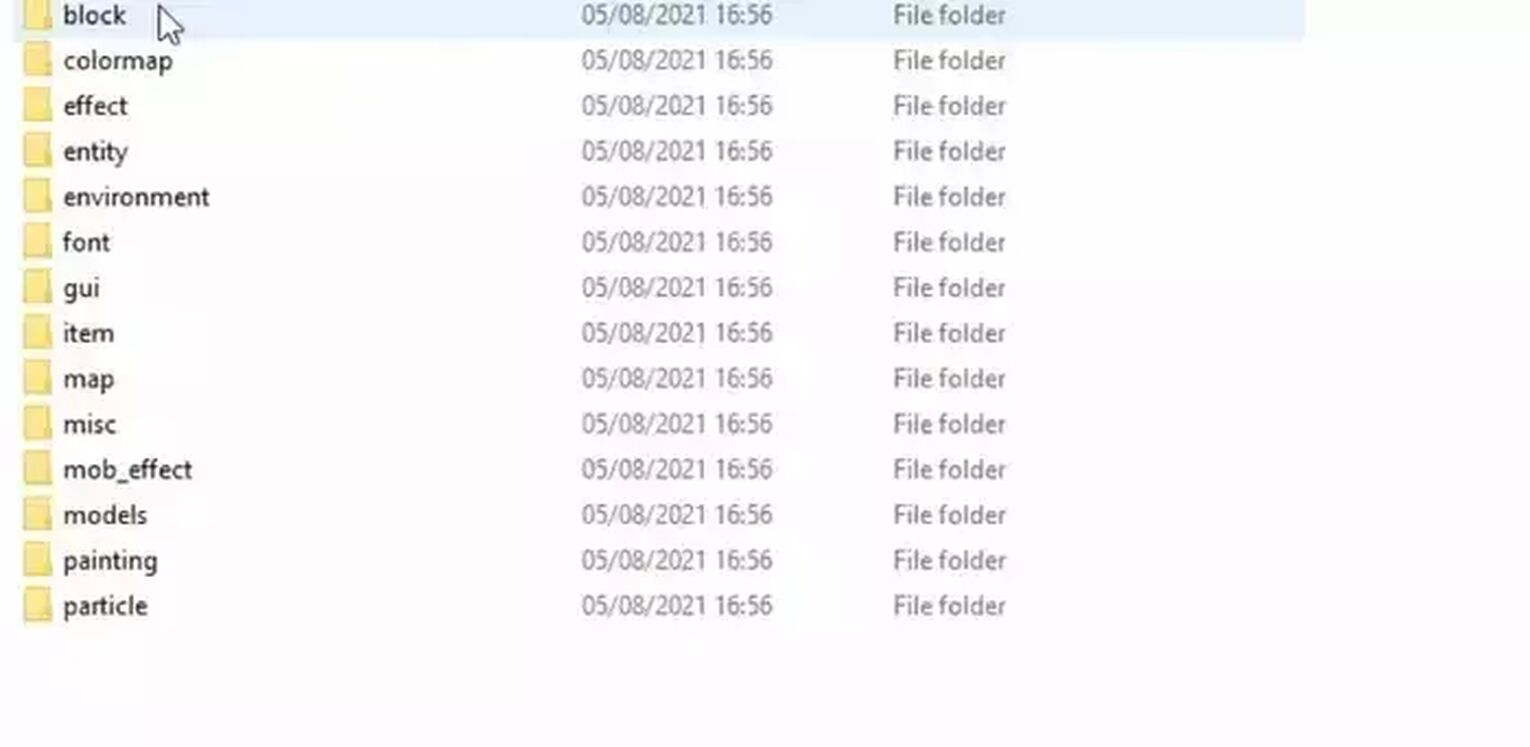
Next, you’ll have to make your way to the textures folder.
The textures folder is located in the assets->Minecraft->textures. This is basically the place where texture packs/resource packs are added to create new textures in the game.
As you can see you now have access to all the textures in the game. You can open any one of them up to see, in the next step we’ll start editing them.
Step #7: Creating custom textures
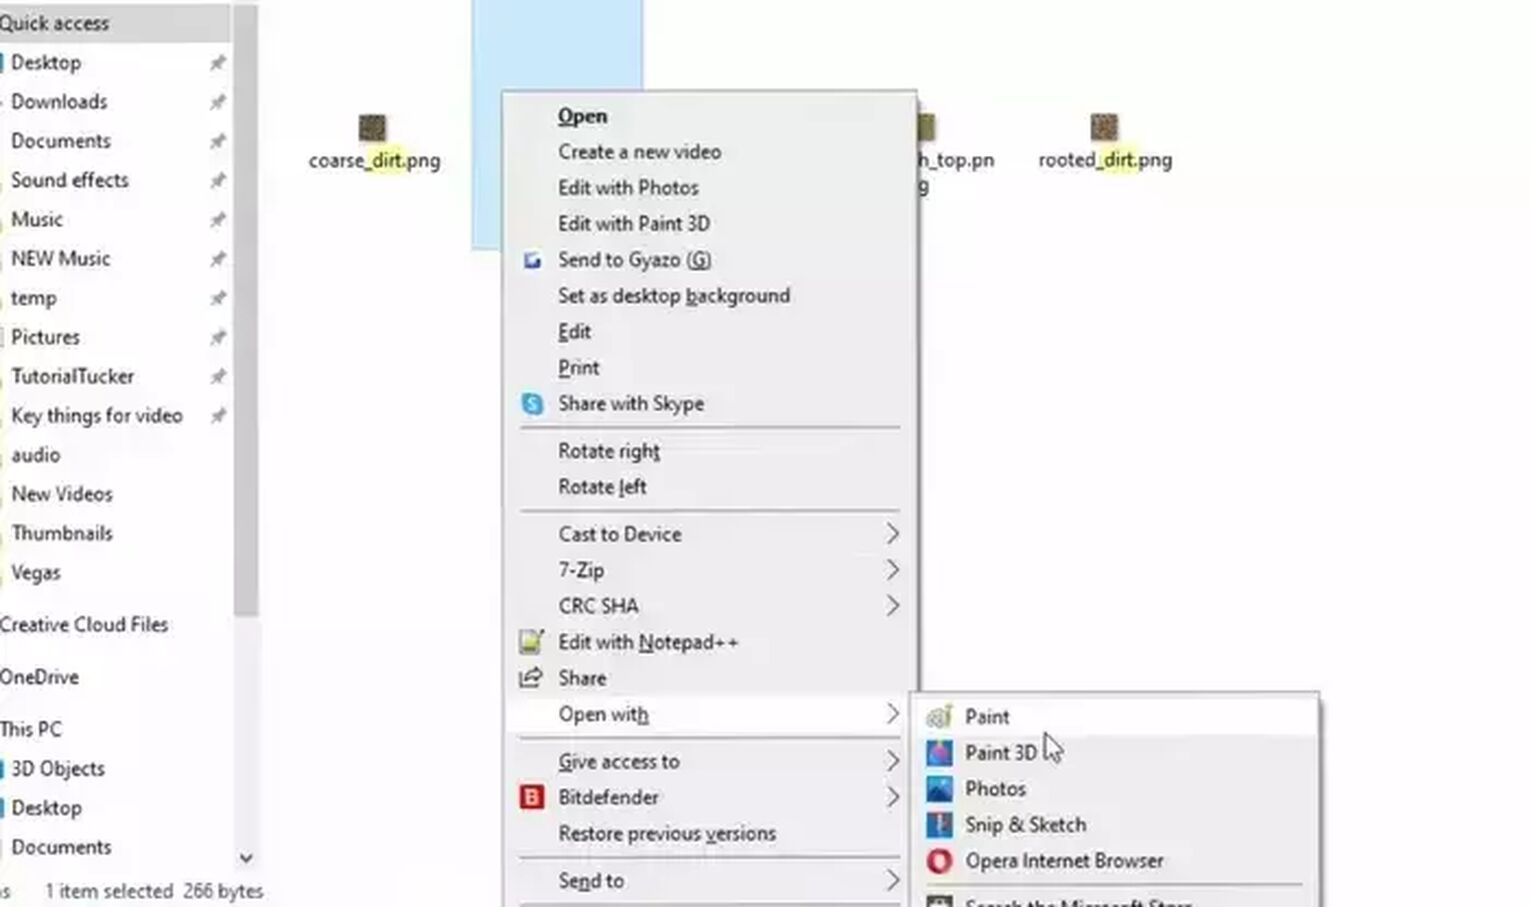
Once you locate the texture that you want to edit, right-click on it, and then use the edit option to edit the image.
You can use any editing software of your choice while creating a Minecraft texture pack
If you feel comfortable with some other image editor, feel free to use that, just make sure the file location doesn't change, because this is the place where Mojang intended to keep the texture packs/resource packs.
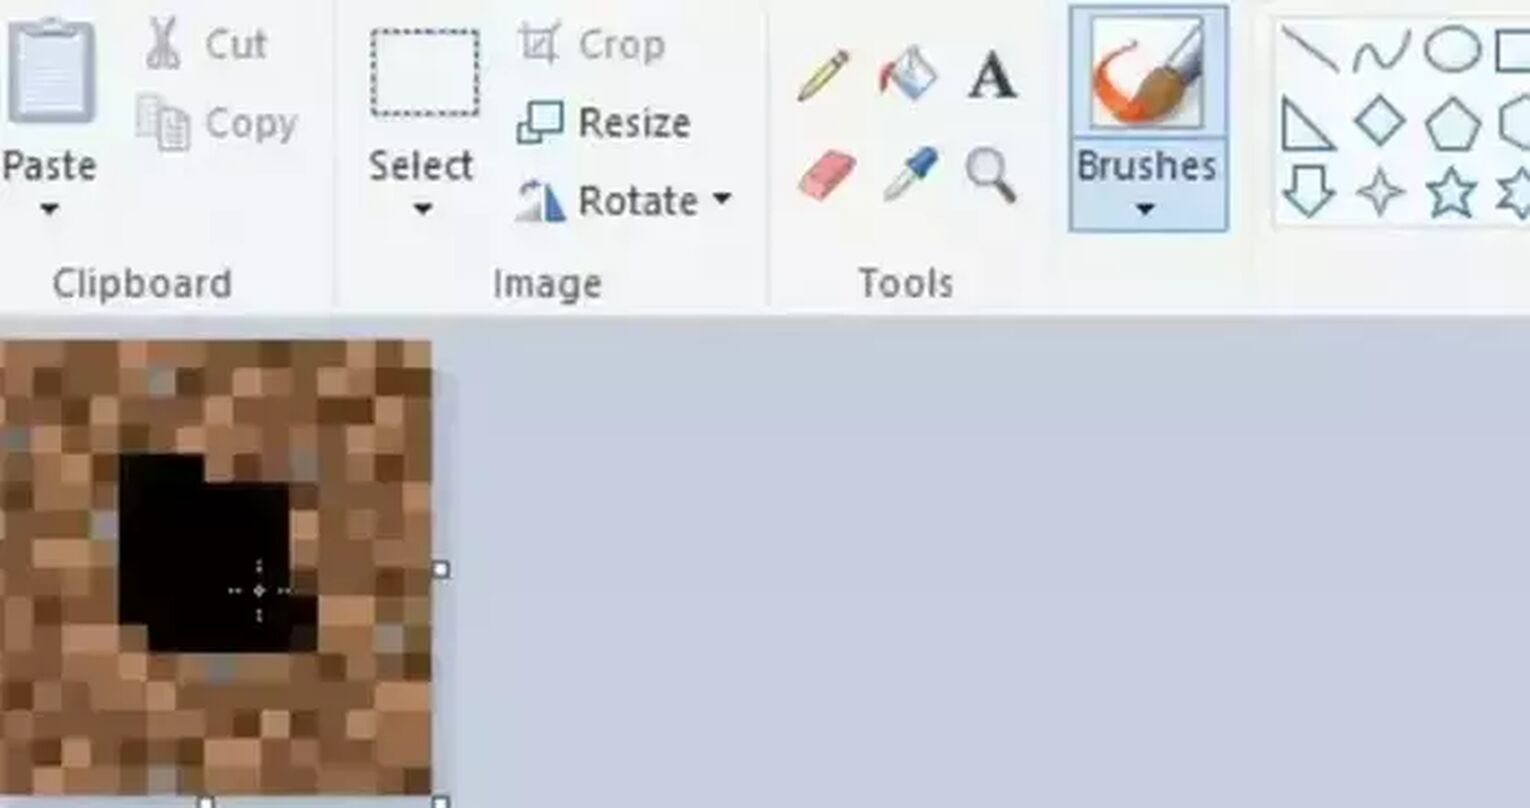
As you can see you can pretty much do anything with the block, turn it into a red-colored block, put a name on it, add new variations, there is unlimited potential, when creating a custom Minecraft texture pack
Once you’re done move on to the next step whether we show how to actually save this in the texture pack folder.
Step #8: Saving the custom textures
To save the new textures simply press ctrl+s when you’re done painting on them. And you will have saved the texture pack in the texture pack folder. You can also do this by going to the file and saving the image, and that’s how you create a custom texture for your resource pack.
You can do this for every simple block in the game, and eventually create a Minecraft texture pack. Many players start by doing this and eventually end up creating a lot of Minecraft texture packs.
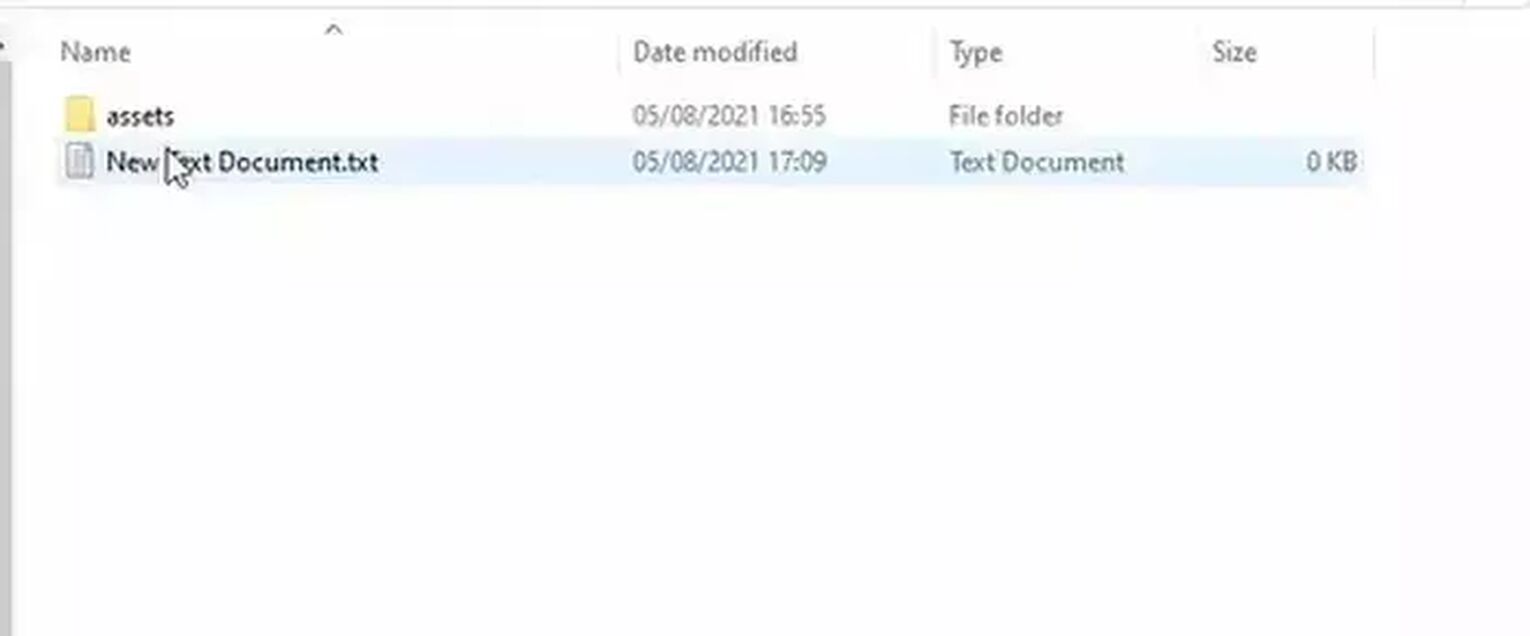
To actually save all of the texture packs to the game you’ll have to rever back to the folder where the asset folder was. As you’ve deleted everything in here there's nothing to look at. Add a new text folder in this place.
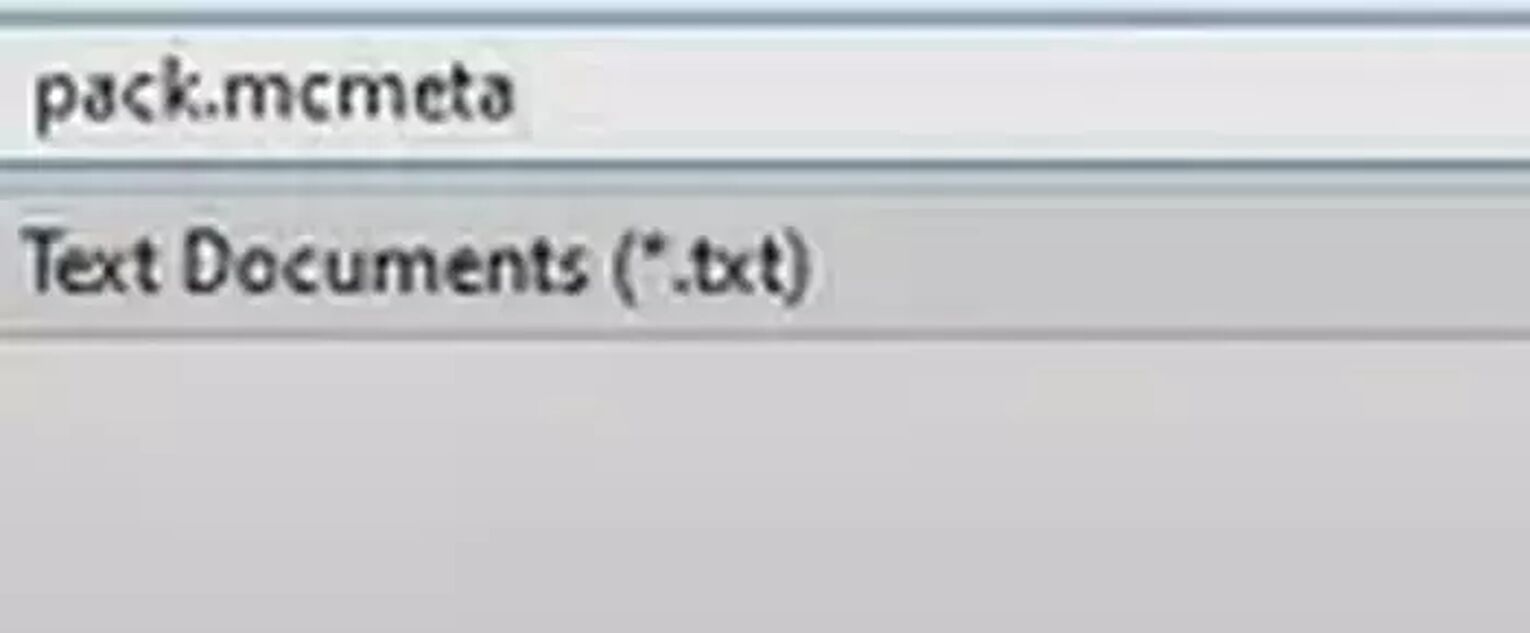
Then open the text folder and save as pack.mcmeta, and in the save as type option choose all files.
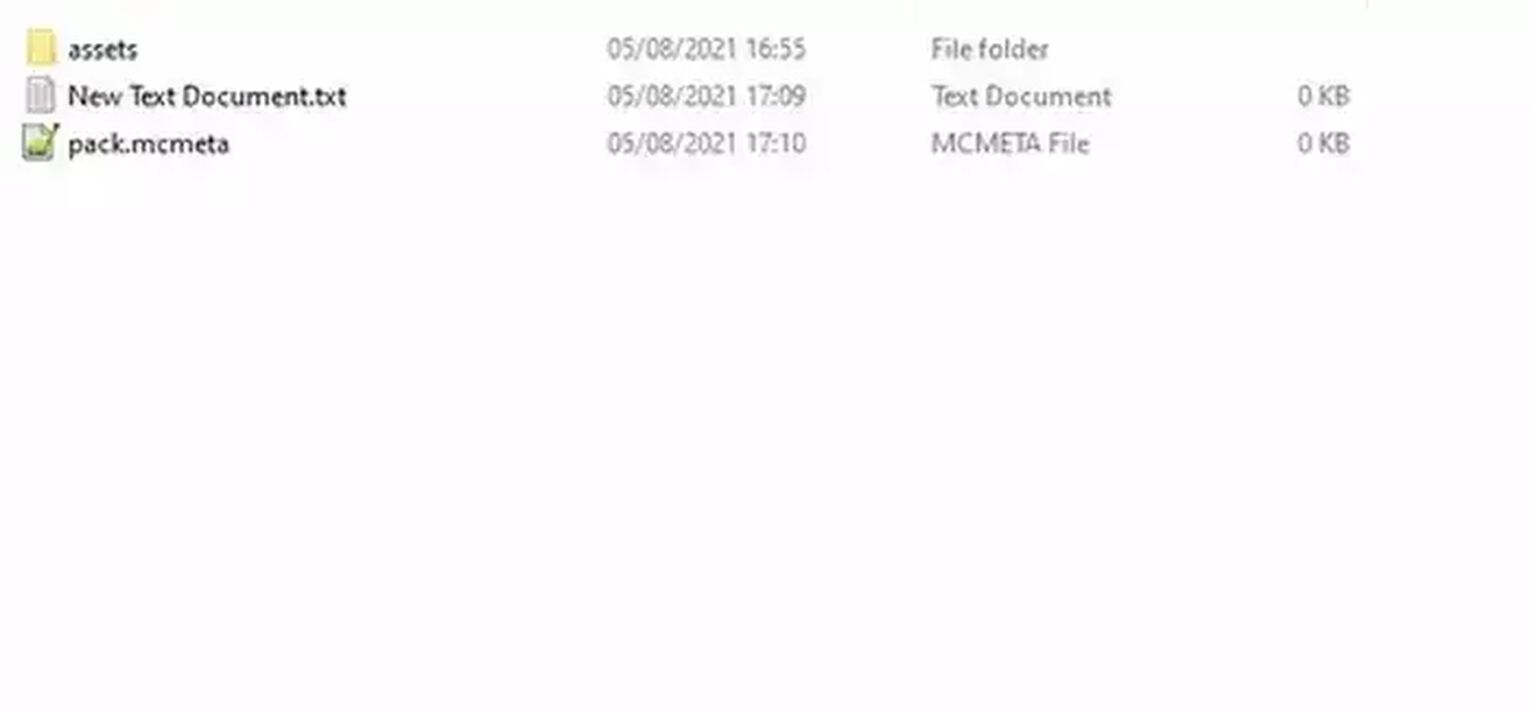
When you’re done the pack.mcmeta folder will look something like this.
Step #9: Download Notepad++ and add the custom code
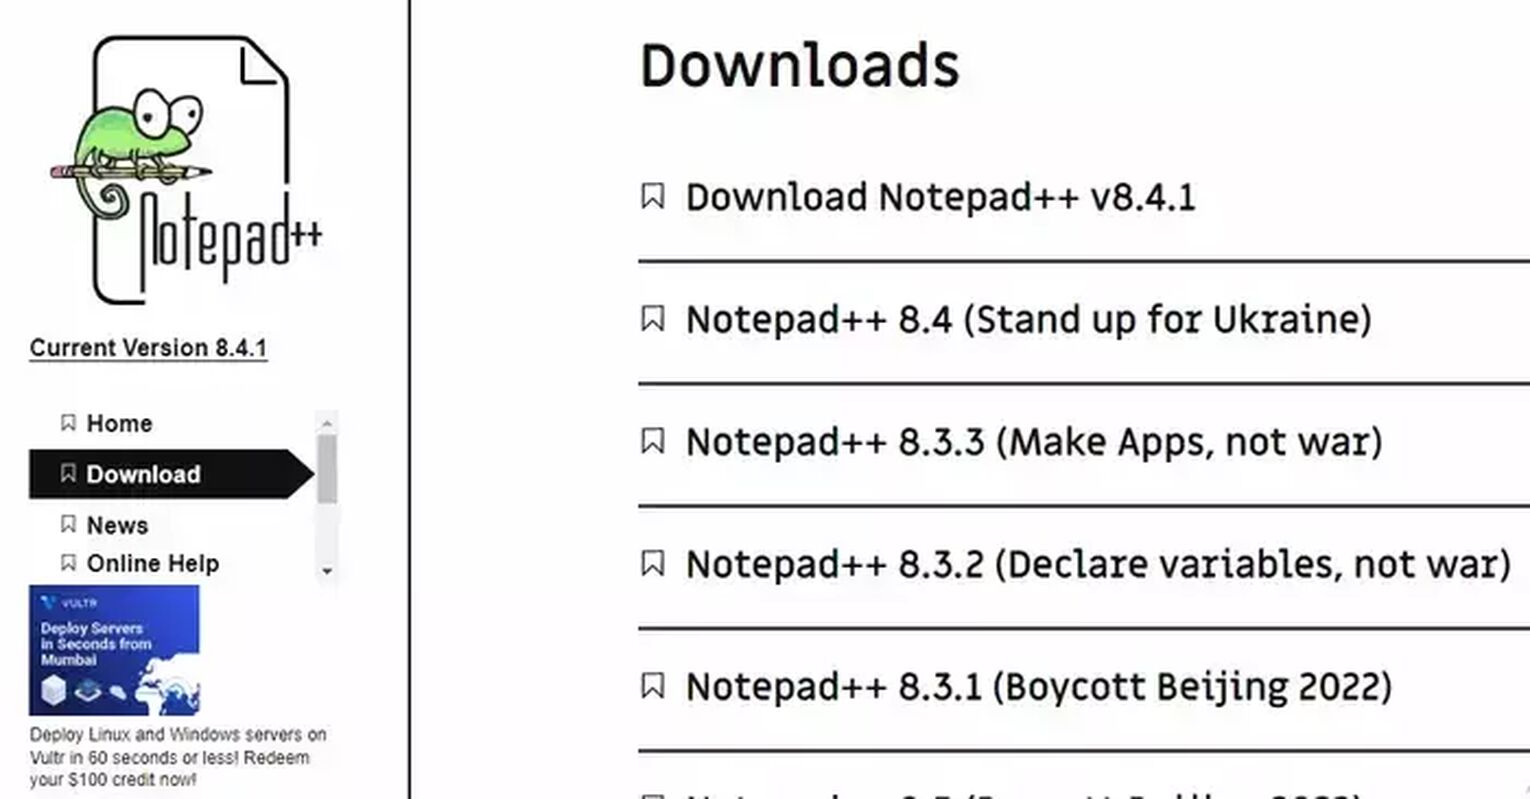
Using thislink, download the Notepad++ application, we’ll be needing it to save our texture packs.
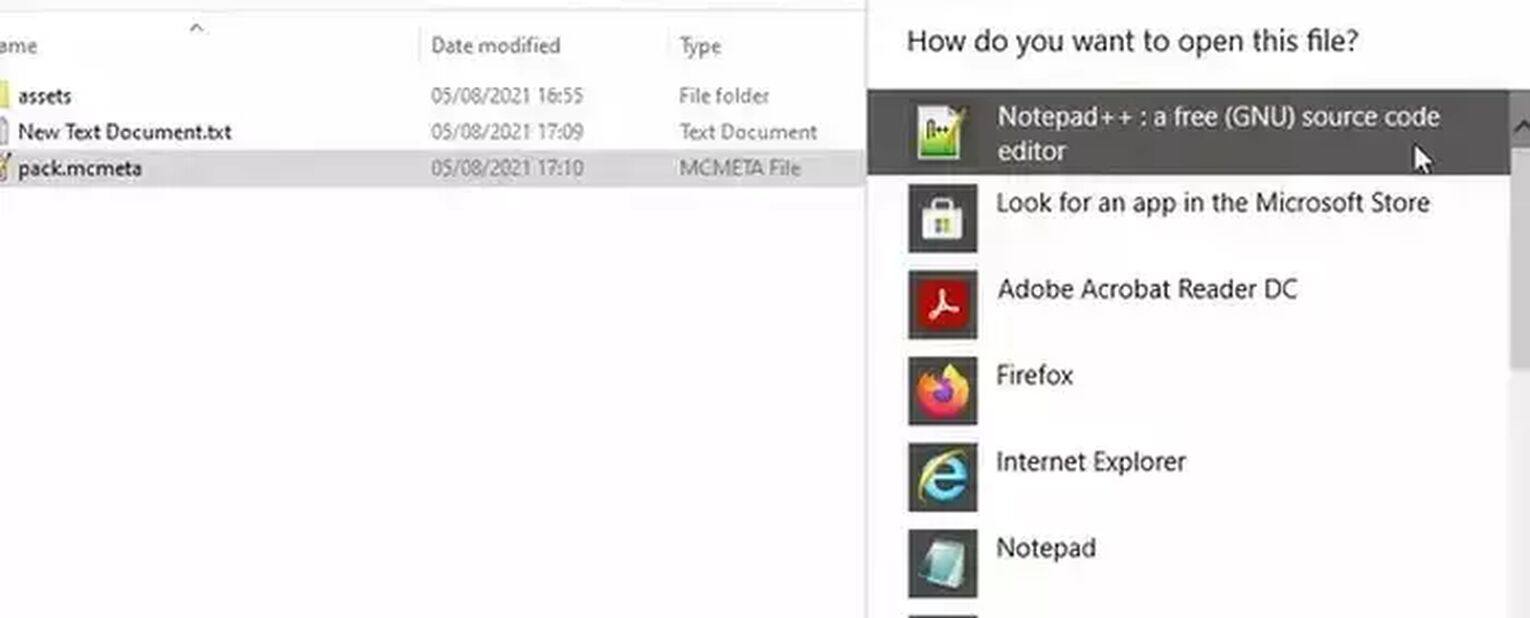
Go back to the pack.mcmeta folder and right-click on, and open it with the Notepad++.
Then paste this code, the way it is in the folder and save it.
{ "pack": { "pack_format": 4, "description": "any name you like" } } |
After doing this you can delete the text document that you had created before, we won’t be needing it.
Step #10: Compress the files
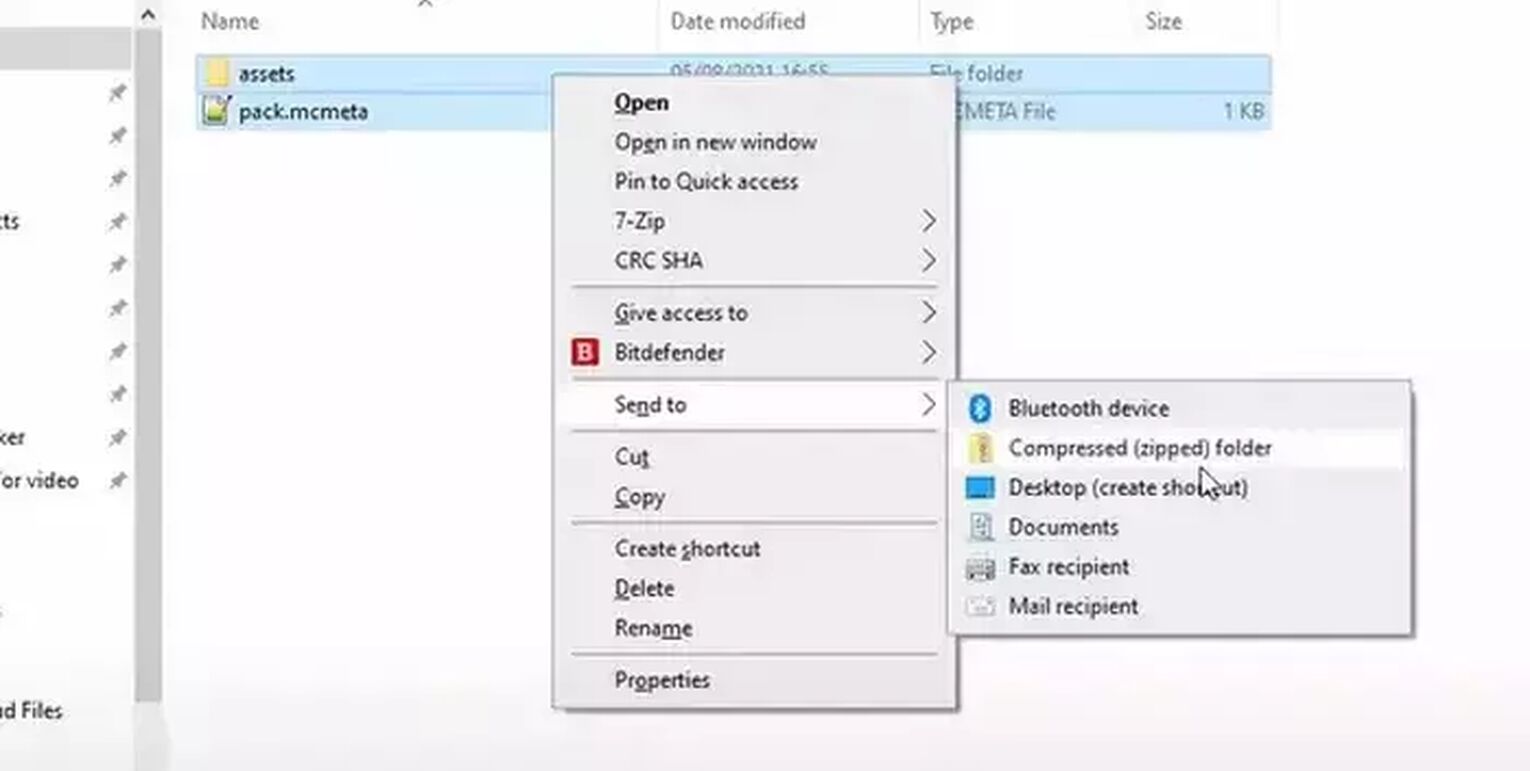
Select the assets and the pack.mcmeta file, and then using the Send to option, compress it into a zipped folder.
You’ll get a new zipped folder called assets.zip; you can change it to whatever you want.
Step #11: Launch and locate the folder
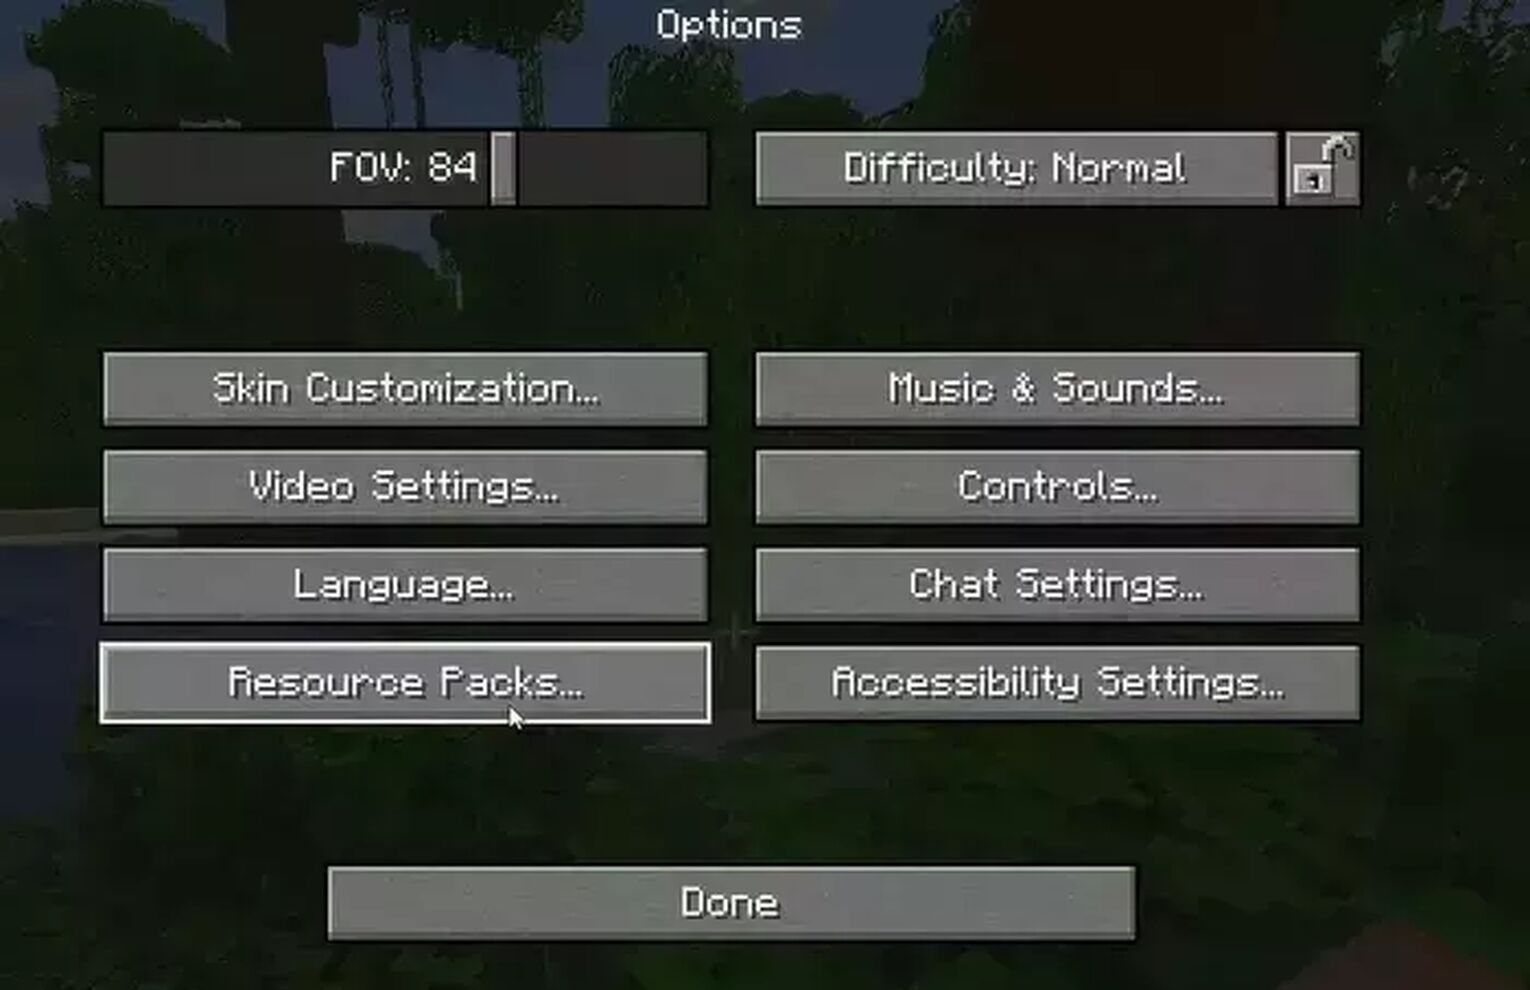
Open Minecraft, pause it, and then the go-to option. Here choose the Resource Packs button.
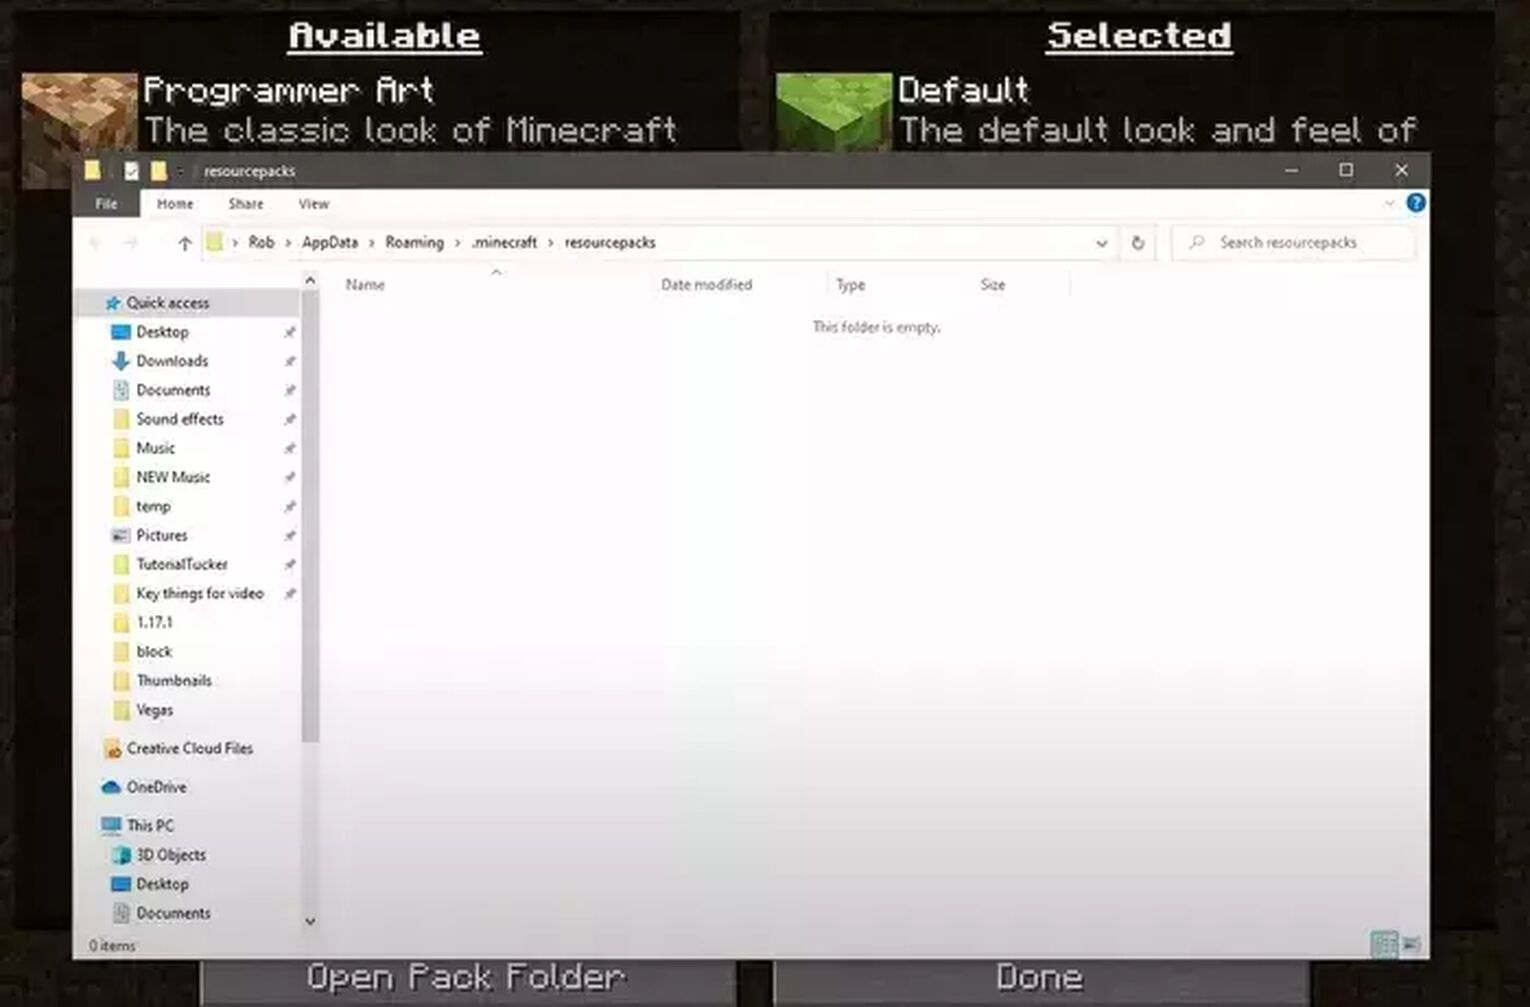
Using the open pack folder button, locate the newly created zip file that we compressed in the last step and select it. Choose this resource pack.
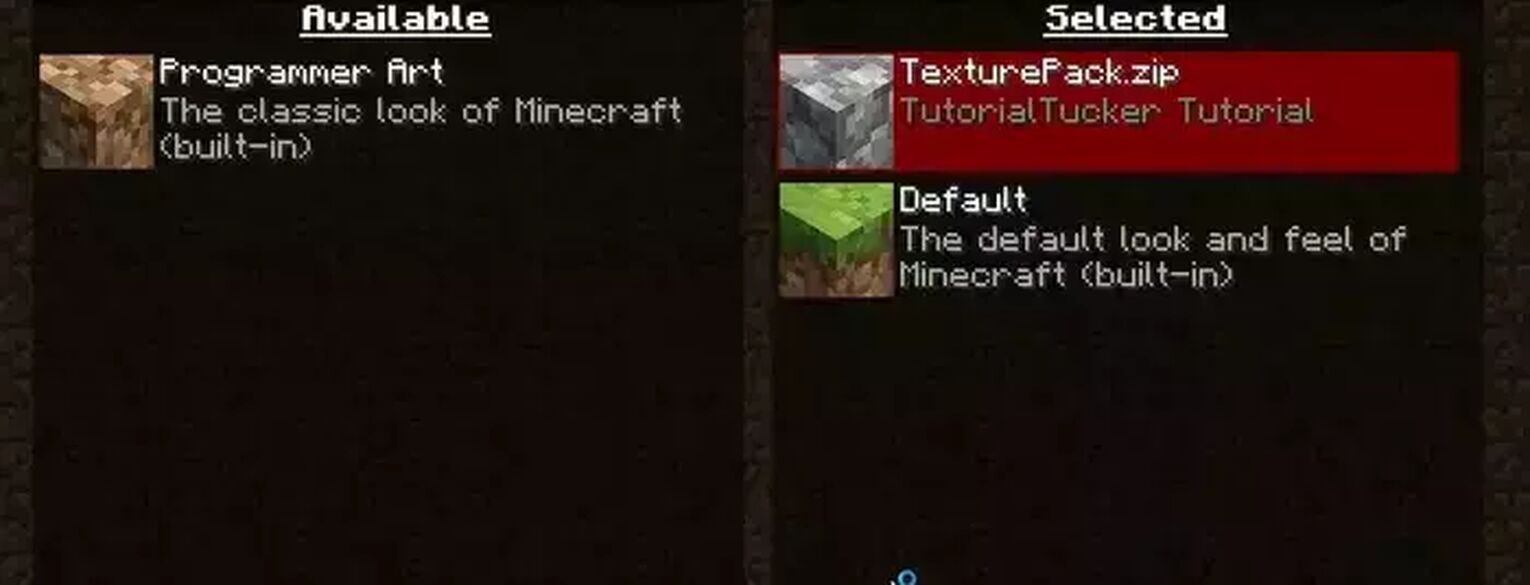
Drag the texture pack folder to the right-hand side, and click Done!
And that’s it basically; you just created a new texture pack/resource pack and save the texture file to your game successfully!
The process may sound complicated if you don't know anything about the game, but we hope this guide helped you out. Now you know how to create a custom texture pack; you can now create a texture pack of any genre or theme; go nuts!


.svg)


![Best HUD Mods in Minecraft [Top 10 List]](https://theglobalgaming.com/assets/images/_generated/thumbnails/4077159/best-hud-mods-minecraft_03b5a9d7fb07984fa16e839d57c21b54.jpeg)
![How to Join a LAN World in Minecraft [Java & Bedrock]](https://theglobalgaming.com/assets/images/_generated/thumbnails/4077161/how-to-join-a-lan-world-minecraft_03b5a9d7fb07984fa16e839d57c21b54.jpeg)
