

.svg)
How to Publish a Game On Roblox Studio Easily (2 Quick Methods)
Are you having trouble publishing your Game On Roblox Studio? Well, fret not as we will help you publish your game in no time.
Now that you've spent day and night pouring your blood, sweat, and tears along with perfecting every minute detail of your Call of duty or Valorant clone, you're now ready to publish for the world to see. Roblox Studio allows you to create a plethora of custom games. You want to create your own version of Valorant; some templates help you create exactly that.
Although more intricate experiences require extensive knowledge of Lua. Lua is the programming language that is the foundation of Roblox. Creating UI and barebones elements can be done within the Roblox Studio editor itself but creating new mechanics requires substantial programming knowledge.
Once you've checked all the requisite requirements, the easy part is publishing. The gripe with publishing is Roblox studio has an innately horrendous user interface. This can make it quite challenging to publish. Fret not; the hard part is over (Making the game). Follow this guide to make publishing a frictionless experience.
Creating a Roblox Studio experience
To publish the game itself, you must create it first. Roblox studio's interface isn't very beginner friendly. The user interface is loaded with verbose terminology that can be very off-putting to the average creator.
Don't worry about it; if you're having trouble creating a game, follow the steps as detailed below:
Launch Roblox studio and log into your account
- Click on the "New" tab. This shows you the plethora of starter templates that you can start off with.
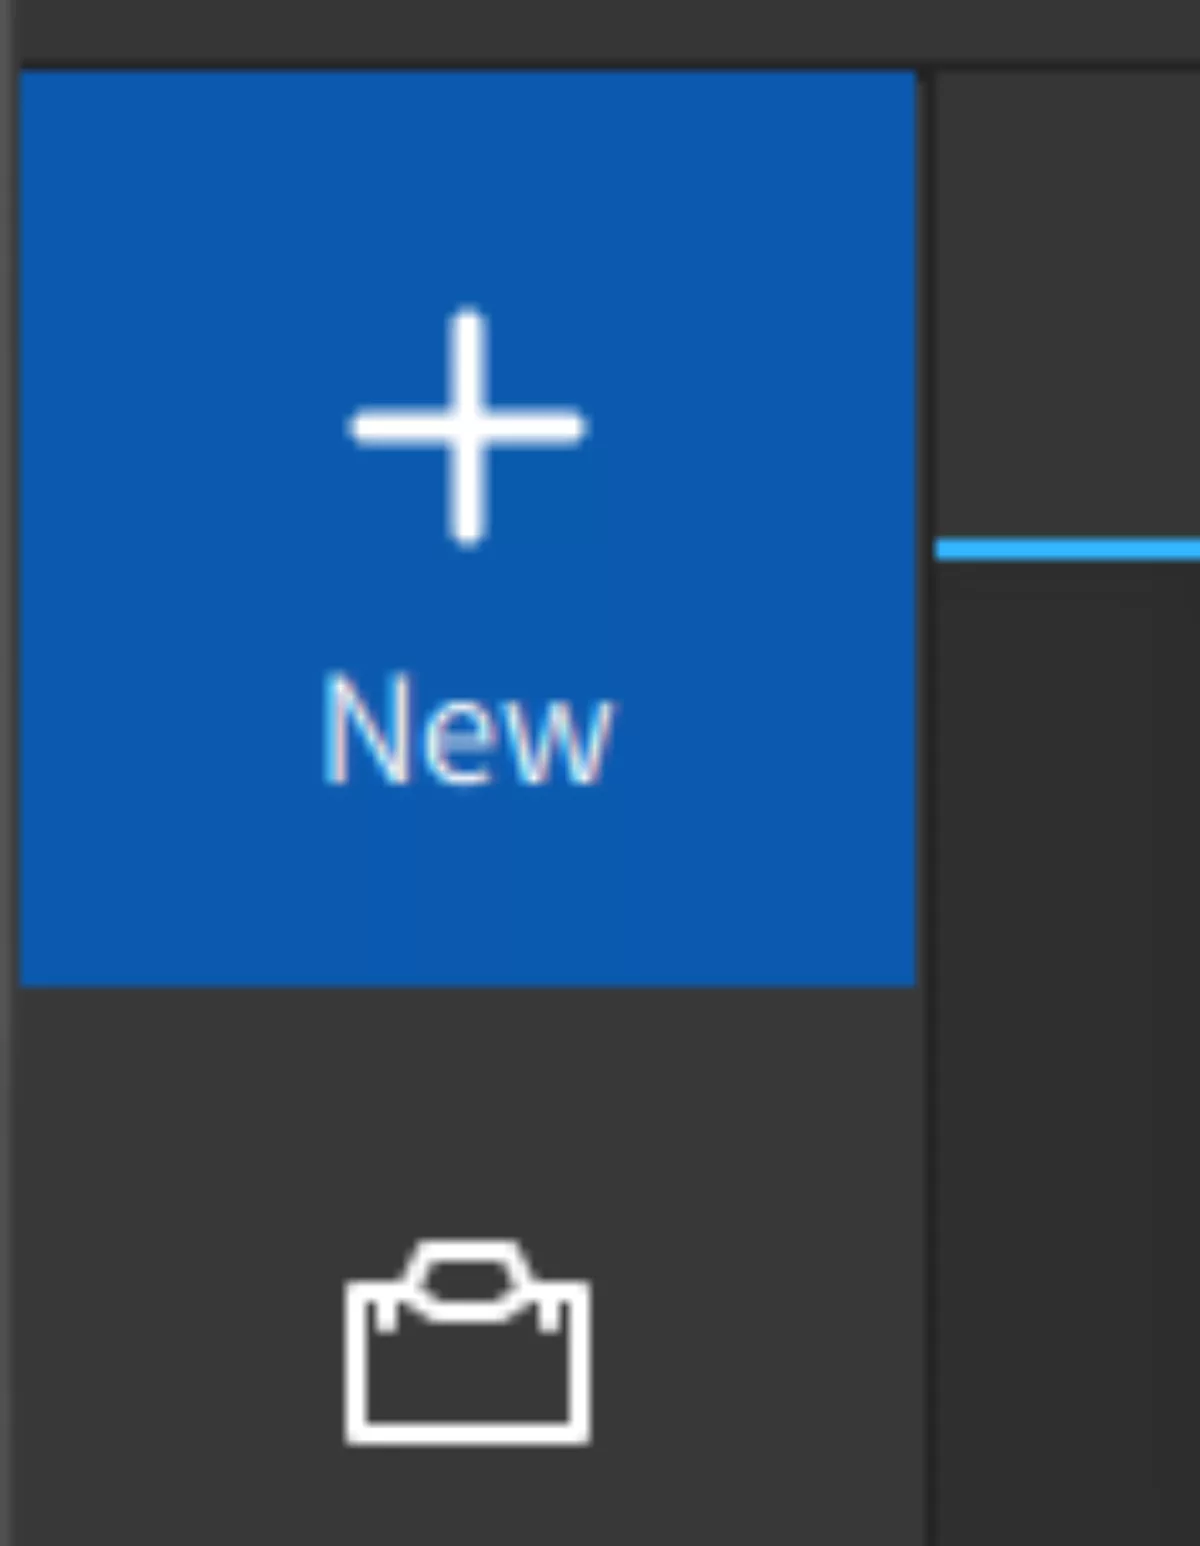
Select a template that you like as a starting point.
Once you've selected the template, you'll be greeted with the Roblox Studio dashboard, and your game's been created.
To save your Roblox game, click on the "File" option in the top-left-hand corner and select the "Save" option. Alternatively, you can hit the shortcut "Ctrl+S" to save.
Once you’ve created your game, you’re ready to publish your creation. There are two methods to publish your experience.
Method 1: Publishing games VIA the in-game client
Publishing to Roblox is quite a straightforward process. There is a huge caveat, though. Making sure that when you're launching Roblox Studio, you grant it administrator privileges.
Not only does it prevent access issues, but it allows Roblox Studio to utilize your system to its maximum capacity, which is paramount to creating Roblox games in a timely and efficient fashion.
If you're looking to squeeze every ounce of system performance from Roblox Studio, follow this guide, “How to improve Roblox Studio performance”.
To publish to Roblox, follow the steps as detailed below:
On the top-left corner of your Roblox studio application, click on the "File" option
- Once you've opened the dropdown menu, click on the "Publish to Roblox" option (Alternatively, you can hit the shortcut Ctrl+P to enter the publishing menu)
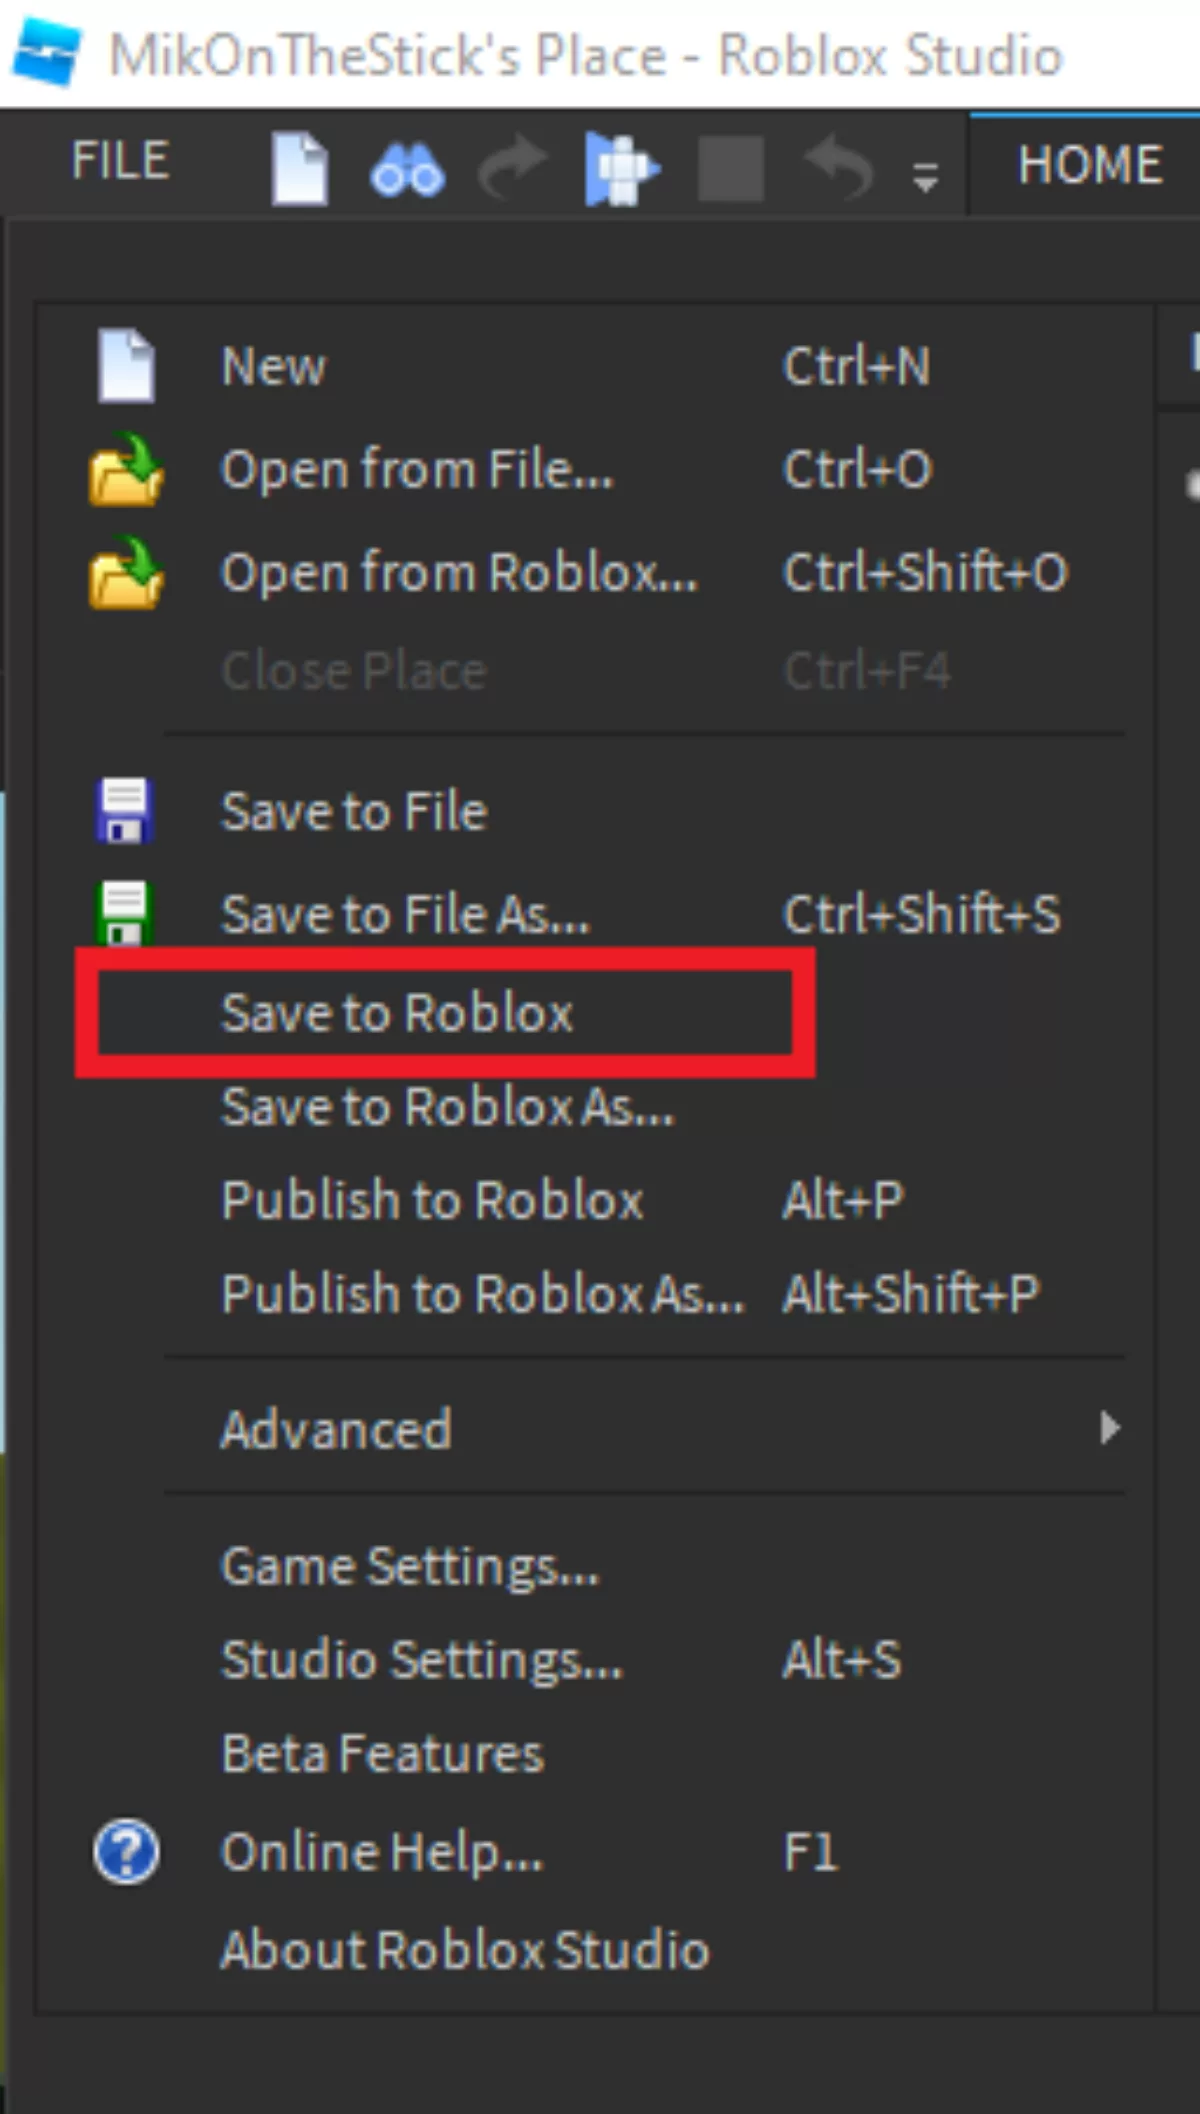
You will be taken to the Publishing Menu. In the menu, enter your Basic information.
Once you're satisfied with your settings, click on the "Create" to publish to Roblox servers.
Wait until you've gotten the prompt that says, "Game has been published".
Once you've uploaded it to the official Roblox server, the game will usually be playable after 3-4 hours since there is an abundance of games uploaded every second.
Roblox games are private by default. Meaning that the game is on the Roblox server, but the Public does not have access to the game.
To make the game public follow the steps detailed below:
Visit the Roblox official website
Once you're in, head on over to the "Create" tab
- Under "My Creations", click on the "Experiences" tab
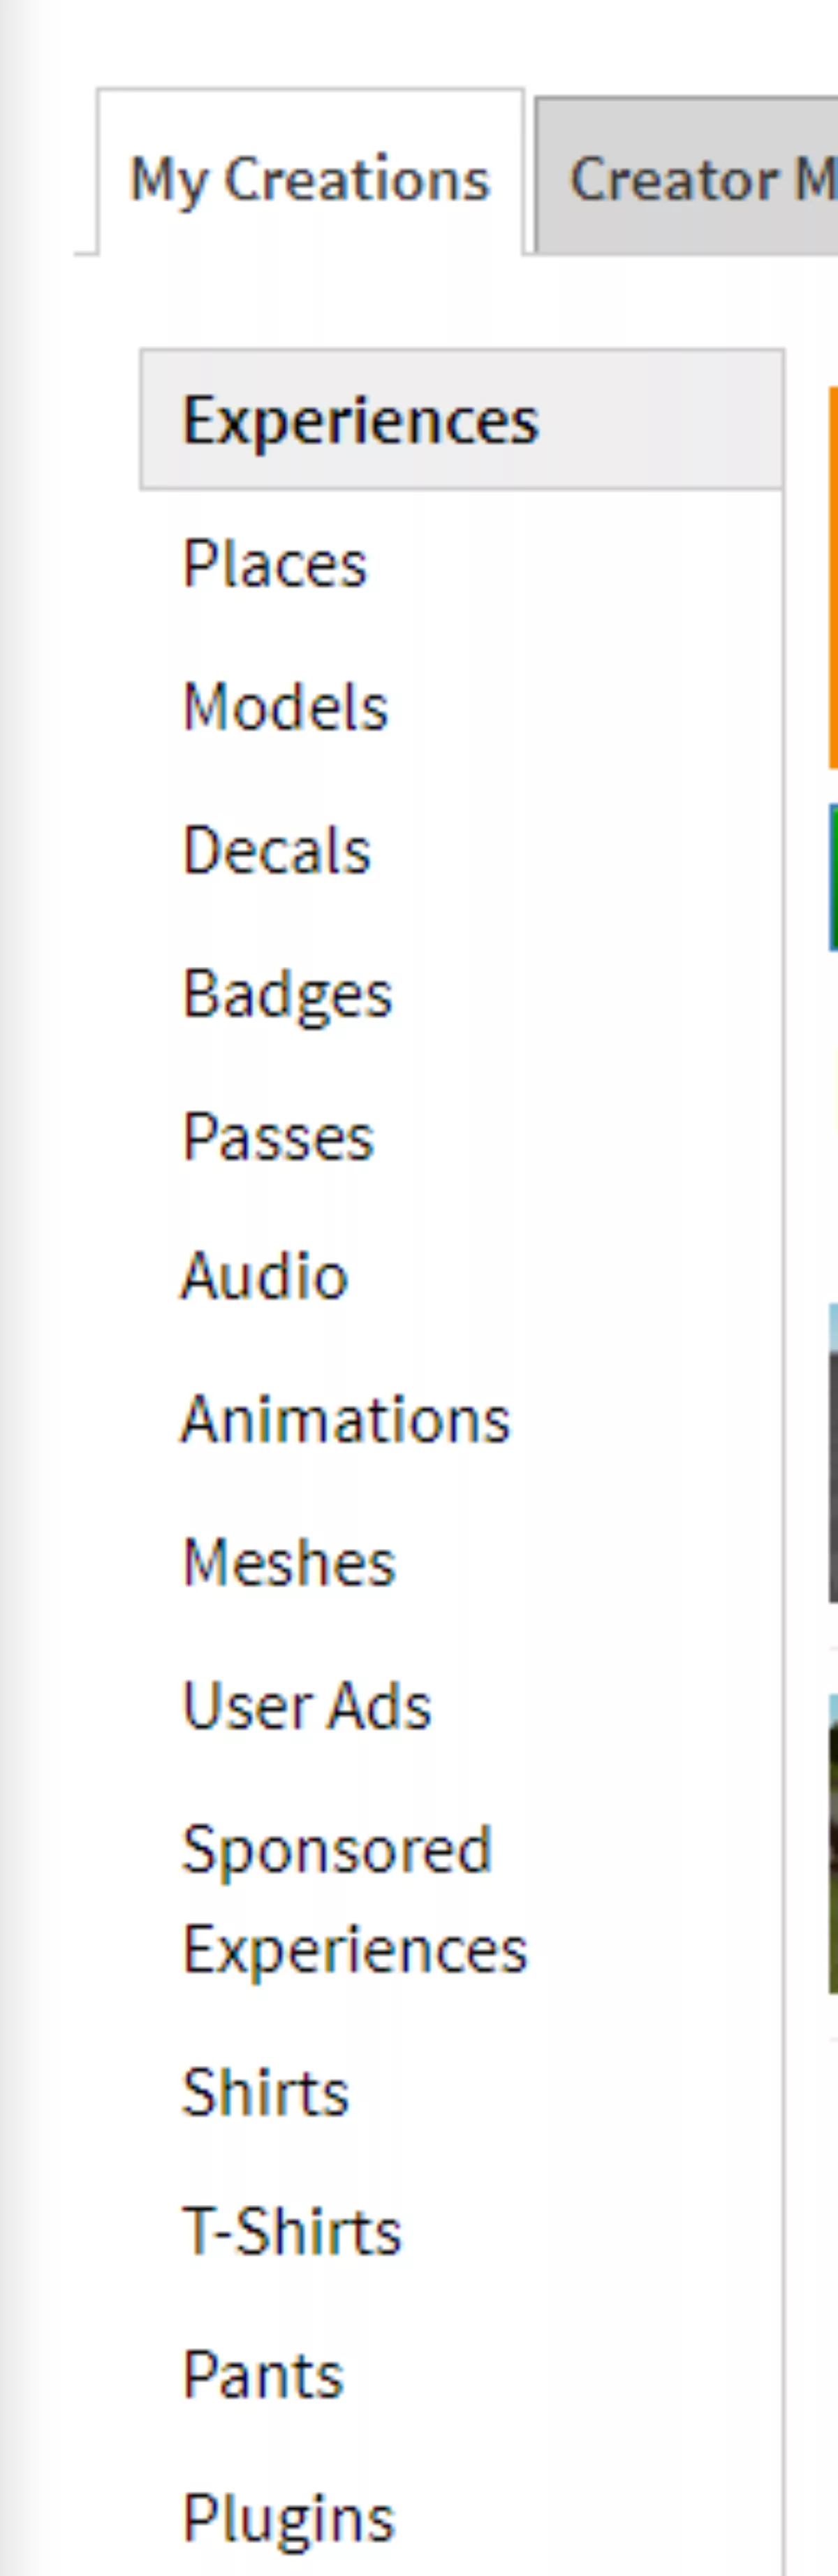
Your "Experiences" are your published games. Select the experience that you want to alter, and click on the gear icon.
- This will open up a drop-down menu; click on the "Configure Experience" option.
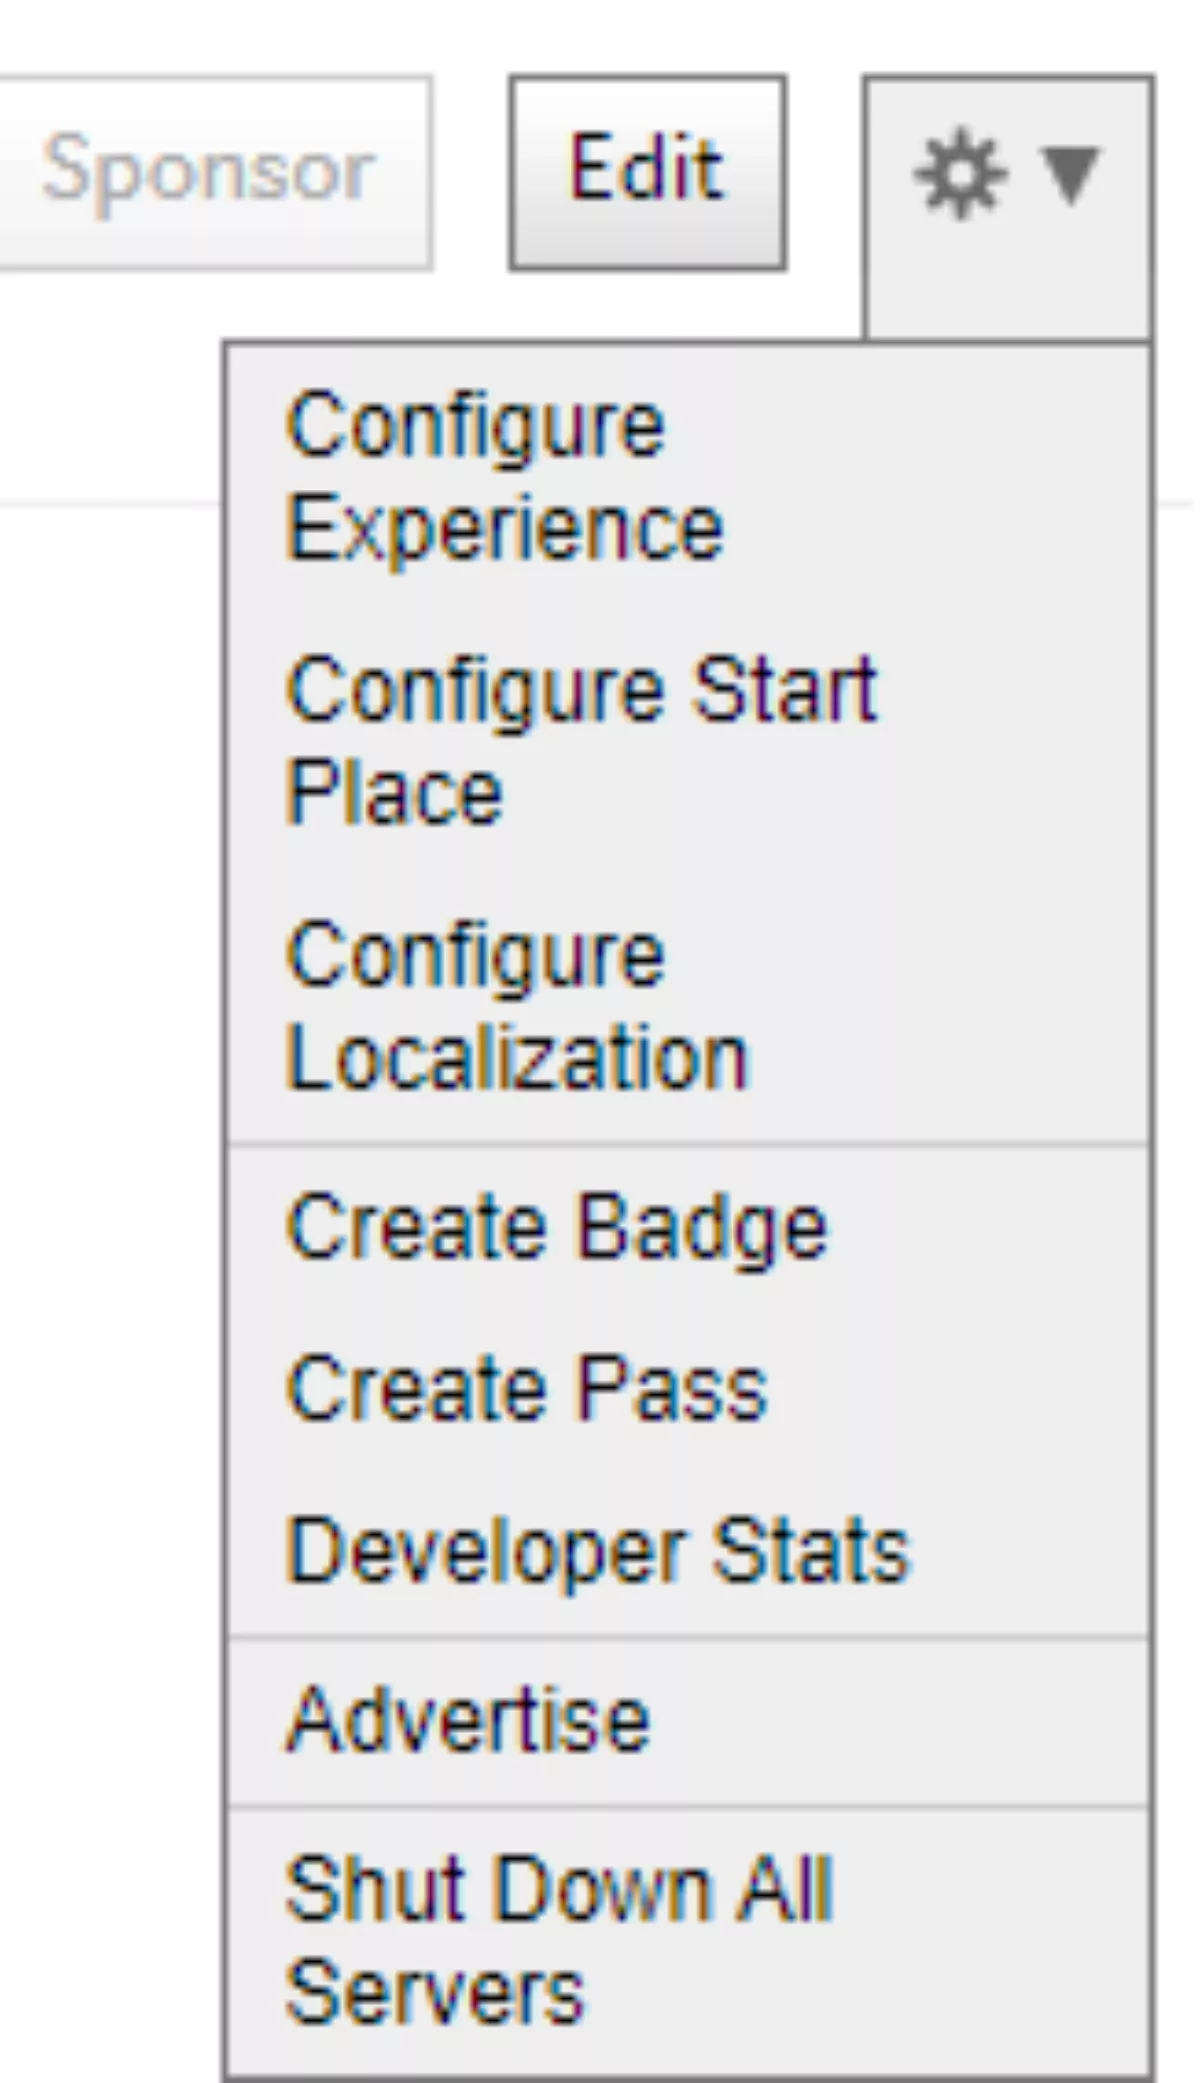
- Change the "Privacy" setting from Private to Public.

Save and exit.
Method 2: Publishing games VIA the browser client
Alternatively, you can try to create a game through the Roblox browser client. I would like to preface this method by saying that there is no alternative to downloading the Roblox Studio client. That is where you create the actual game.
Some users have reported that creating Roblox games directly from the Roblox studio application is hit-or-miss; hence, if you have issues publishing, you can try the following method.
Navigate to the Roblox official website
Once you're on the website, click on the "Create" tab
- Once clicked, it will direct you to the create a landing page; click on the "Start Creating" buttonor the "Create new experience".
- This will either ask you to download the Roblox studio client or, if you have Roblox studio installed already, it will prompt you to "Open Roblox".
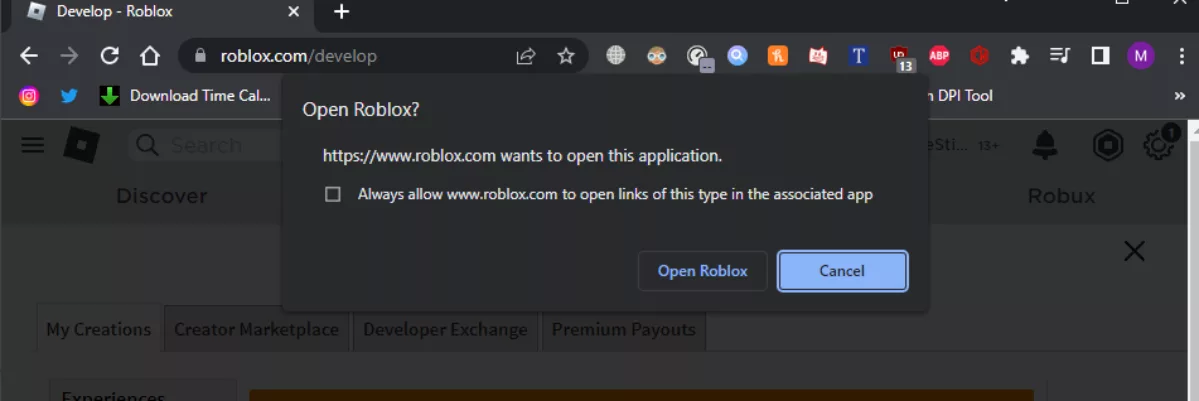
If you haven't received the prompt that shows you to open Roblox, you might have a pop-up blocker turned on.
Make sure to have ad-block or any other pop-up blockers disabled. If you're not comfortable with having them turned off, whitelisting Roblox.com will alleviate the issue. This solution is quite a hit-or-miss. If you're on a chromium-based browser, it works perfectly, but your mileage may vary for others. If you’re still having connection-related issues, follow the guide “How to fix connection fail in Roblox”.
How to Fix the Upload Failed bug
On the off chance that you get the infamous "Upload Failed" error. This happens because either your place is too big or there are a ton of assets that exceed the maximum limit.
This coincidentally is caused by the same issue as the “Roblox studio errors could not open the place” error. Trying the fixes in the guide should be employed if the problem persists.
If you're having trouble gauging whether you are over, follow the below-detailed steps:
To save your Game, click on " File" and Save your game.
Whilst Roblox Studio is running, create a new Game to superimpose a block onto (if it's confusing, it'll make sense later)
Select the game that is causing the issue (i.e. The Game that you were trying to save prior to the error) and add the "Empty" place that you've just created.
If the system ends up working, this means that you need to reduce the number of assets, and when it throws an error at you. You're in the clear.