
Destiny 2 is among the most played games on Steam. The game manages to look stunning even on the lower settings, but it does require good hardware to run at its maximum potential. If you are testing the game settings and you want to monitor your PC's performance while playing, we will show you 4 ways how you can display your FPS counter in real-time.
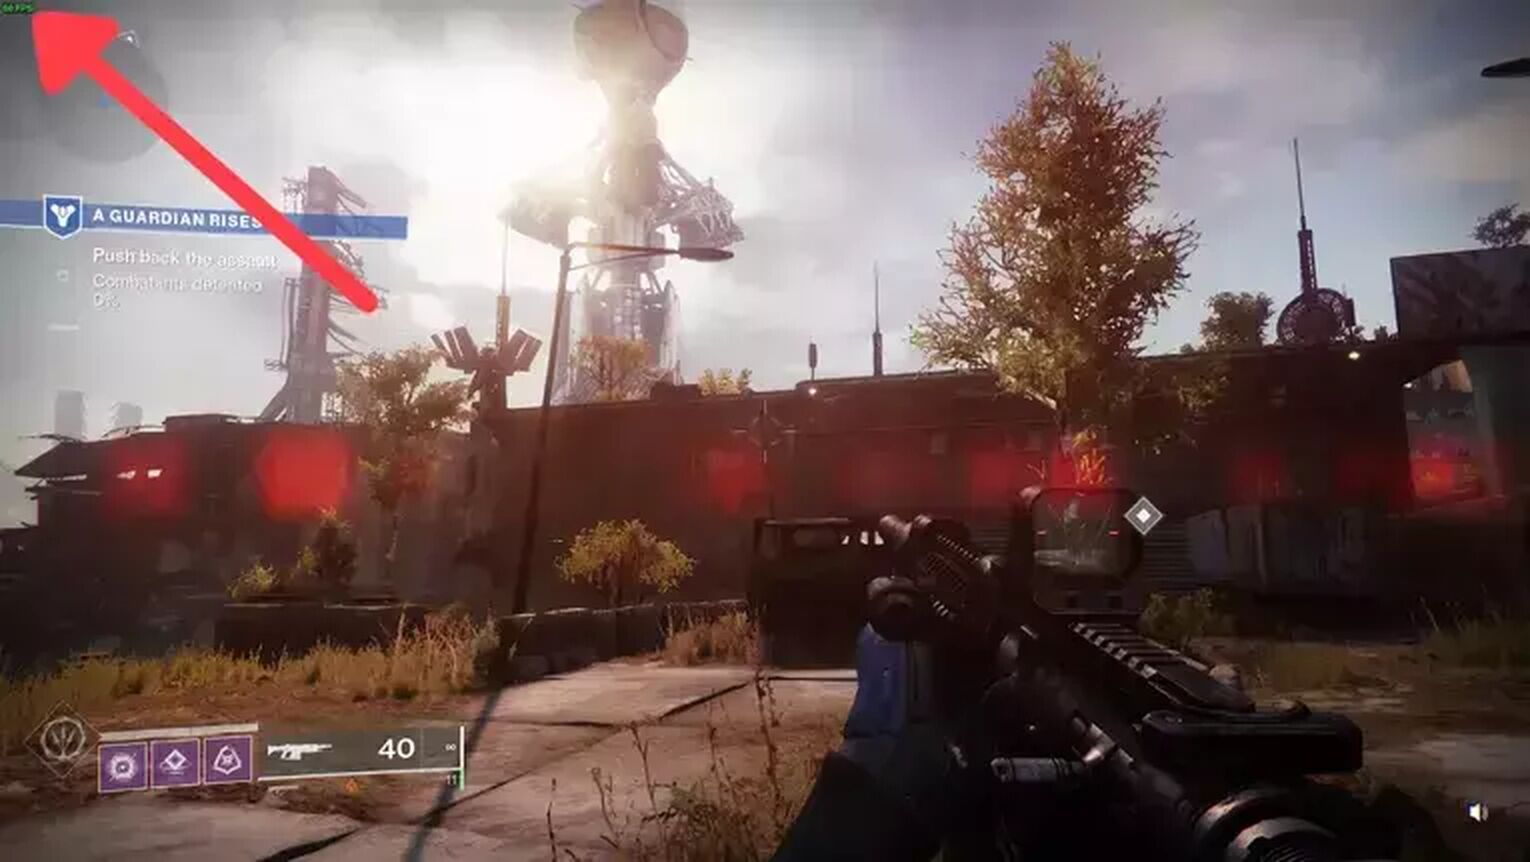
Method #1: Show Your FPS in Destiny 2 By Using the In-Game Settings (Easiest Method)
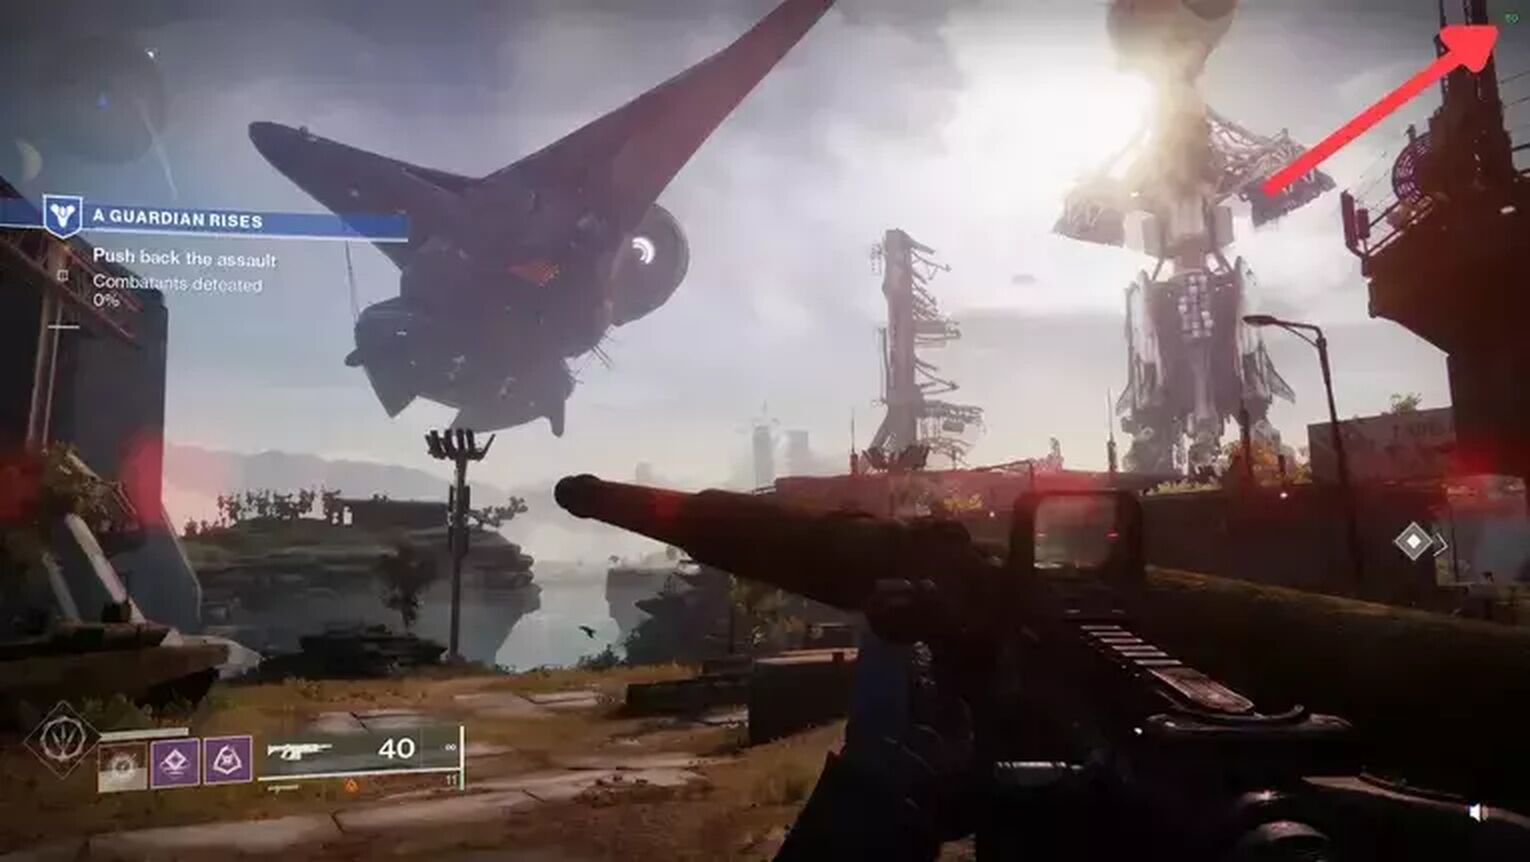
The easiest way to display your FPS is using the In-game internal FPS counter in the Destiny 2 settings menu. This feature is not available on any console, such as the Xbox Series S and the Xbox Series X. Here's how you can do it:
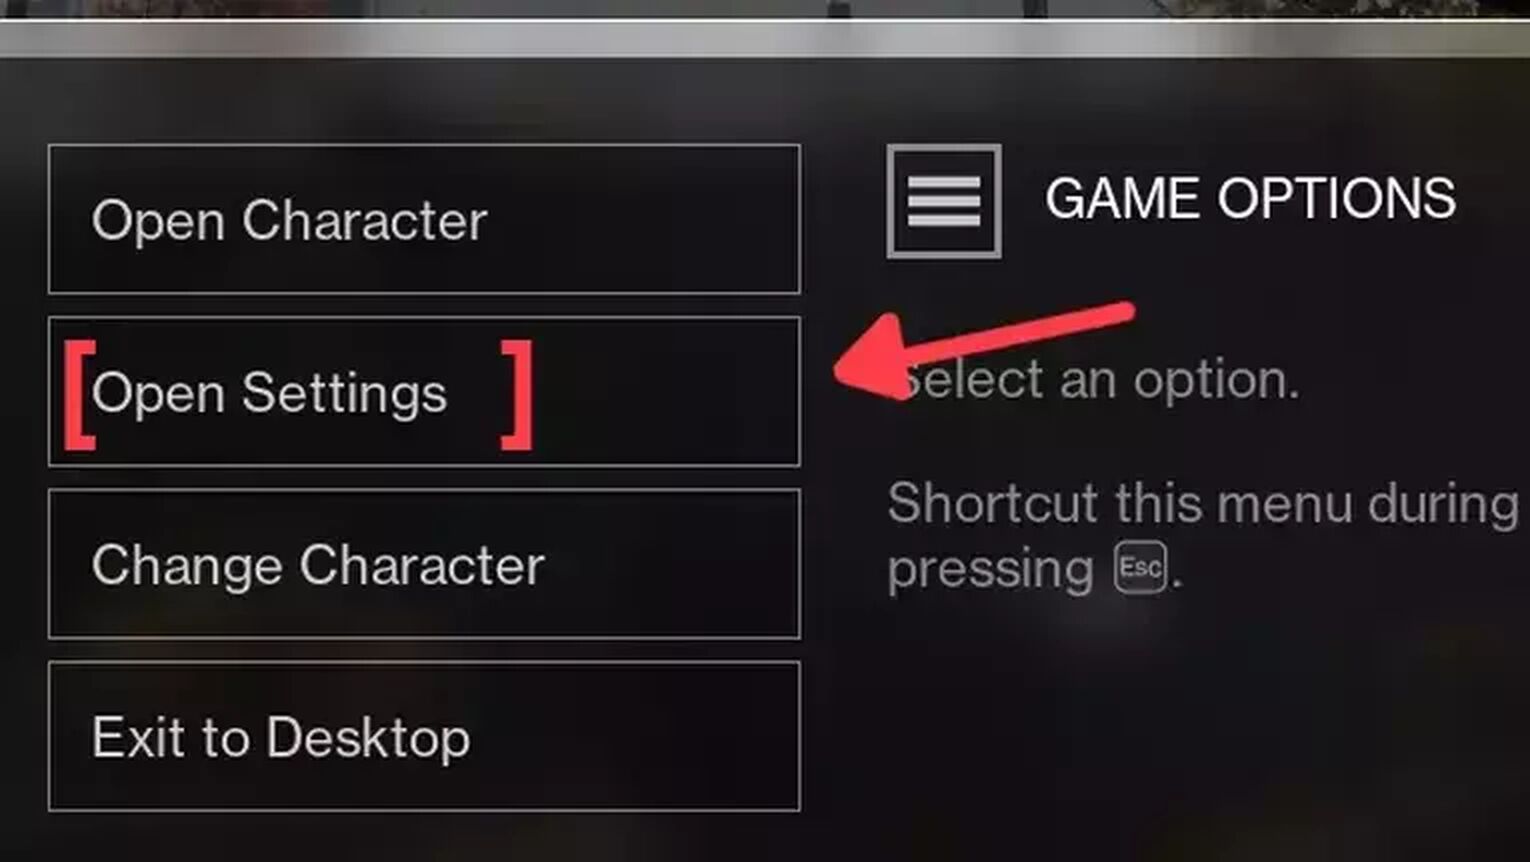
- While in Destiny 2, press Esc and click on Open Settings.
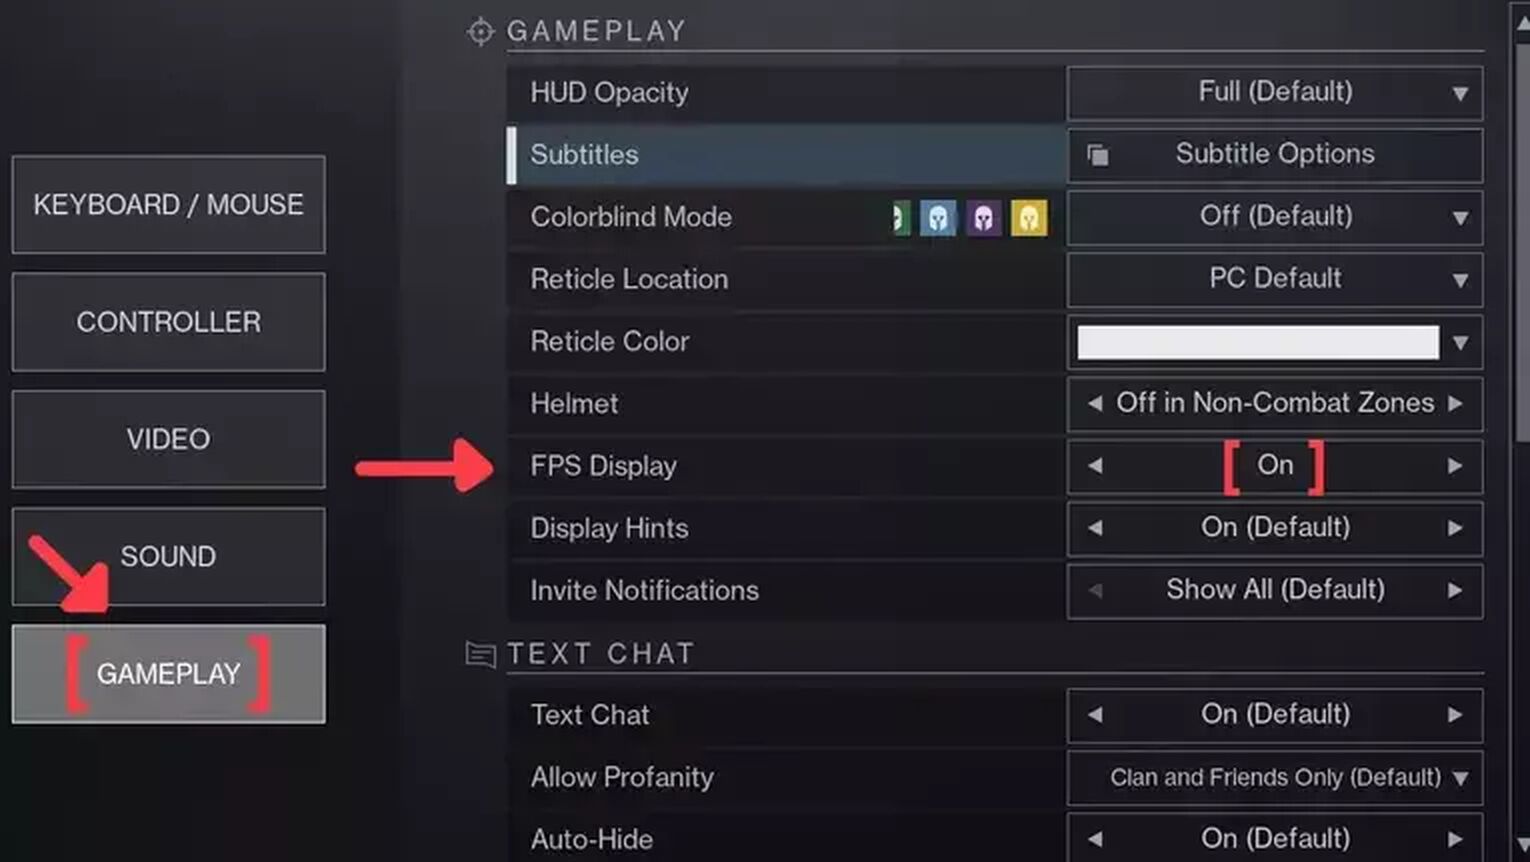
- Go to the Gameplay tab.
- Search for the FPS Display option.
- Just click on the checkbox to enable the FPS counter.
Method #2: Show Your FPS in Destiny 2 By Using the Steam Settings

If you are playing Destiny 2 on your Steam gaming library, another easy way you have to display your FPS counter is using the Steam Settings. Follow this simple guide to learn how:

- Open the Steam app and click on Steam on the left upper corner of your screen.
- Go to Settings.
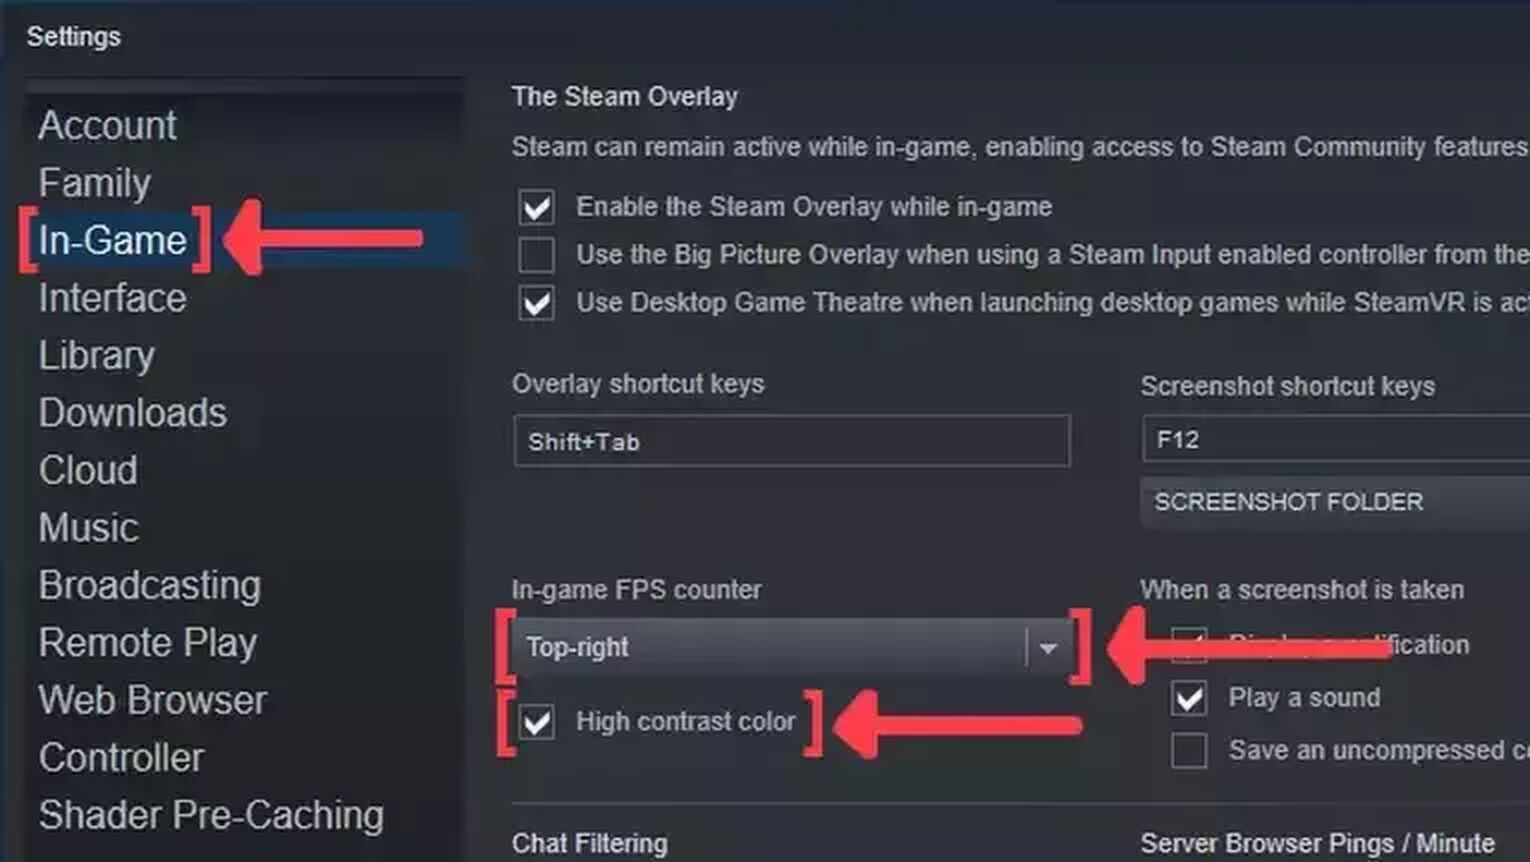
- In the Settings window, click on the In-Game tab.
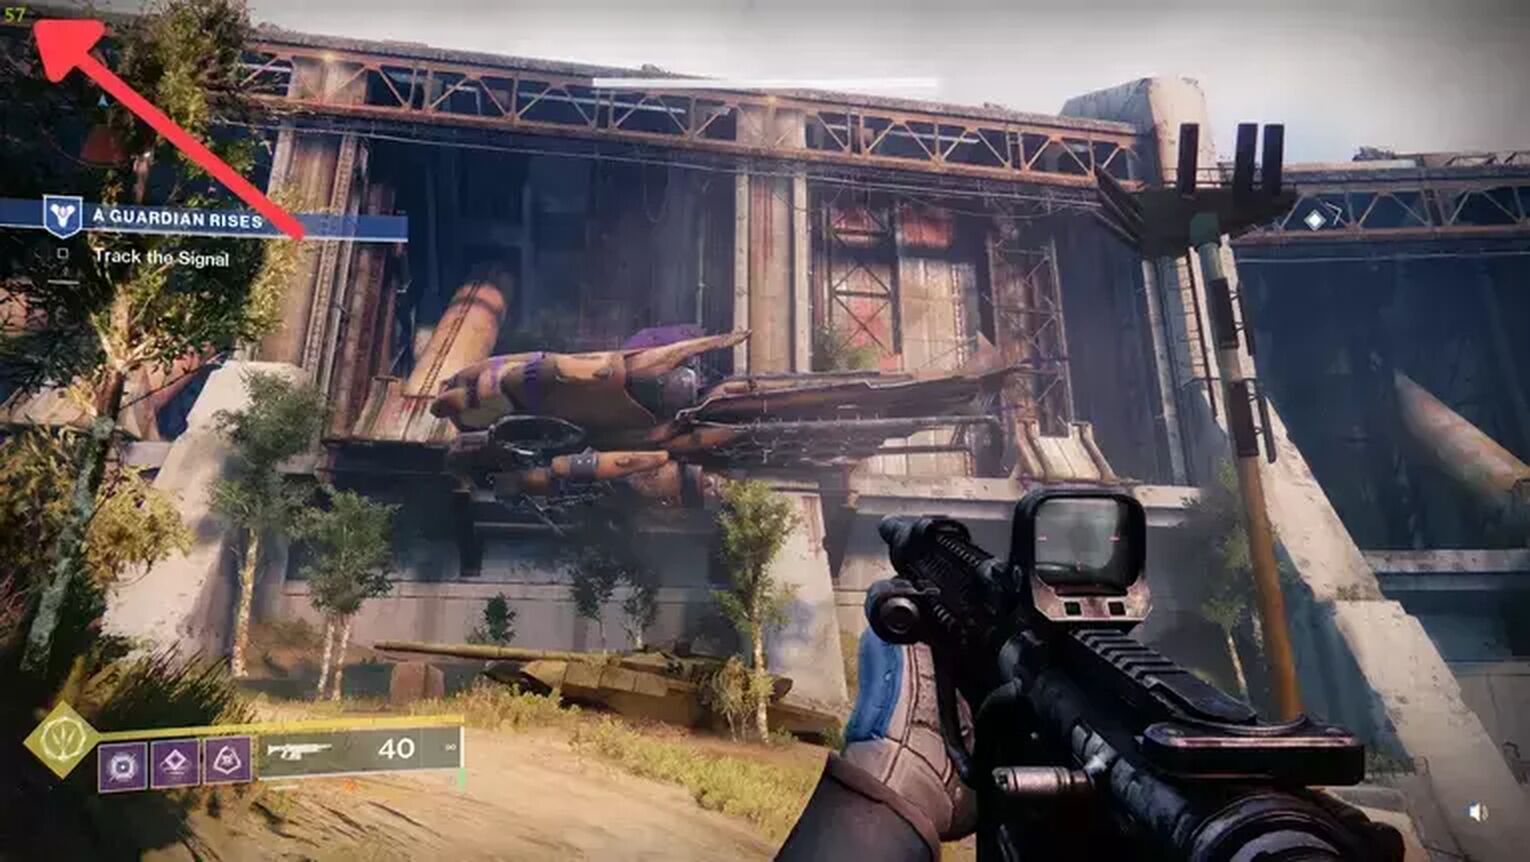
- Search for the In-game FPS counter and click on the arrow. This action will open a list of options that you can choose in which corner you prefer your FPS counter to be displayed.
- We also recommend you activate the High contrast color option, so you can get a better view of your FPS while playing Destiny 2.
Method #3: Show Your FPS in Destiny 2 By Using the GeForce Experience
If you have an NVIDIA graphics card on your gaming PC, then the GeForce Experience is a great way you have to display your FPS counter. Follow this step-by-step guide to learn how:
- Go to the GeForce Experience site and download the latest version.
- Follow the standard download steps.
- Create a new account or log in if you already have one.
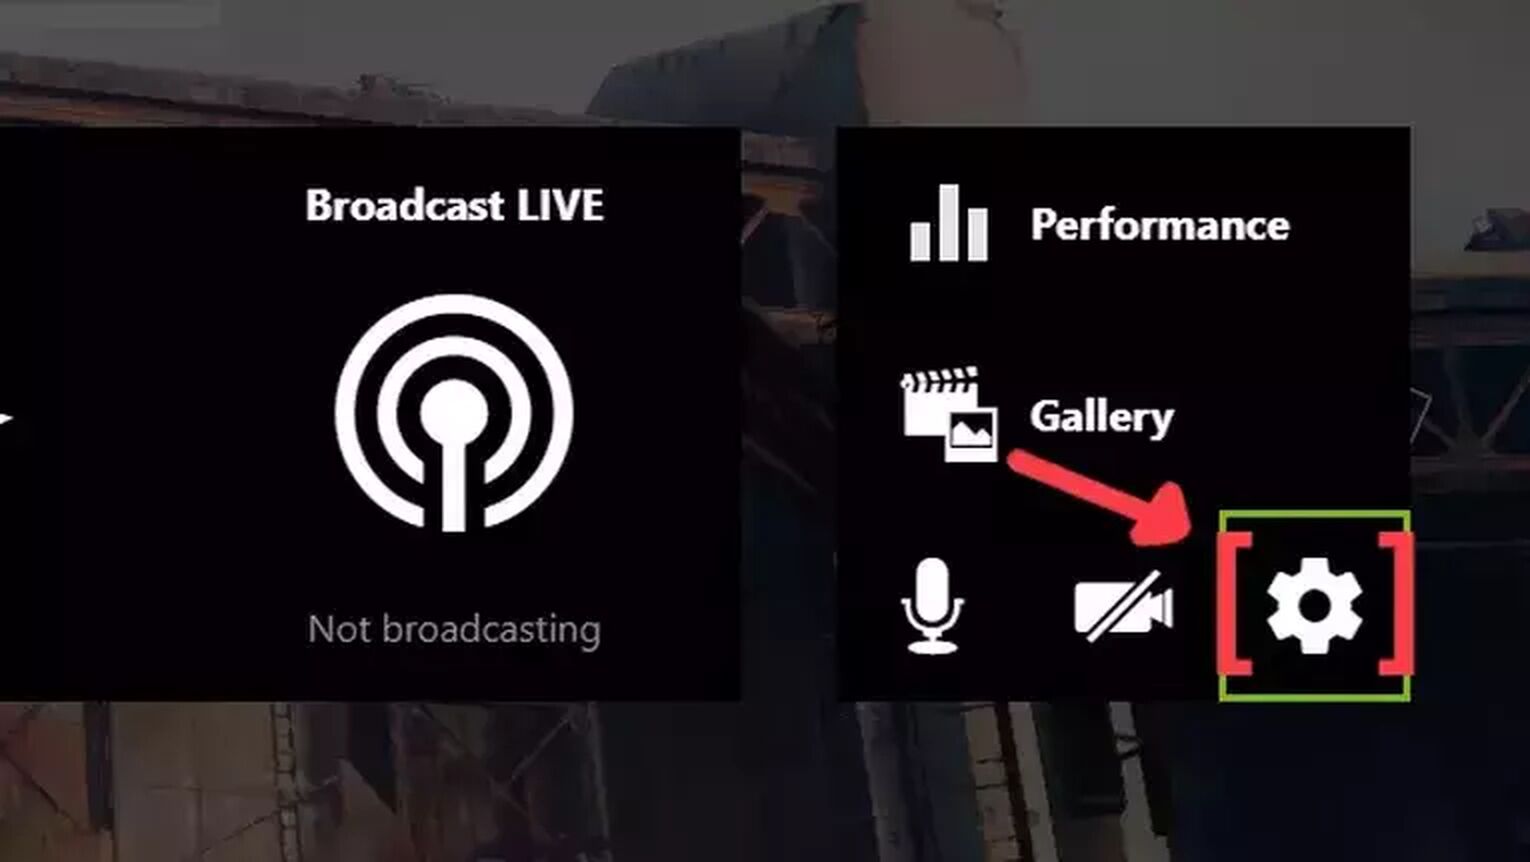
- Launch the Destiny 2 game and press Alt+Z to open the GeForce Experience tools overlay.
- Click on the gear icon to open the settings screen.
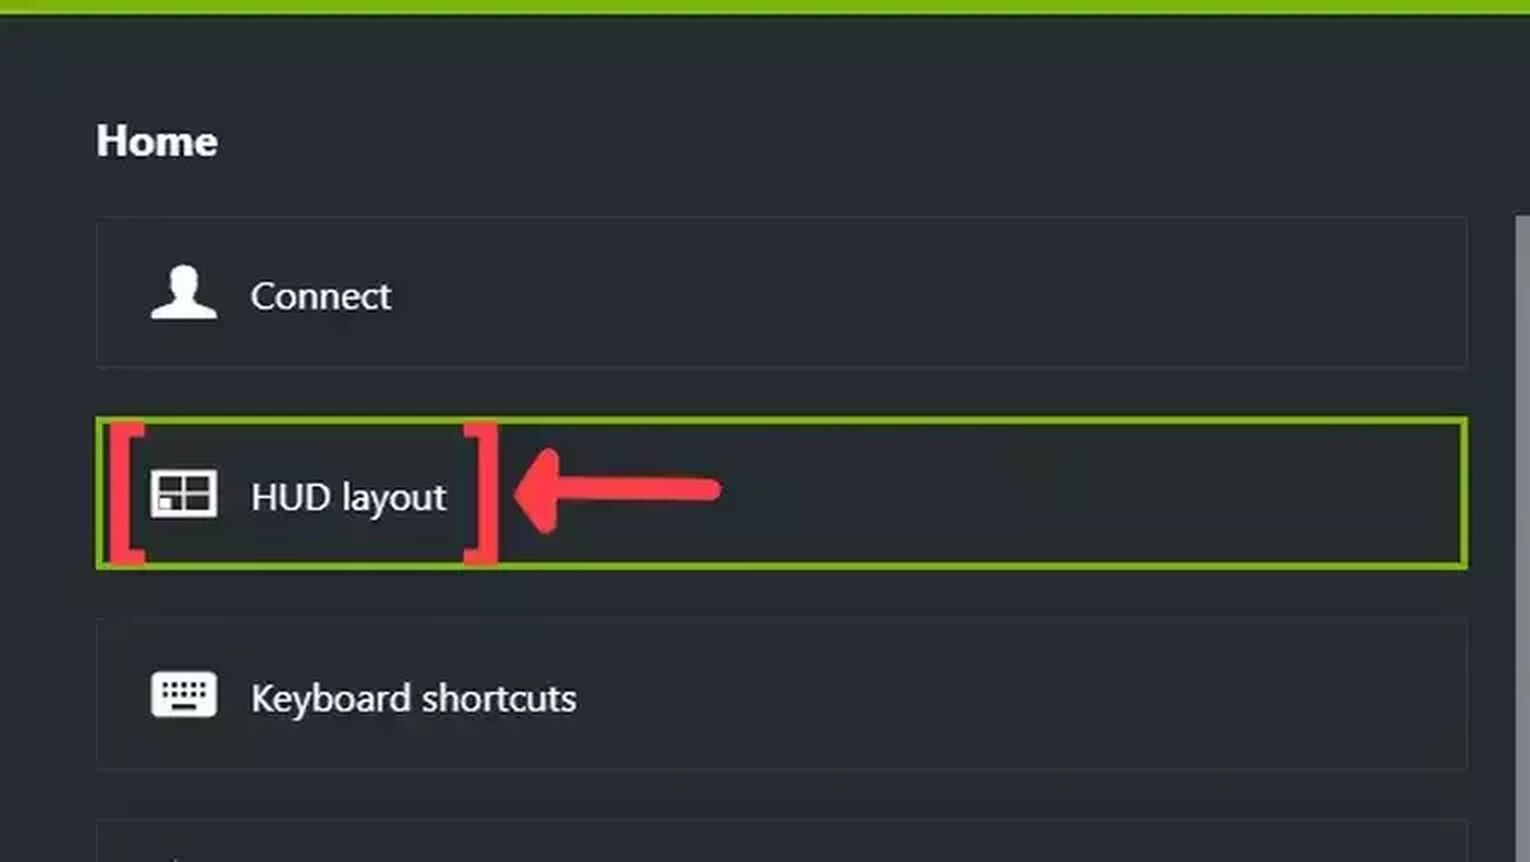
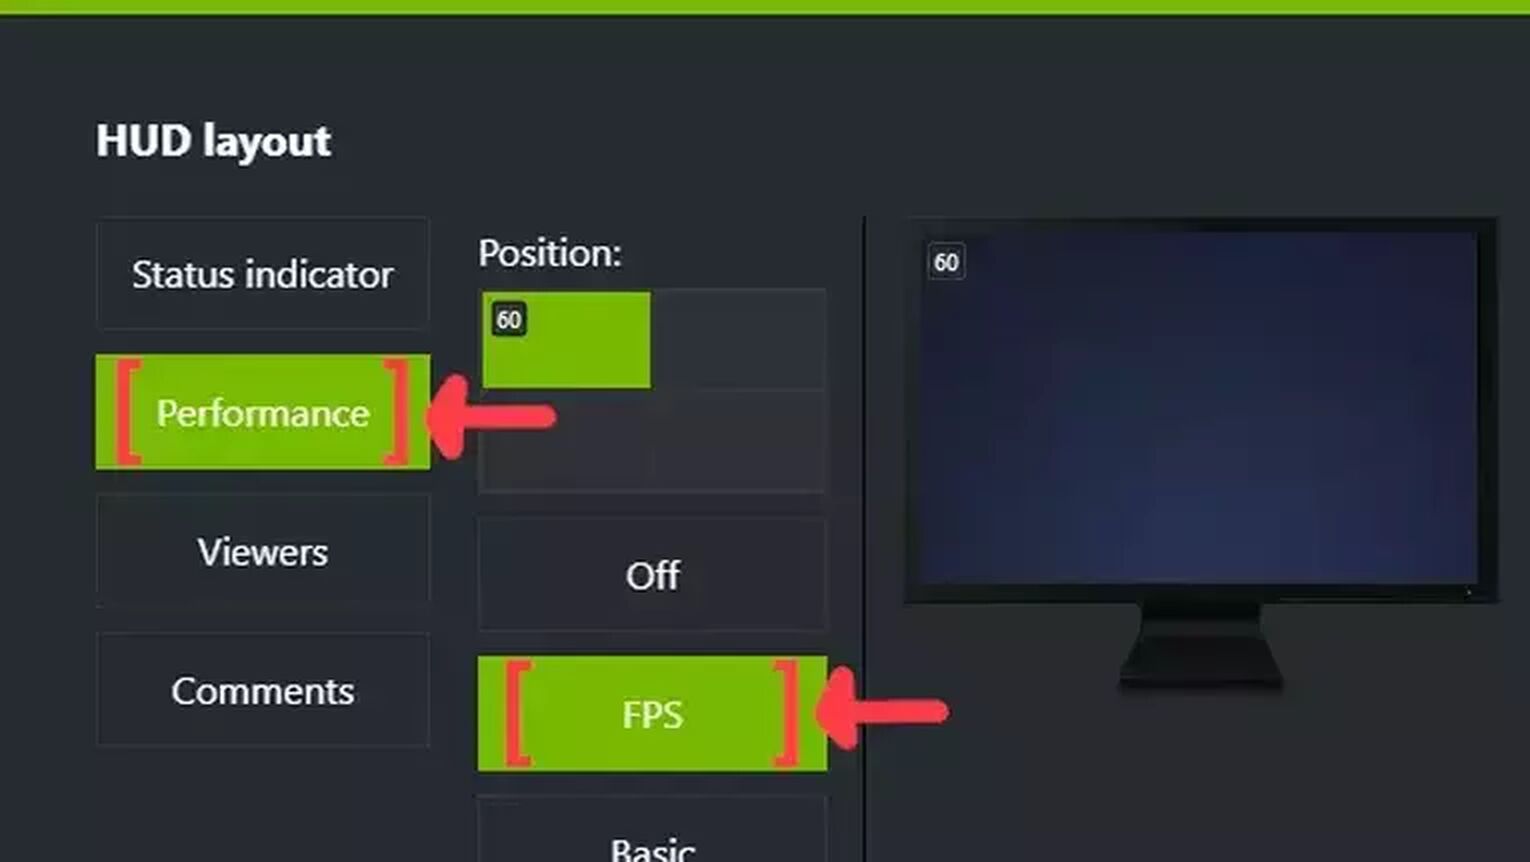
- Click on the HUD layout option.
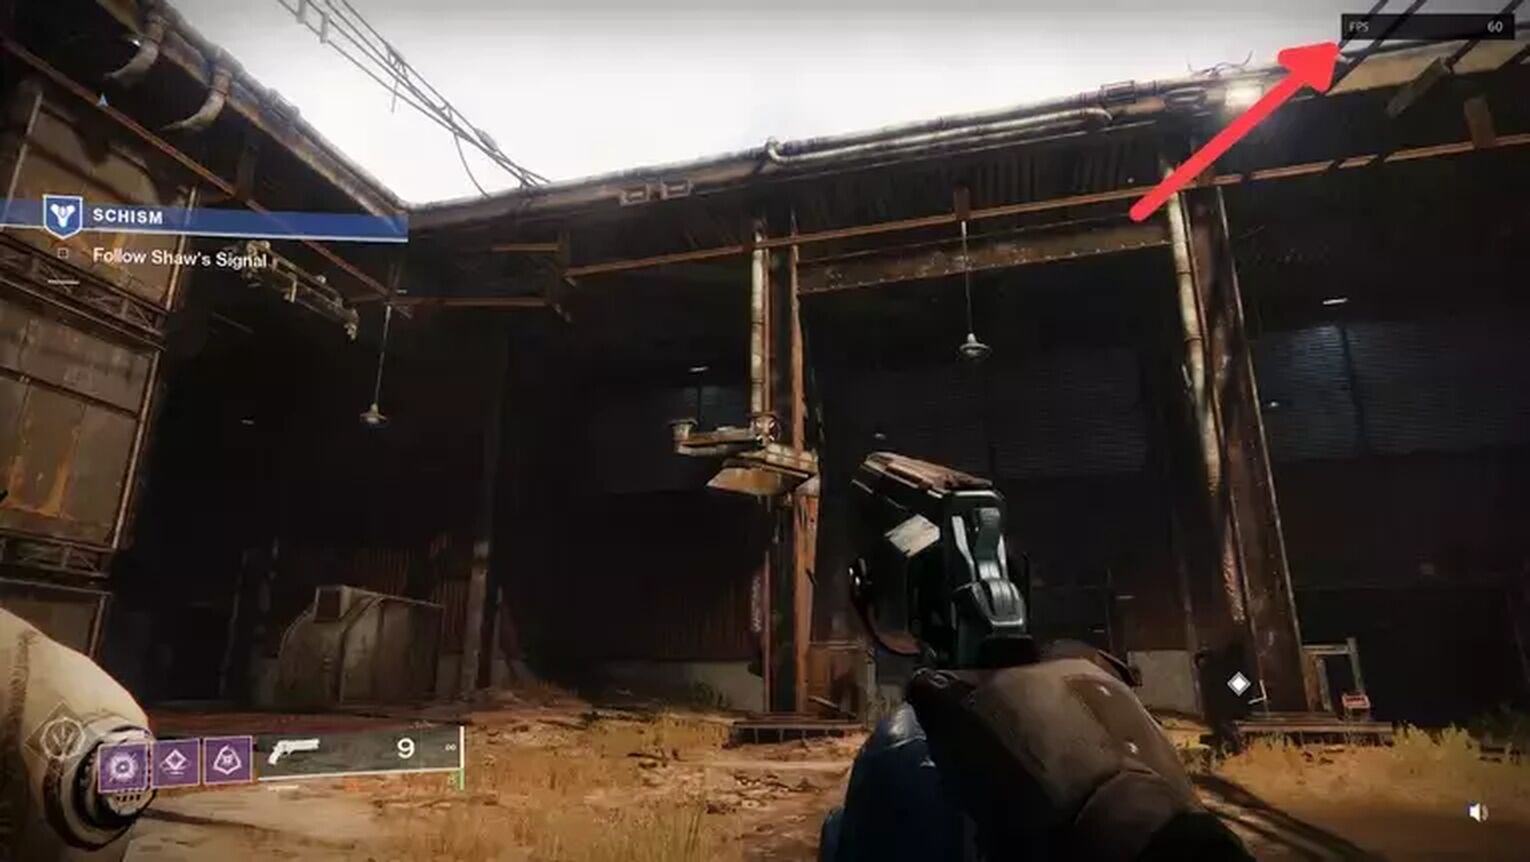
- To activate the FPS counter in Destiny 2, click on Performance and next on FPS to enable the FPS counter display.
Method #4: Show Your FPS in Destiny 2 By Using the AMD Radeon Software
If you are playing Destiny 2 using an AMD graphics card, a great alternative to the GeForce Experience is using the AMD Radeon Software to display your FPS counter. Follow these simple steps to set it up:
- Go to the AMD Radeon Software site and download the latest version.
- Follow the standard download steps.
- Start the Destiny 2 game and press Alt+R to open the AMD Radeon Software window.
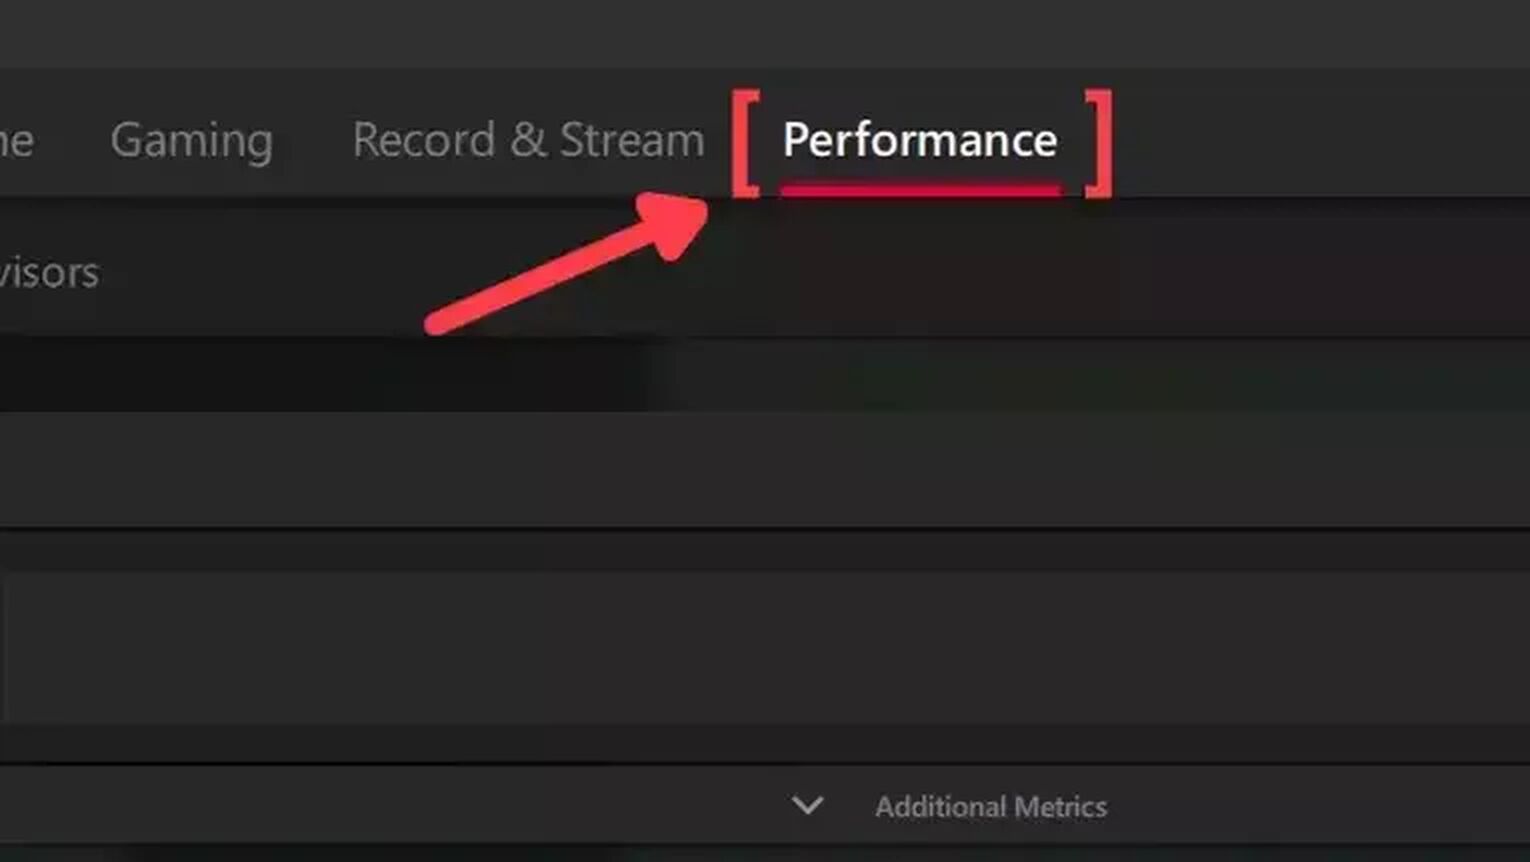
- Click on the Performance tab at the top.
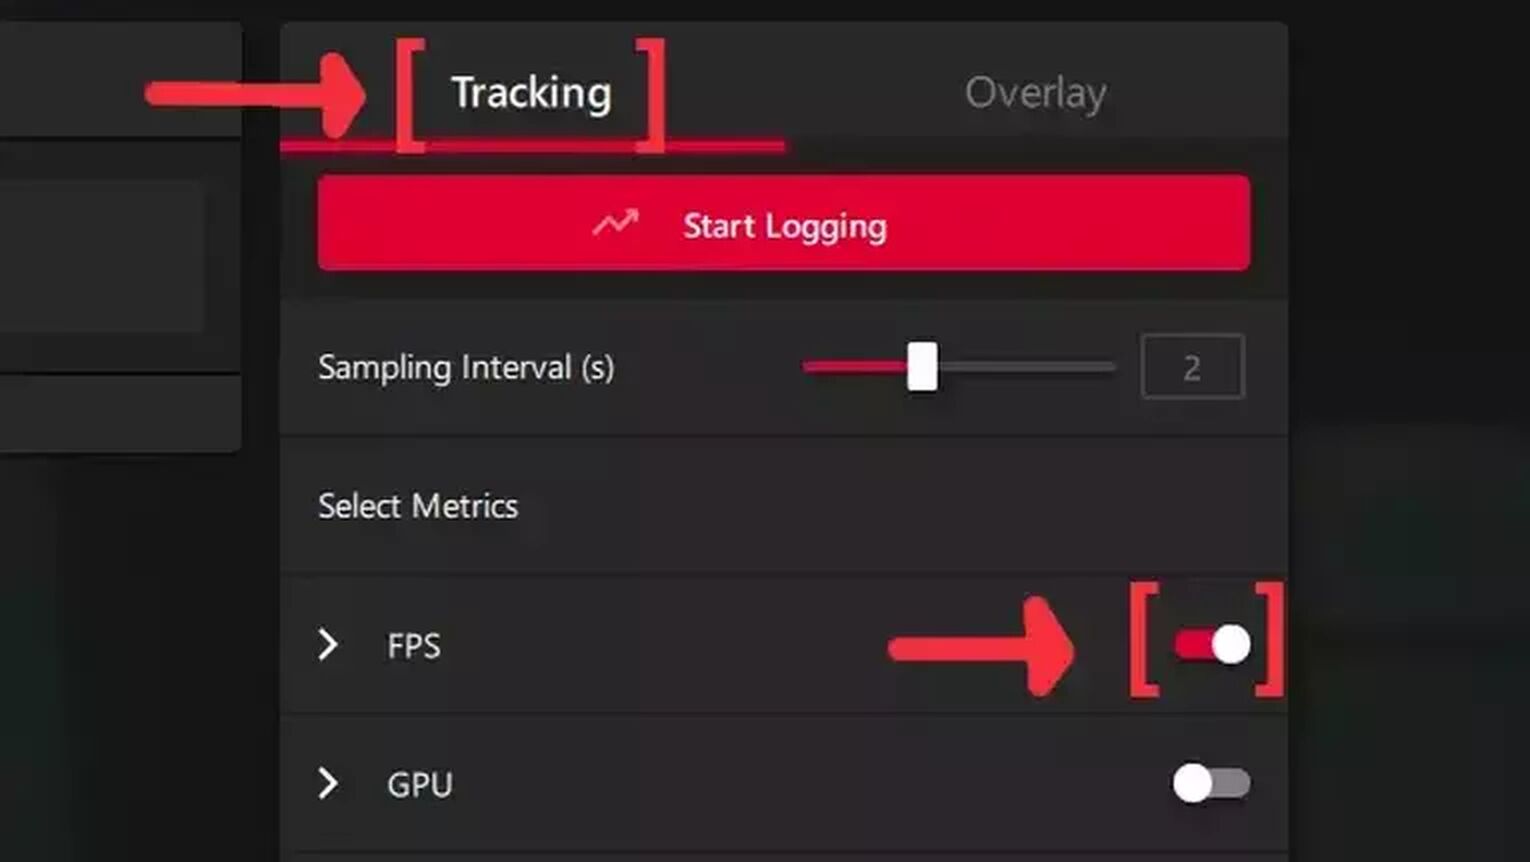
- In the Tracking tab on the right, click on the FPS checker to enable the FPS counter in Destiny 2.
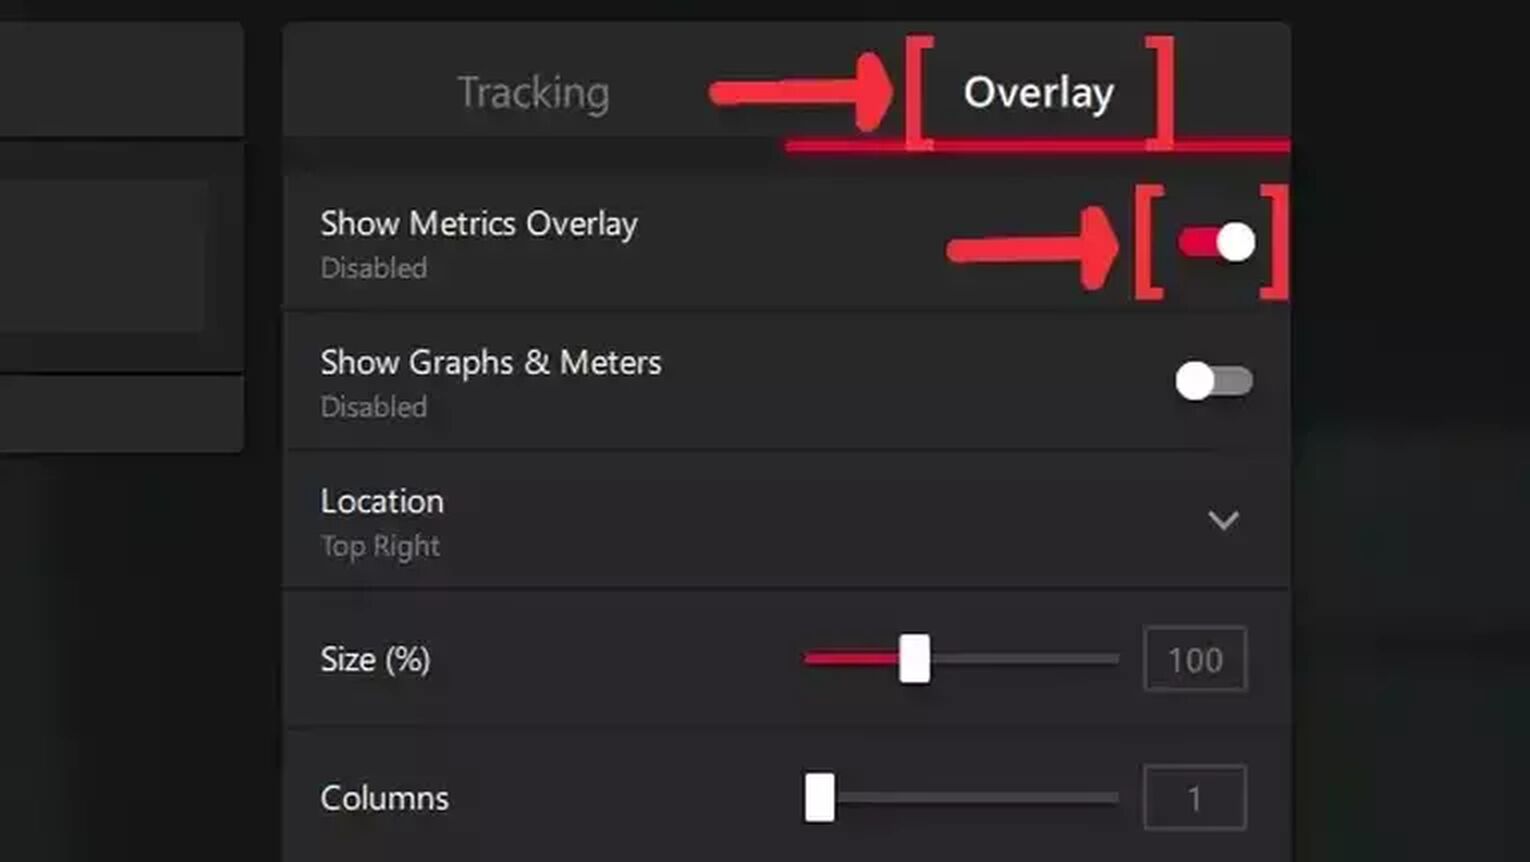
- Now go to the Overlay tab and select the Show Metrics Overlay checker to enable the FPS counter.
If you are looking for a way to have an FPS boost while playing Destiny 2, check out our article on how you can improve your FPS in Destiny 2 to increase your gaming PC frame rate performance and hit the 60 FPS mark. If you want to know more ways to display your FPS counter, we recommend you to read our article on how you can show your FPS in Rainbow Six Siege. Now, if you are suffering from ping-related issues, check out our articles and learn how you can, not only show your ping in Destiny 2 but also how you can fix your high ping in Destiny 2.


.svg)


