If you're looking for a way how to record the gameplay of Destiny 2, look no further because this article will show you exactly that and so much more!
You'll discover the matchless and most straightforward programs you can use to capture Destiny 2 gameplay clips and videos and how to use them, so keep on reading, and we'll reveal everything you need to know about recording Destiny 2 gameplay as quickly as possible.
What’s The Best Way To Record Destiny 2 Gameplay and Clips?
To record Destiny 2 gameplay and clips, we recommend using two programs, Powder and Gazoom. Powder uses artificial intelligence to automatically capture your best Destiny 2 moments in the form of clips while also supporting a reward-based program so you can complete quests and get gift cards! Gazoom, on the other hand, is a better option for gameplay video editing because this program will automatically capture your Destiny 2 clips, but it will upload them to a cloud so that you can access or edit them, even from your mobile device.

How To Record Destiny 2 Clips In A Few Clicks?
If you wish to record Destiny 2 clips (or videos) in just a few clicks, you won't need any third-party software or a capture card, but you will need at least Windows 10 installed on your PC. This is because Windows 10 and above have a handy tool called Xbox Game Bar pre-installed, which can be used for various gaming stuff, including gameplay recording.
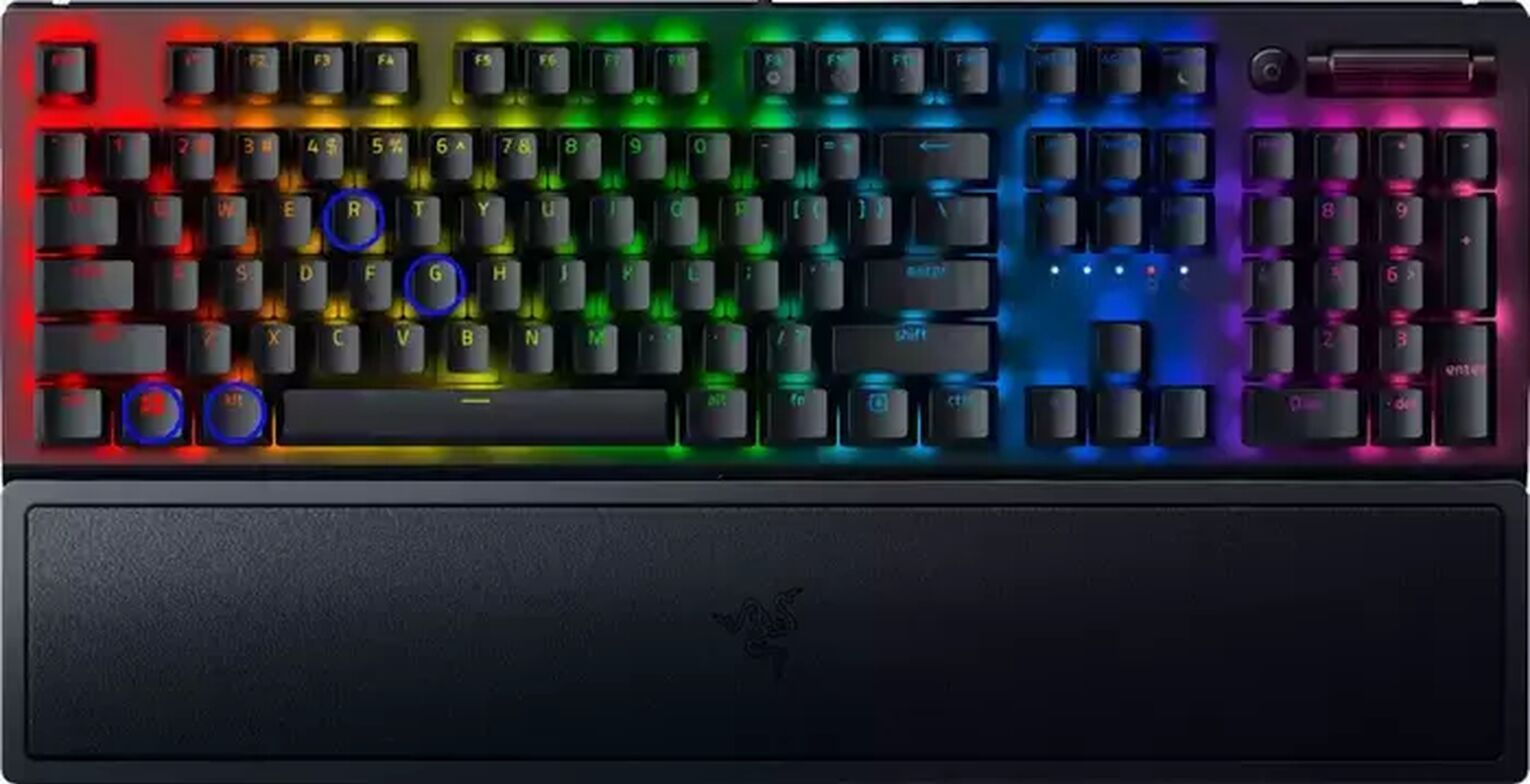
To begin recording Destiny 2 using the Xbox Game Bar, press the Windows button + Alt + G on your keyboard to record clips for up to 30 seconds, or press the Windows button + Alt + R to record gameplay videos.
You'll find your Destiny 2 clips and videos in the C:\Users\username\Videos\Captures folder.
The Best Methods Of Recording Gameplay and Clips In Destiny 2
We'll now reveal the top-class methods of recording gameplay videos and clips in Destiny 2, in our opinion, which is based on personally trying and testing various screen recording programs.
In the end, we settled for three of them that we believe are a cut above the rest, but we also included the honorable mentions at the bottom of this article.
Interested in learning more about gameplay capturing? Find out how to record Rainbow Six Siege gameplay or how to record PUBG gameplay.
Method #1: Nvidia GeForce Experience
To start with, here's how you can use our first choice of best programs for recording Destiny 2 gameplay - GeForce Experience:
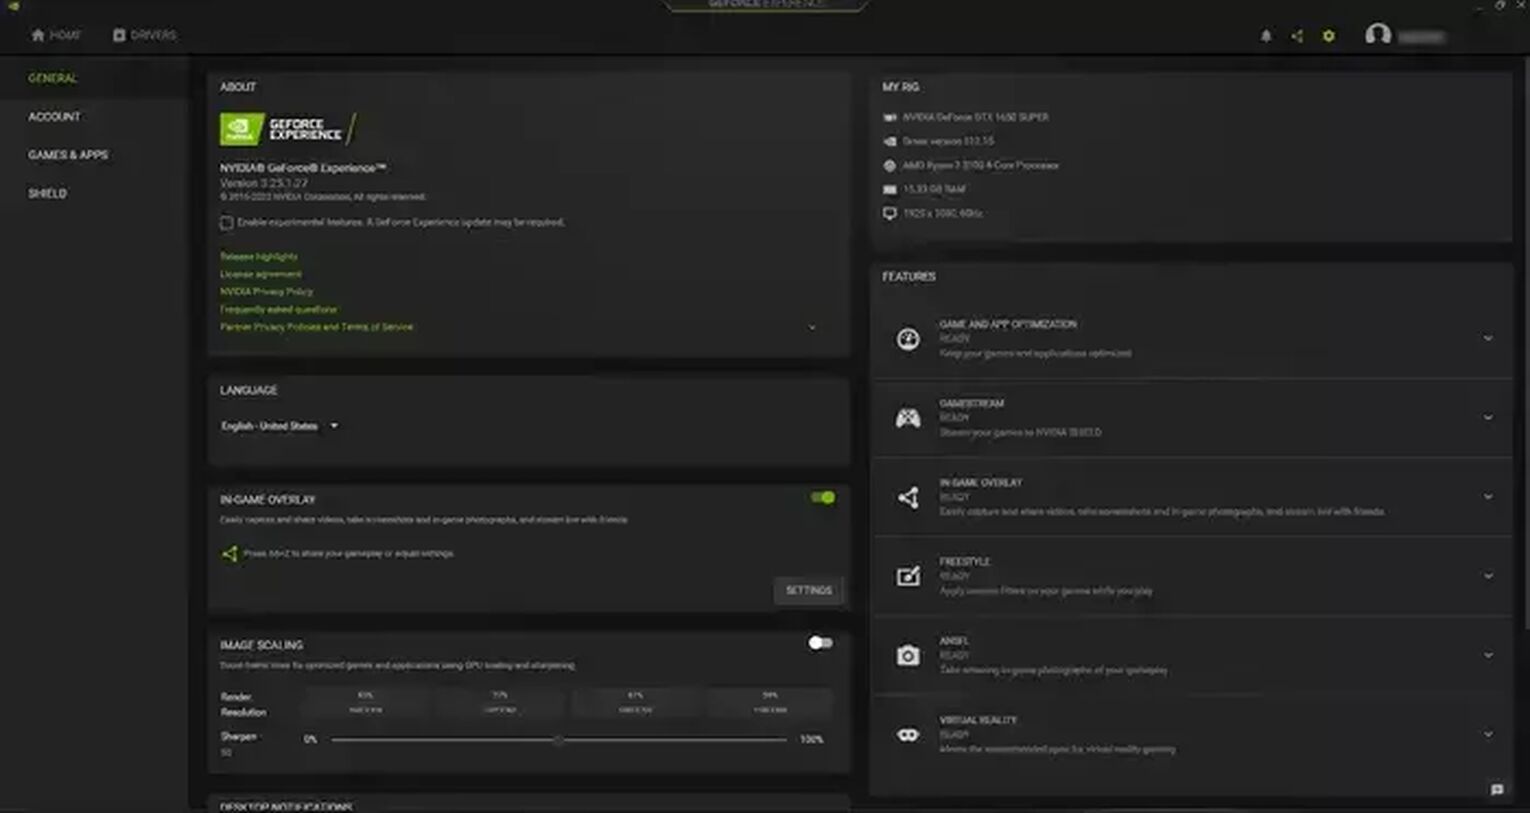
- Download the GeForce Experience from Nvidia's official website, and once you install it, the program will automatically run.
- Click on the settings cog icon in the upper right corner, left of your username.
- Enable the "In-game overlay" option by clicking the button.
- Finally, click on the "Settings" under the "In-game overlay" tab.

You'll now be able to configure GeForce Experience however you want, but keep in mind that the program is already pre-configured based on your graphic card, so it's ready to use straight away.
Once you wish to start recording Destiny 2 gameplay using GeForce Experience, press one of the two keyboard hotkeys - Alt + F9 to record videos of any length or Alt + F10 to record clips.
Whenever you want to rewatch or share your Destiny 2 captures, you'll find these videos and clips stored in the C:\Users\<Username>\Videos folder.
Method #2: Radeon ReLive
Find out how to record Destiny 2 gameplay using our second choice, Radeon ReLive, in the steps shown below:
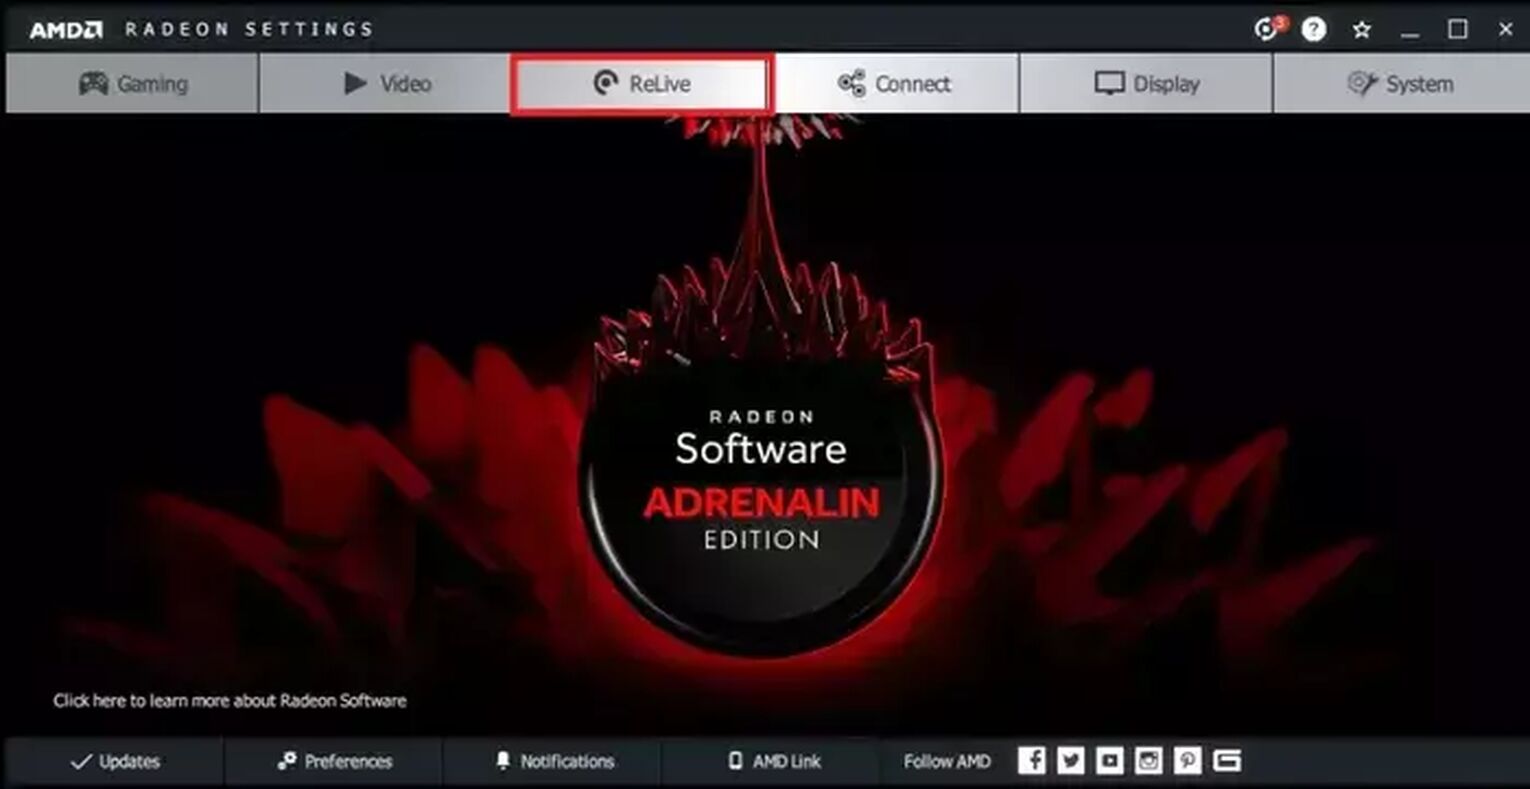
- Visit AMD's official website and download Radeon Software Crimson ReLive Edition, and after installing it, you'll need to restart the PC before using the program.
- Then, click on the ReLive tab in the AMD Radeon Settings.
- Enable ReLive function (which is off by default) by ticking the button.
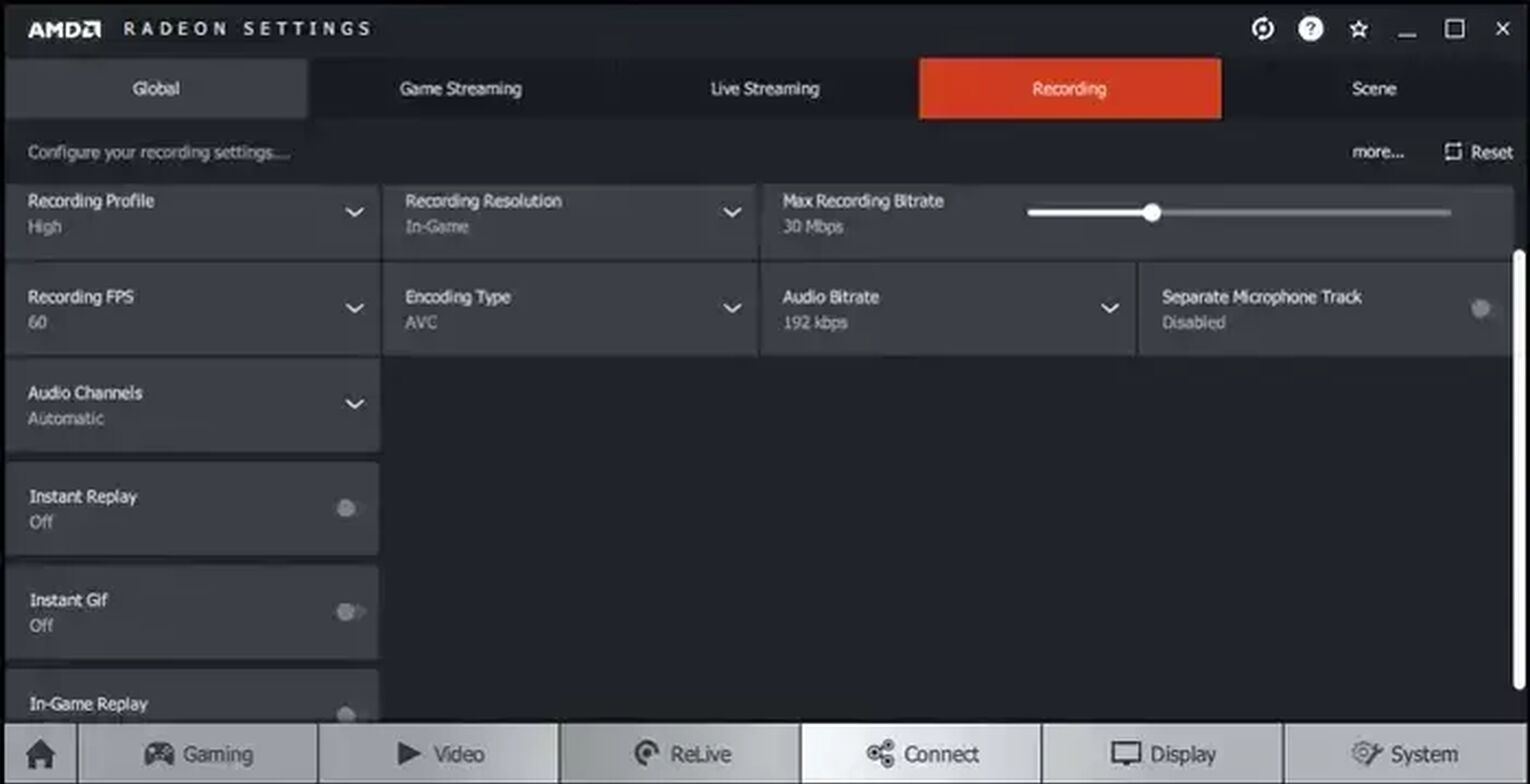
Restarting the PC was essential so that the program could auto-configure everything and save you some time you would spend configuring stuff manually.
However, some attractive options are off by default, which you should definitely enable. These options are "In-game replay," "Instant Replay," and "Instant Gif," which you can use to capture Destiny 2 clips and gifs in no time.
Whenever you wish to start recording Destiny 2 gameplay, press Ctrl + Shift + R, and you'll find Destiny 2 clips and videos stored in the C:\Users\<Username>\Videos\Radeon ReLive folder.
Method #3: Open Broadcaster Software
Our third top choice of best programs for recording Destiny 2 is OBS, so keep on reading to learn how to use it:

- Make sure to download OBS Studio from the official source, and once you install it, you'll be greeted with the auto-configuration wizard, which you may use to configure all settings in just three clicks!
- From the main menu of OBS, select the + icon found under the "Sources" tab.
- Then finally, select the "Game Capture" option, write anything into the field, and confirm it.
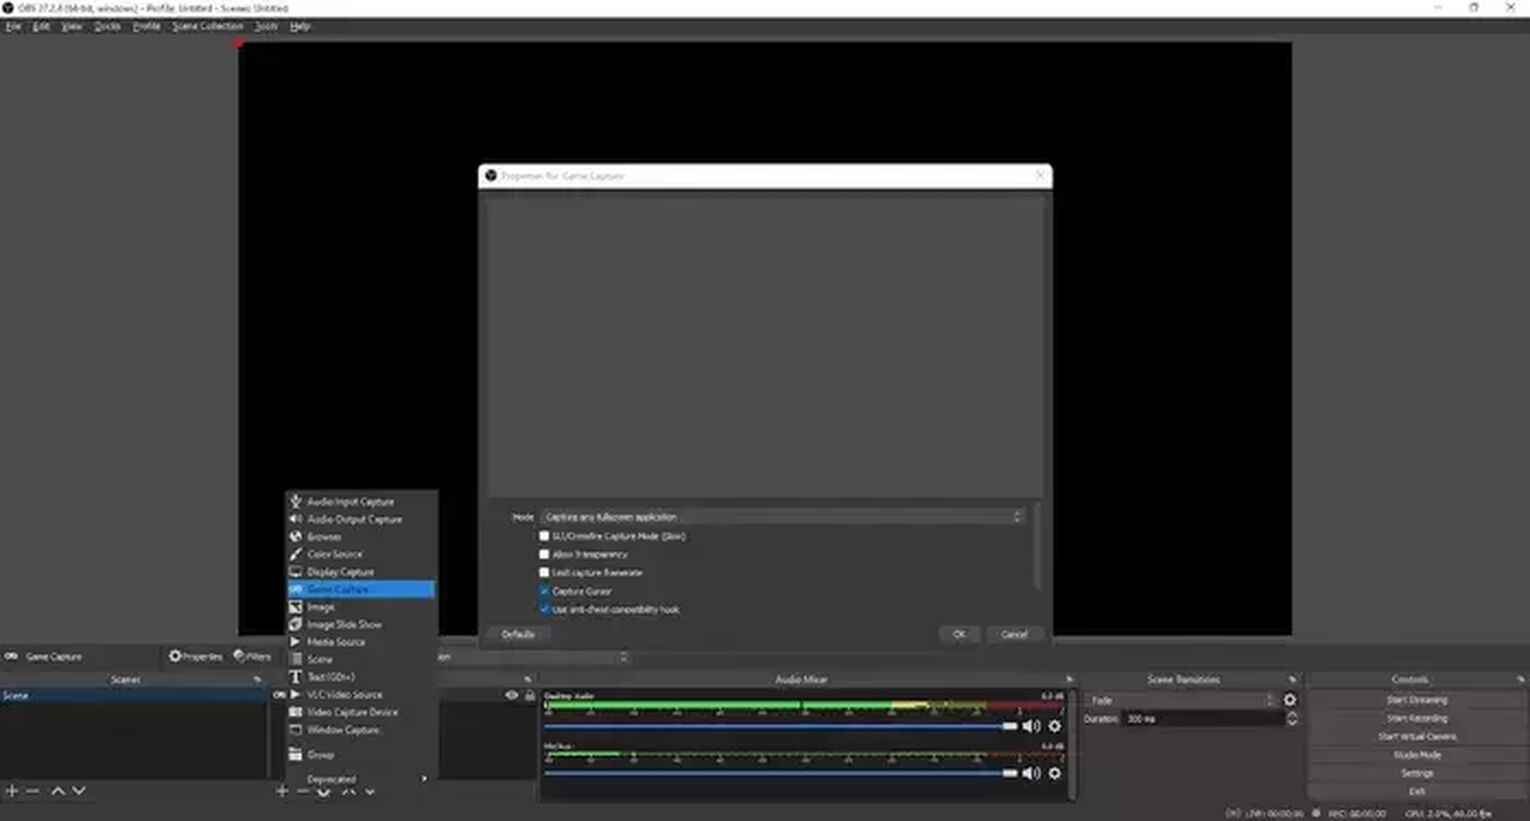
You can also use the OBS to stream Destiny 2 on various streaming platforms since this program isn't created exclusively for gameplay recording.
And in case you need to modify the video, audio, keyboard hotkey, or any other option, select "File" in the upper left corner, then click on the "Settings," and you'll find everything there.
Of all the settings, you won't need to change anything except for the keyboard hotkey, which we strongly suggest you set up so you can start recording Destiny 2 gameplay much more accessible.
Whenever you wish to record Destiny 2 clips or videos, just press the keyboard hotkey (if you have one) or click on "Start Recording" from the main menu of OBS.
You'll find your Destiny 2 gameplay clips and videos stored in the C:\Users\<Username>\Videos folder.
How To Record Destiny 2 Gameplay On Xbox
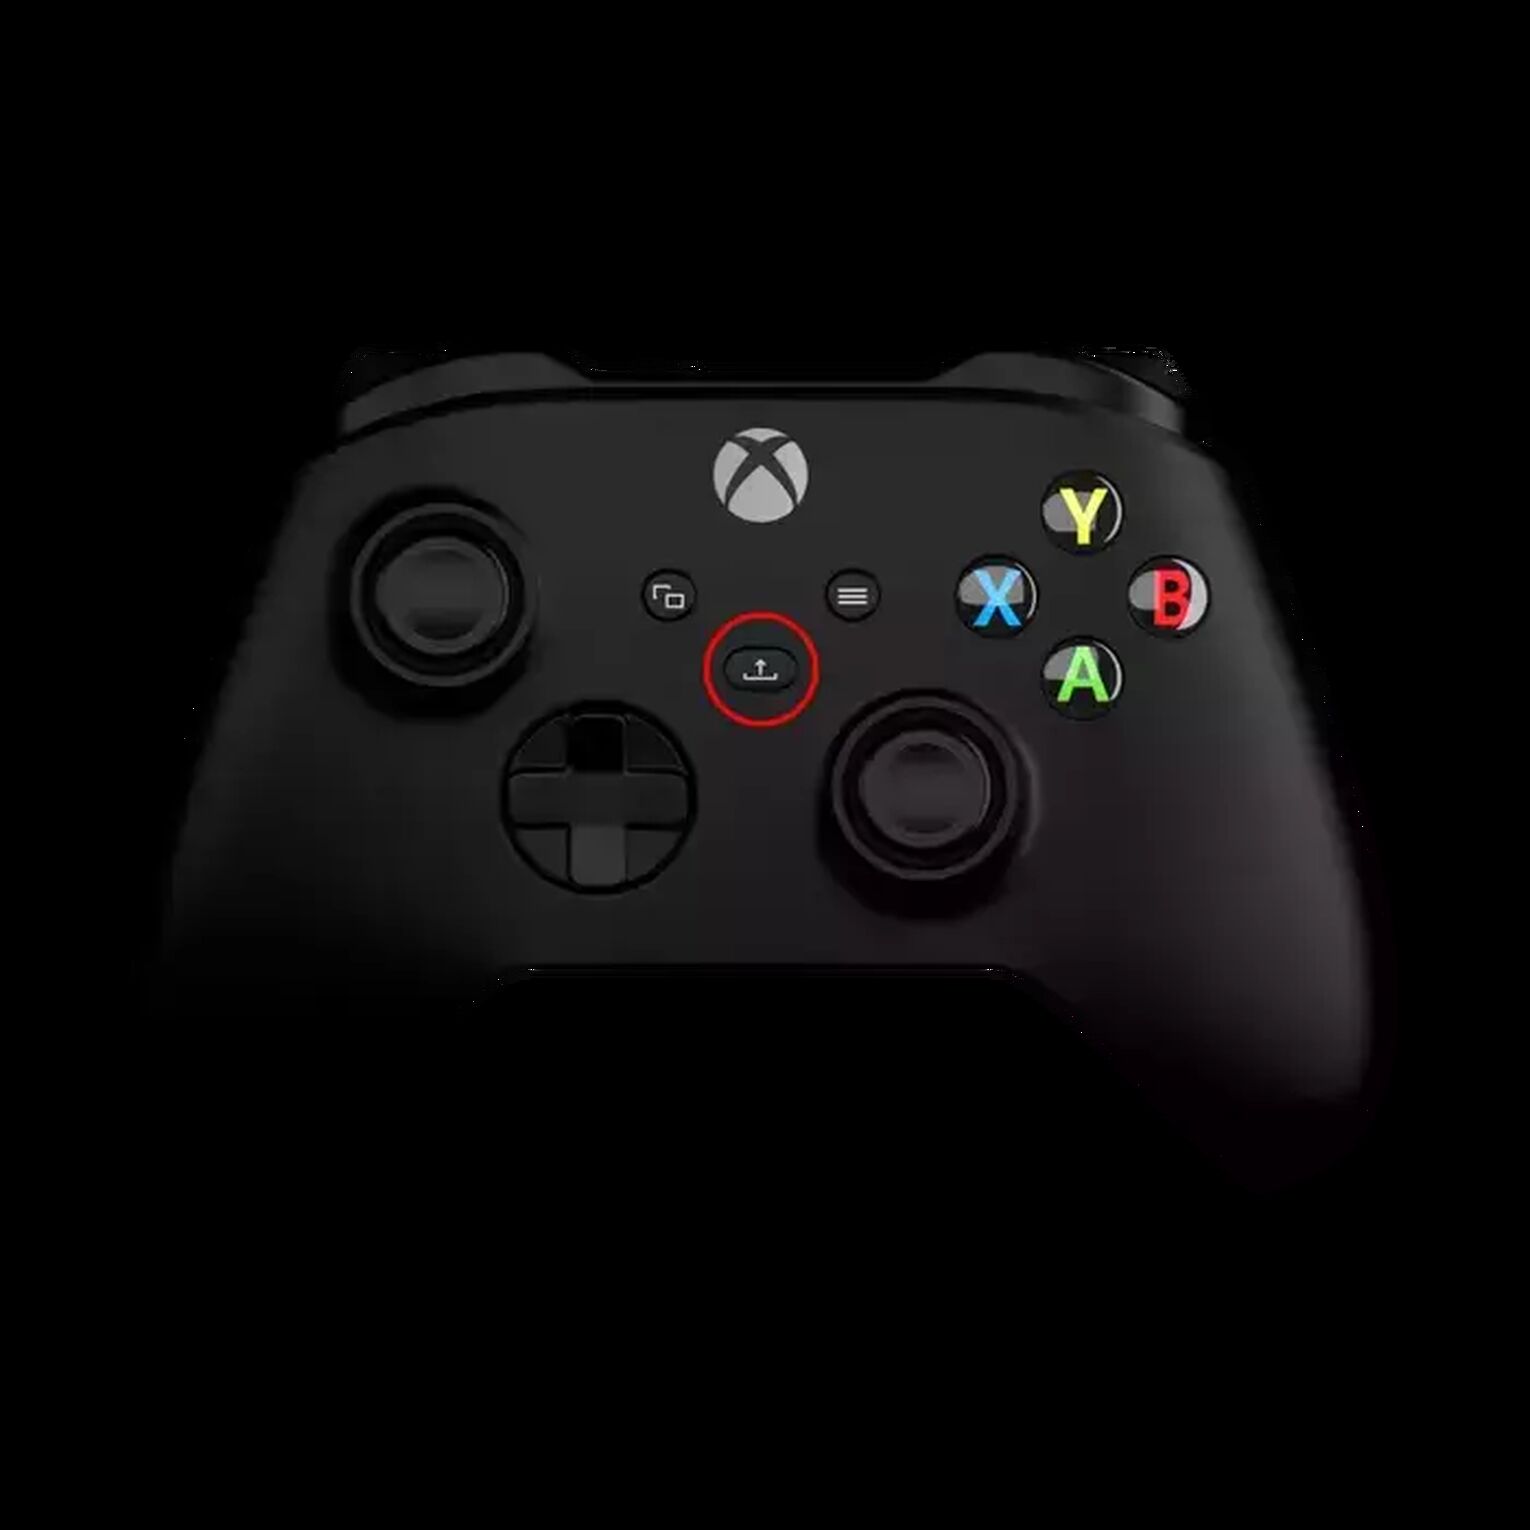
If you'd like to capture Destiny 2 gameplay clips or videos on your Xbox console, press down the dedicated share button found at the midpoint of the controller, then press it again to stop recording.
How To Record Destiny 2 Gameplay On PlayStation
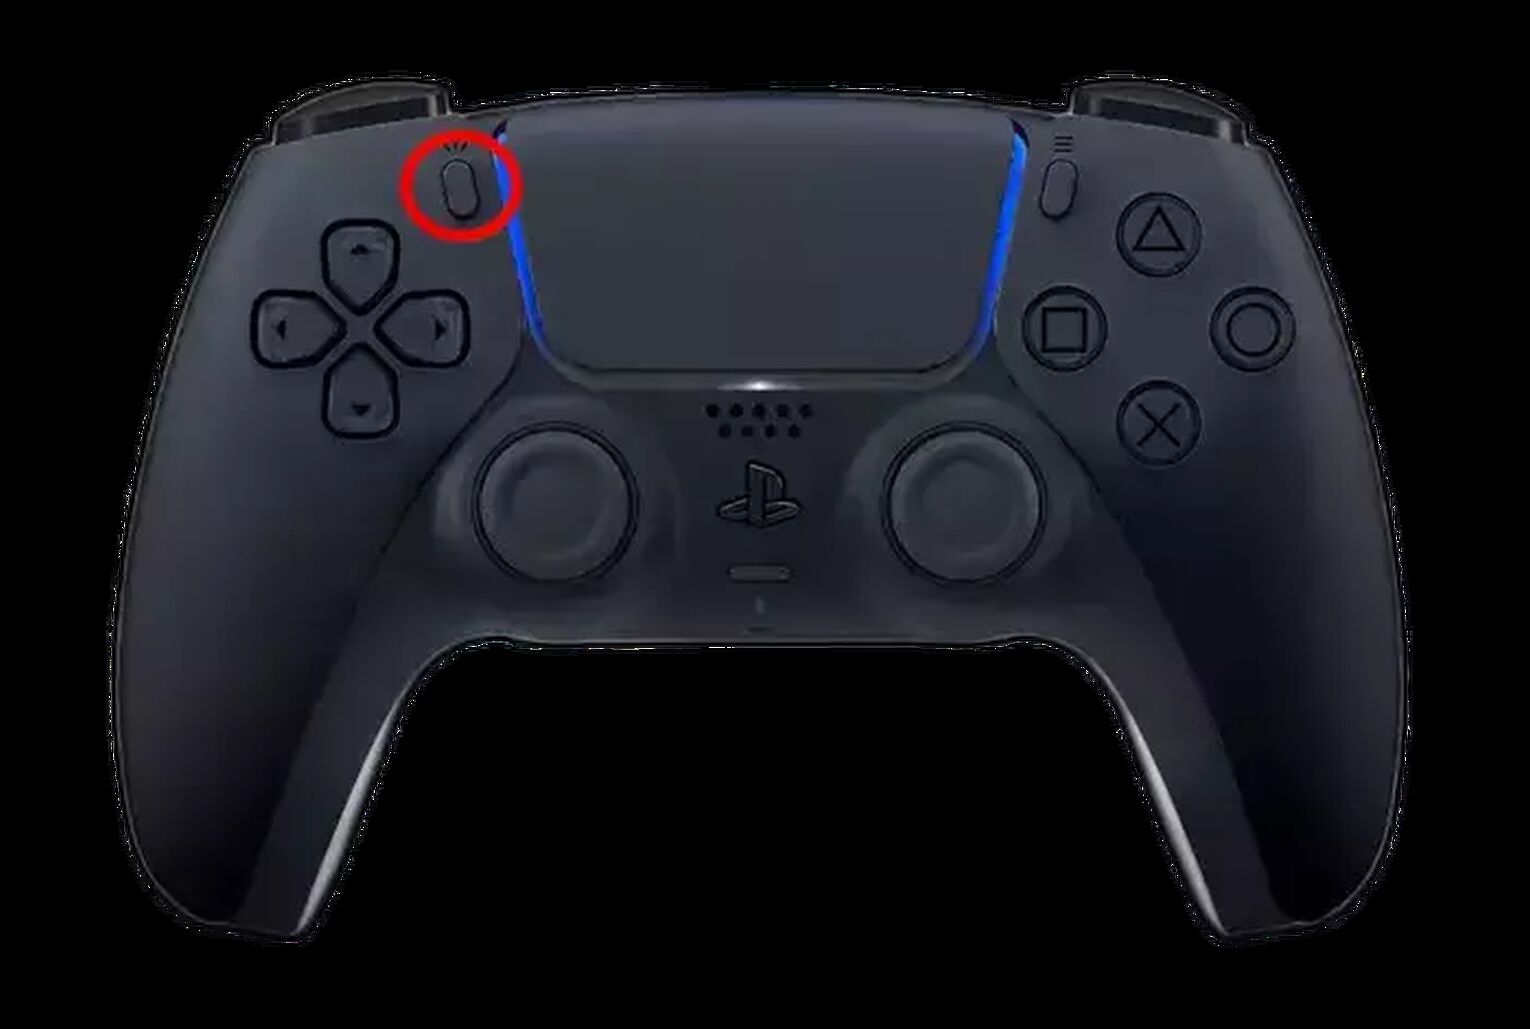
By the same token, if you'd like to record Destiny 2 gameplay videos and clips on your PlayStation console, press down the dedicated share button (found just above the arrows) twice, then press it twice to stop recording.
Other Mentionable Ways Of Recording Destiny 2 Gameplay
Last but not least, here is the honorable mentions list of best ways of recording Destiny 2 gameplay:
- Fraps (Low CPU usage display capture program with superb video quality that creates oversized videos)
- OBS (Perfect choice for both streaming and game capturing, but can be too complex for newbies)
- Adobe Captivate (Ideal for making how-to videos or guides, but comes with a pricey monthly subscription)
- Gamecaster (All-in-one gameplay recording program for beginners, not so suitable for advanced users)
- Action! (Records videos in size around 20 times smaller than comparable programs but doesn't support an option to set the custom frame rate or bit rate)
So there you go, now you have a wide variety of choices regarding programs used for recording Destiny 2, so it's up to you whether you'll take one of our suggestions.


.svg)


![How to make Destiny 2 fullscreen [Solved]](https://theglobalgaming.com/assets/images/_generated/thumbnails/63825/62b464876a3a73d4a451a829_how20to20make20destiny20220fullscreen_03b5a9d7fb07984fa16e839d57c21b54.jpeg)
