Running Your Own Minecraft Server
Minecraft is a beautiful, vast, and infinite sandbox game. However, installing a lot of mods and texture packs can drastically affect the performance of the game, especially if you do not have a high-end PC.
One way to fix these performance issues is to allocate more RAM to Minecraft, especially if you run your own Minecraft server software with your friends. This will allow more people to play Minecraft in your server.
Know How Much RAM Is Installed In Your System
On Windows
The very first step that you should do is to determine how much RAM your PC actually has. This is done by following these few steps:
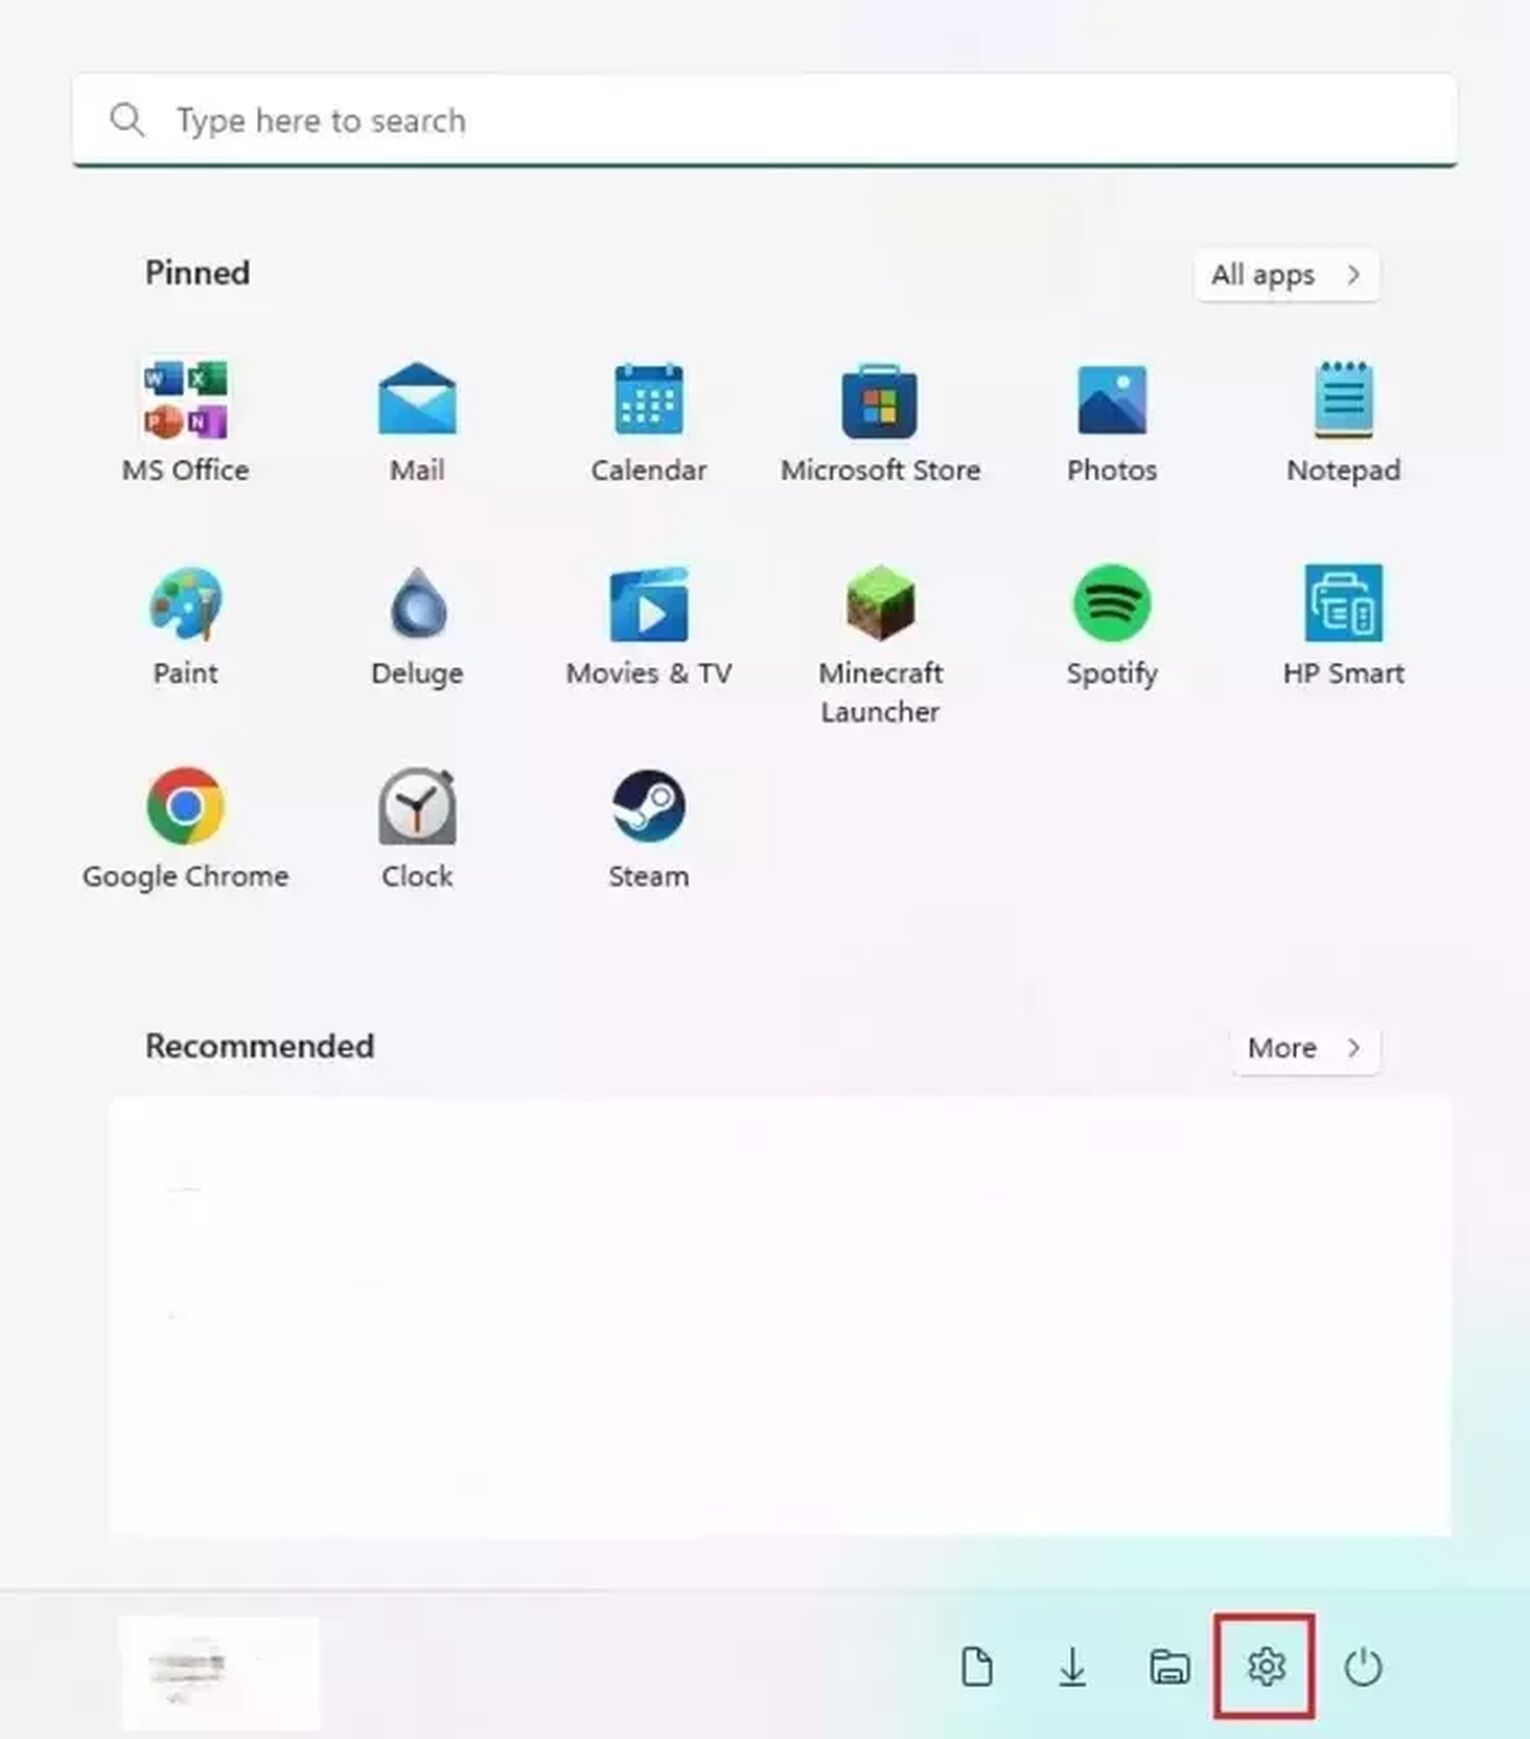
- Find out how much RAM your computer has by pressing the start button on your keyboard or desktop.
- Open Settings. Keep in mind that the start menu can look different from your side because of difference in personalization settings.
- Click the System tab.
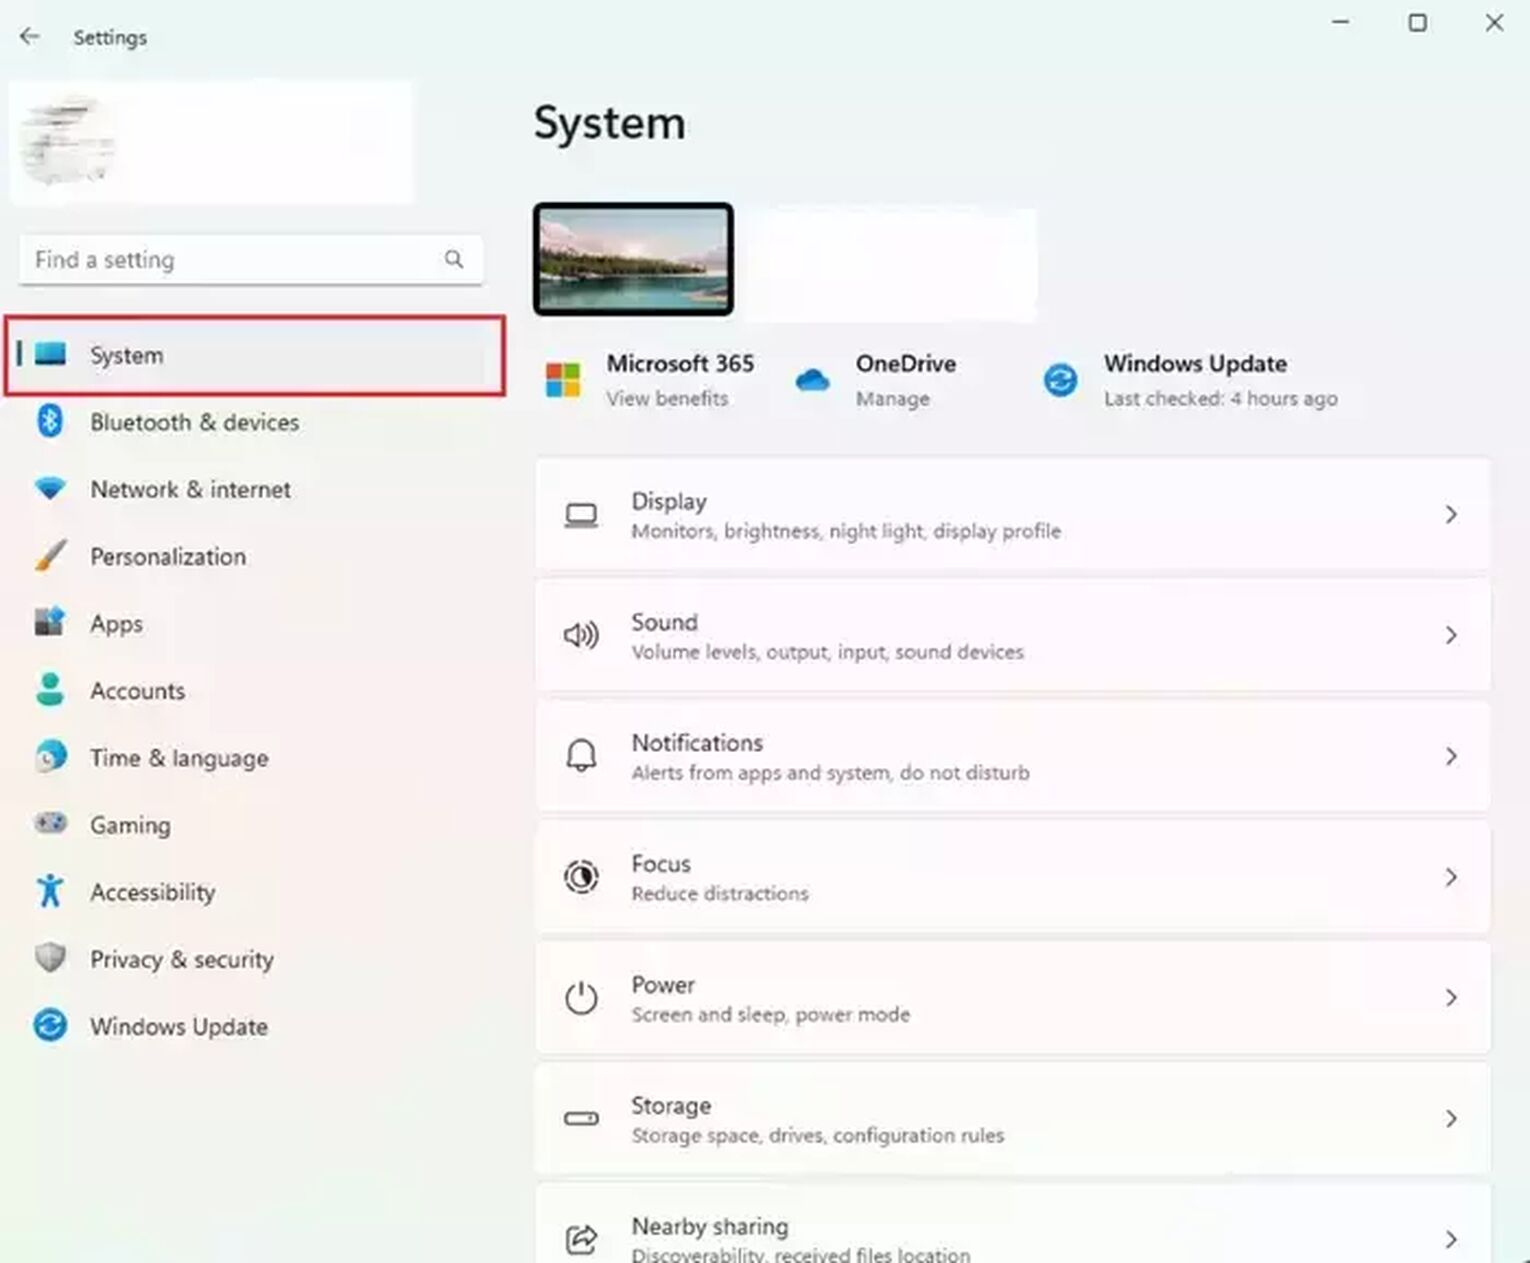
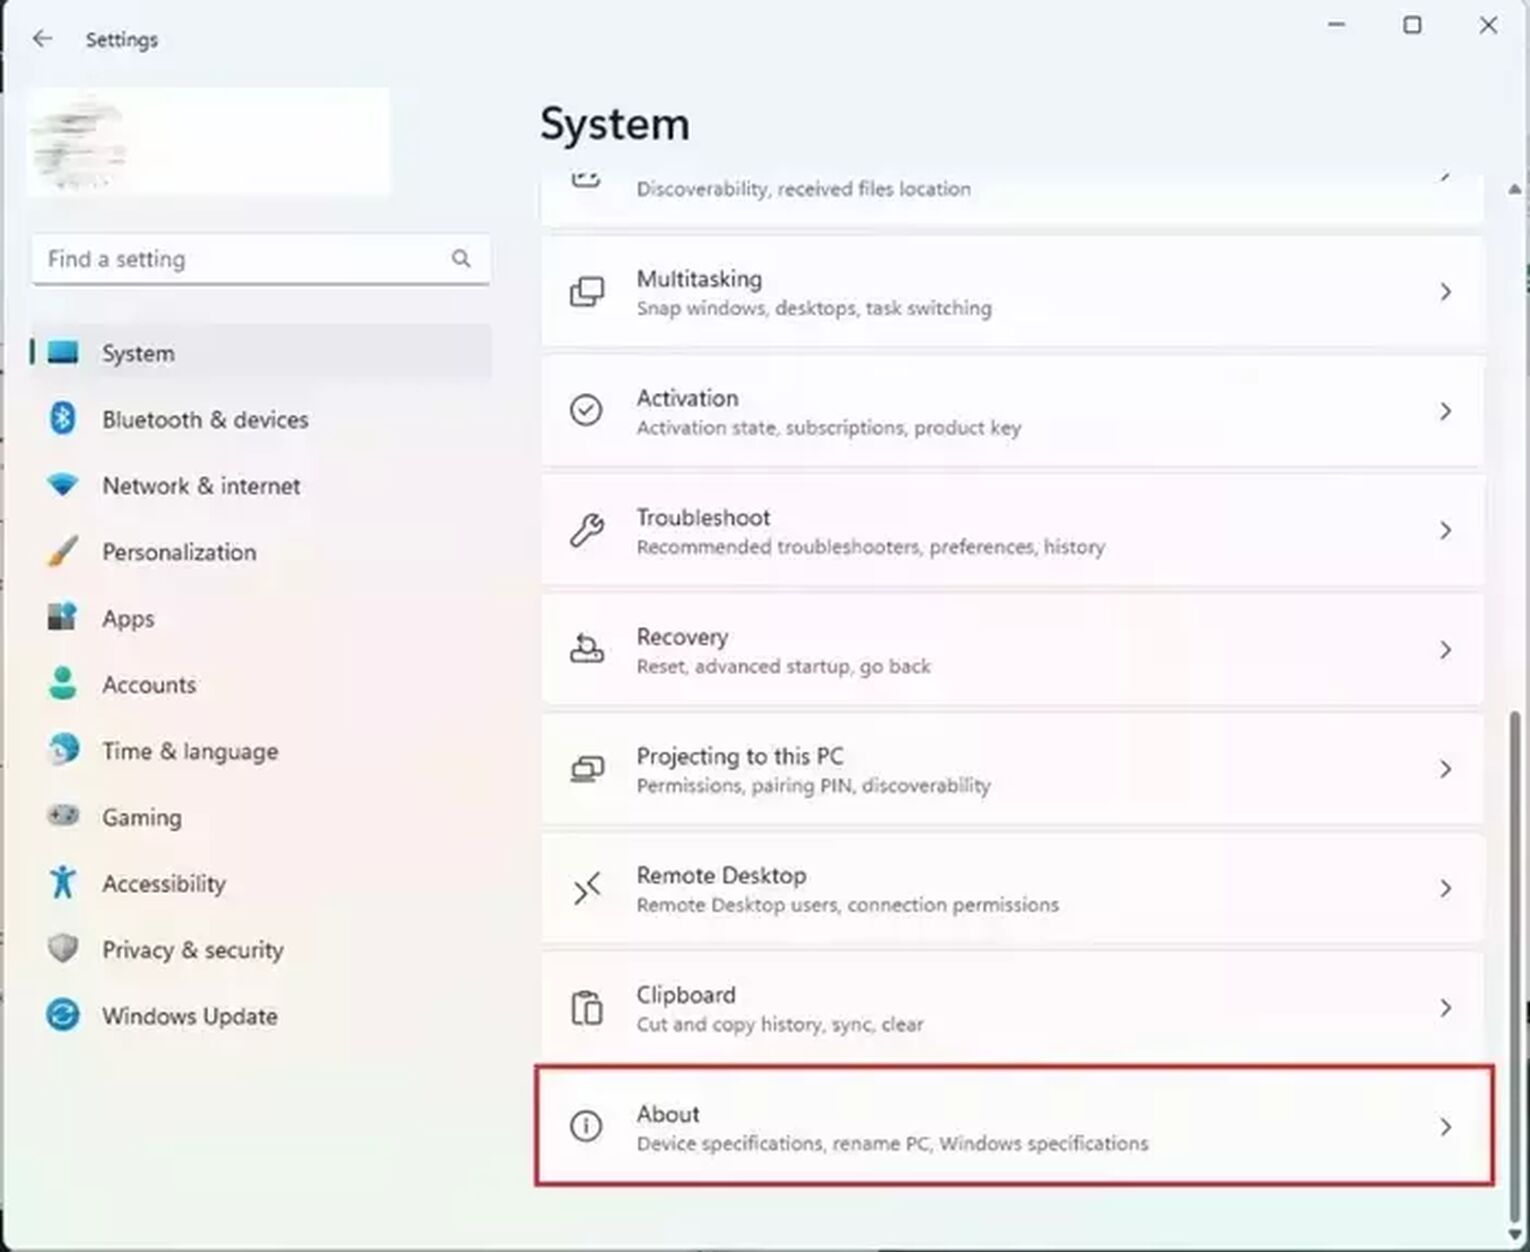
- Navigate to the bottom of the System tab. Find the About option and click it.
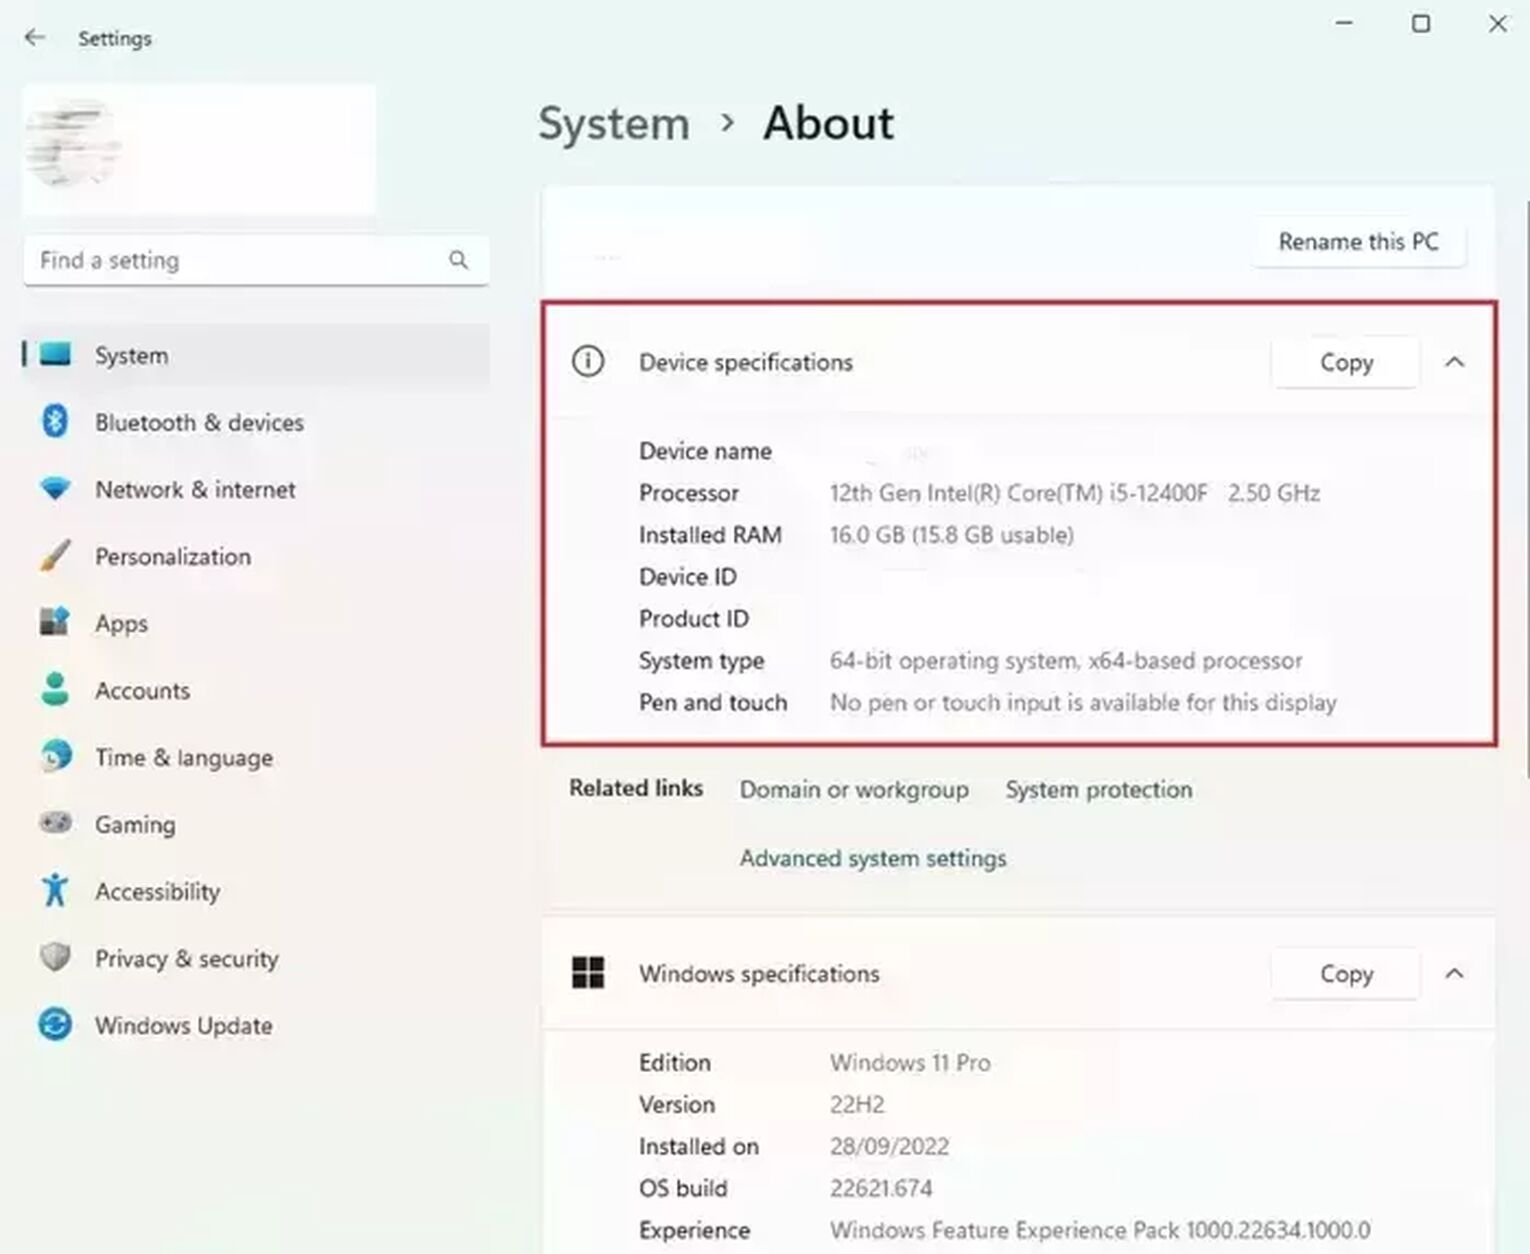
- Inside the About page, look for Device specifications.
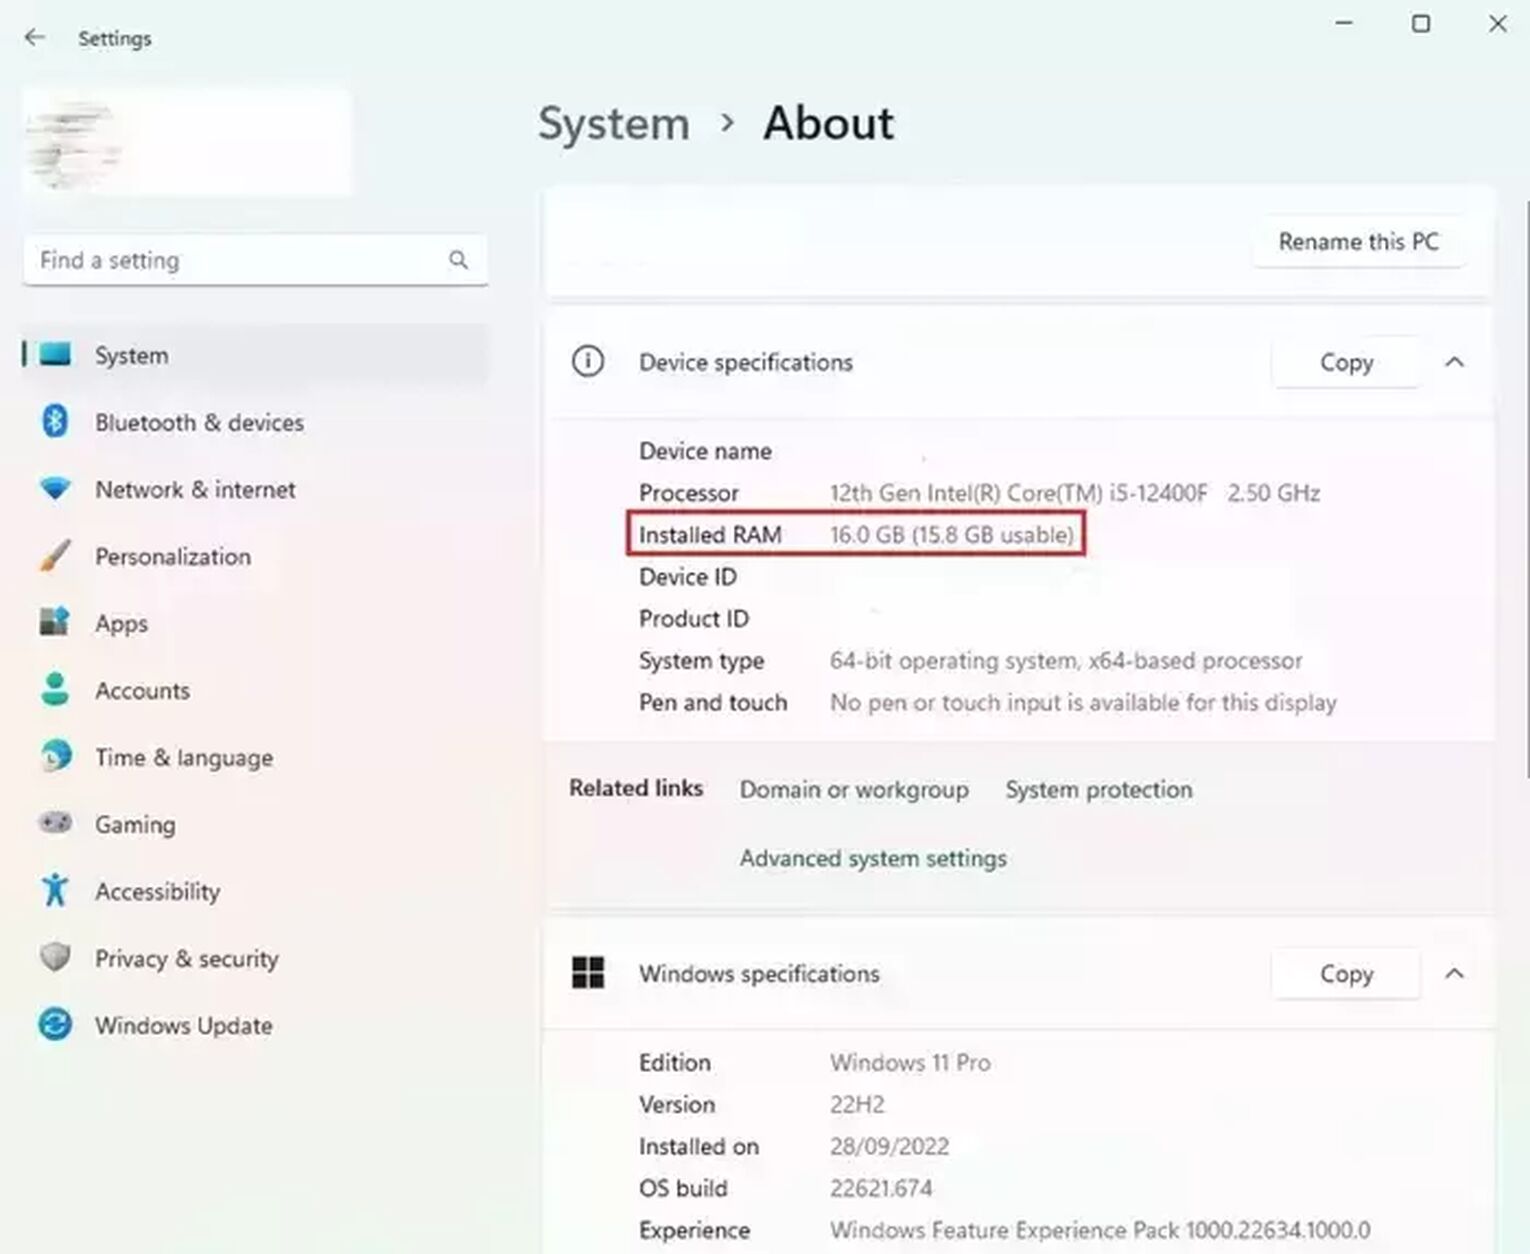
- After which, it will show all the system specifications of your computer. This is where you will find how much RAM is installed. It will also show how much max RAM can be allocated to other application.
On Mac
If you are using an Apple system, follow the similar steps below:
- Click the Apple icon in the top left corner of your screen.
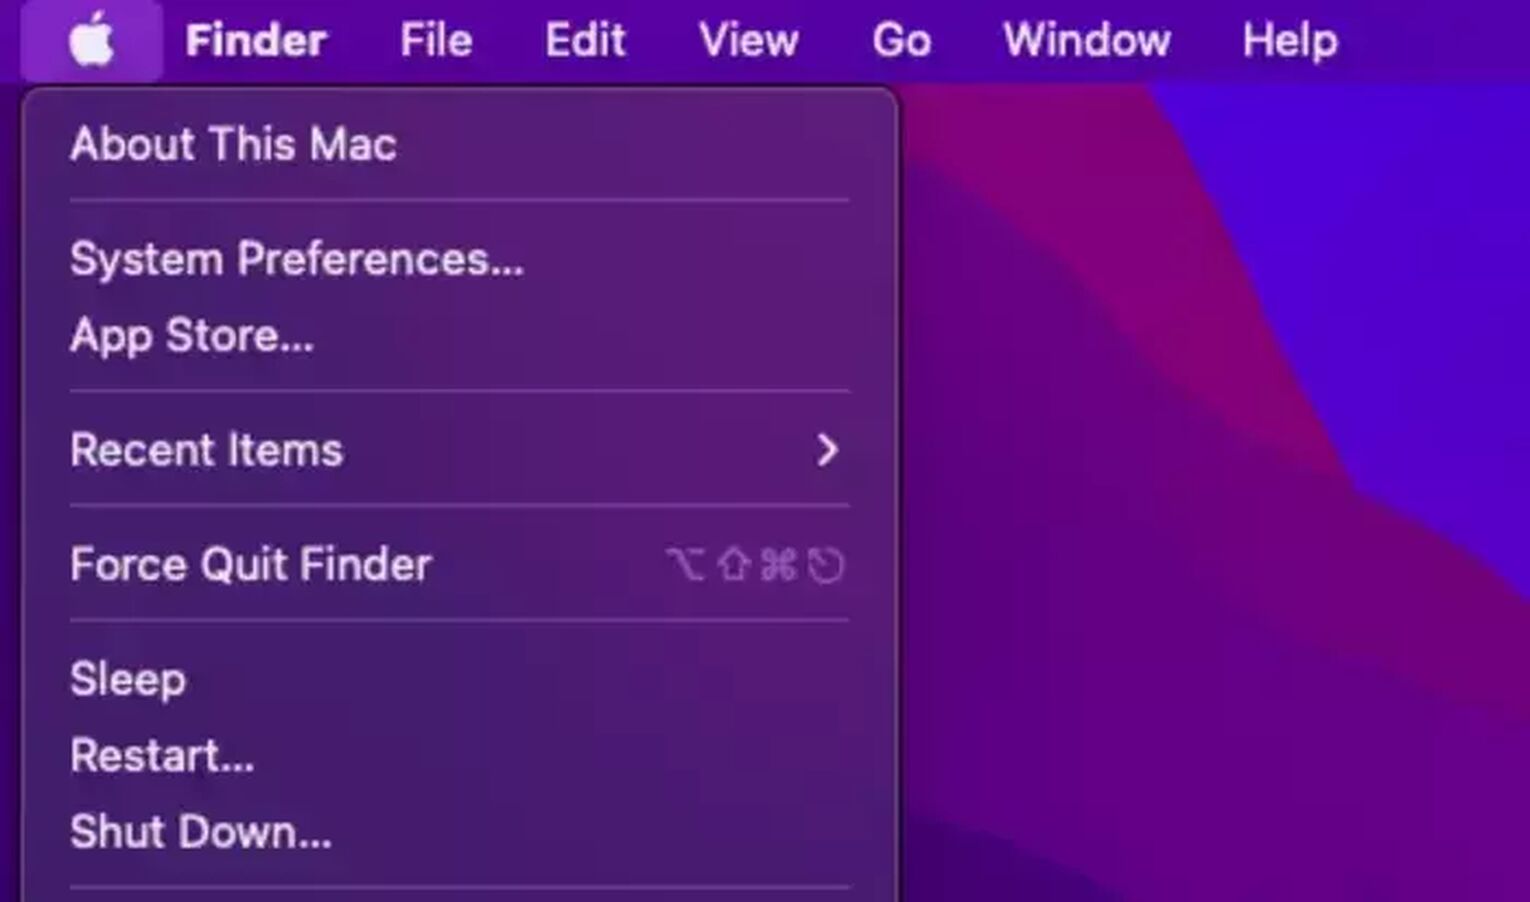
- Select About this Mac.
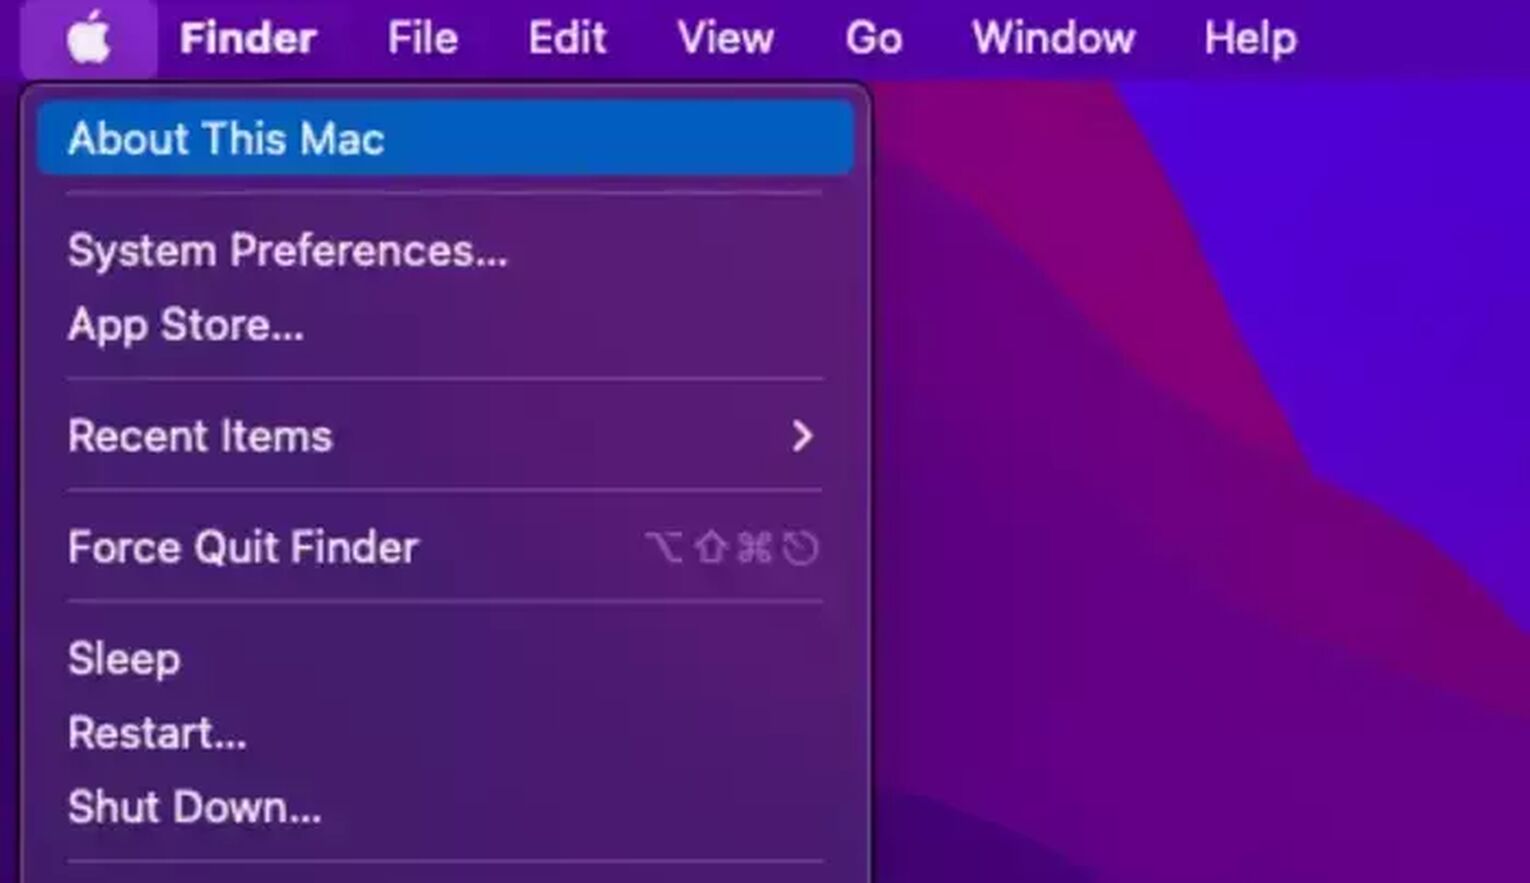
- Go to the Overview tab. The pop-up window should be on it already.
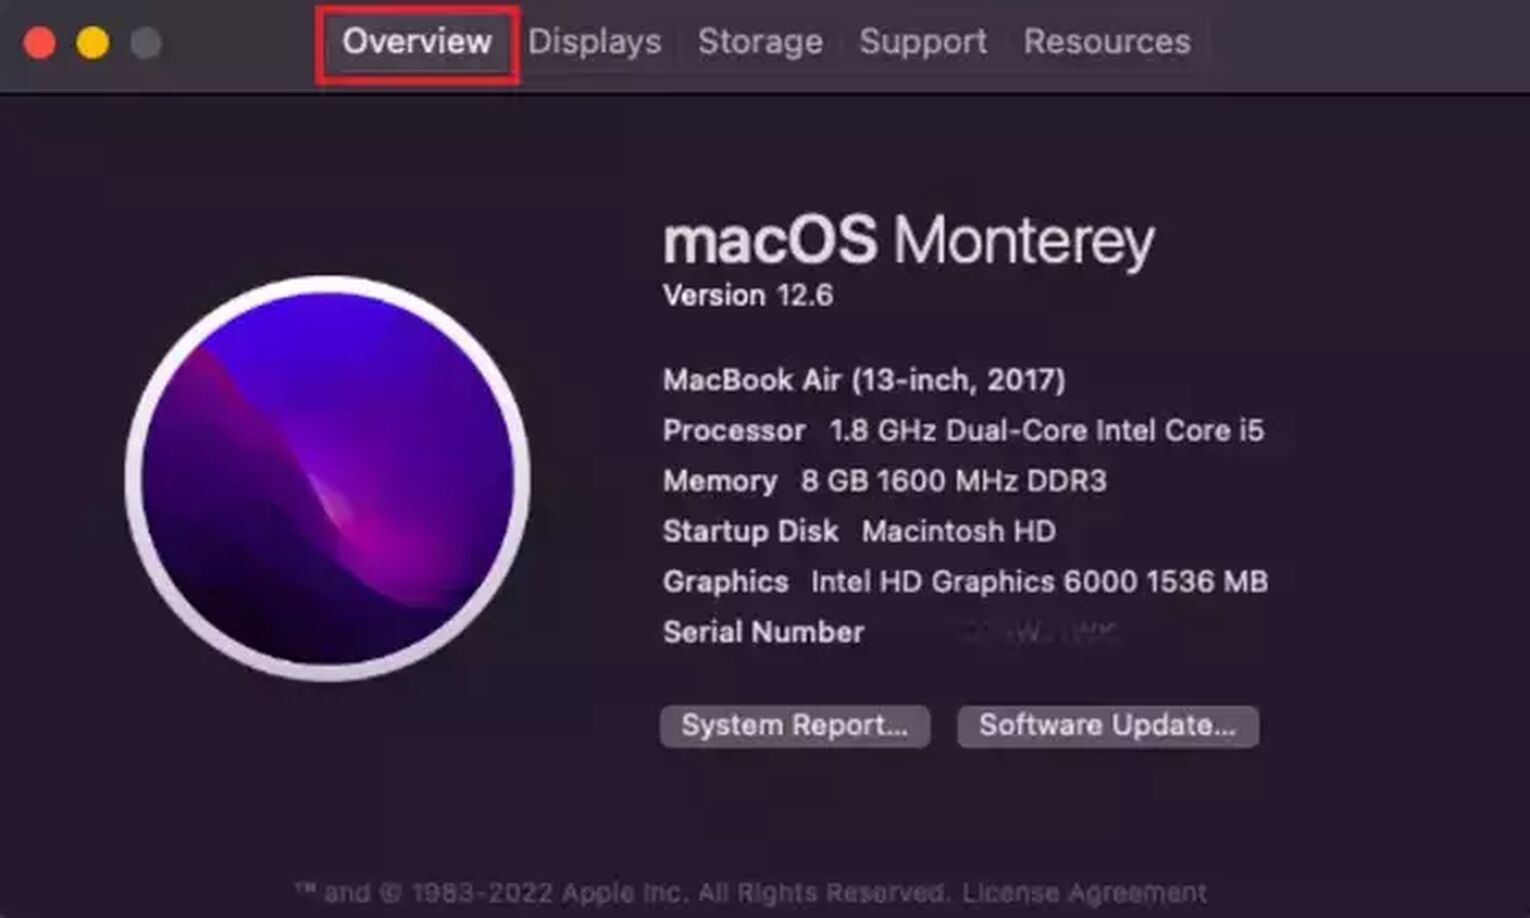
- This should tell you how much RAM is installed as well as other info regarding the system's specifications.
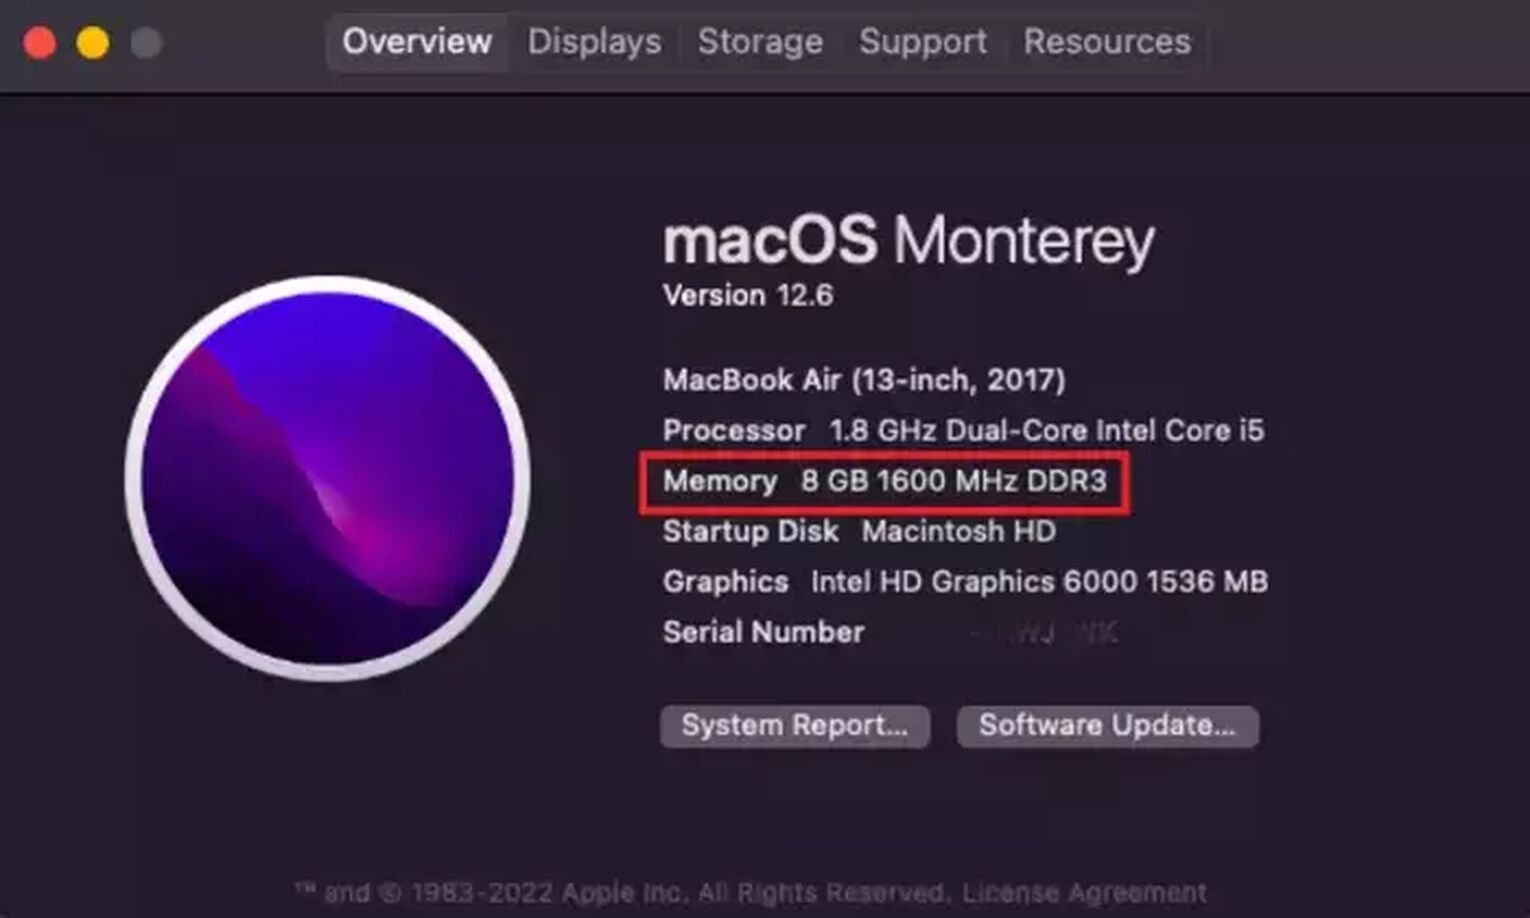
Knowing how much RAM your computer has installed is vital in this RAM allocation process to avoid allocating too much ram. Typically, running a Minecraft server takes up at least 3 GB of RAM as a requirement. The more memory the game has, the better it will perform. This means that when you have more RAM allocated to the game, there can be more people you can host to play in your own server.
Note: Please keep in mind that the following steps should only be done by adults or with adult supervision who has knowledge about computers or Minecraft technicalities in general.
Using The Default Launcher To Allocate More RAM
Before we proceed, the updated version of Java should be downloaded and installed to have more RAM allocated to your Minecraft server. Without the right version installed, the process will not proceed as intended. This will result with you only having to use the default or the usual amount of RAM, which is the required 3 GB. Remember to download and install at least Java 8 64-bit to allocate more RAM to Minecraft.
After which, follow these simplified steps to allocate more RAM to your Minecraft server using the default launcher:
- Open Minecraft using the default launcher.
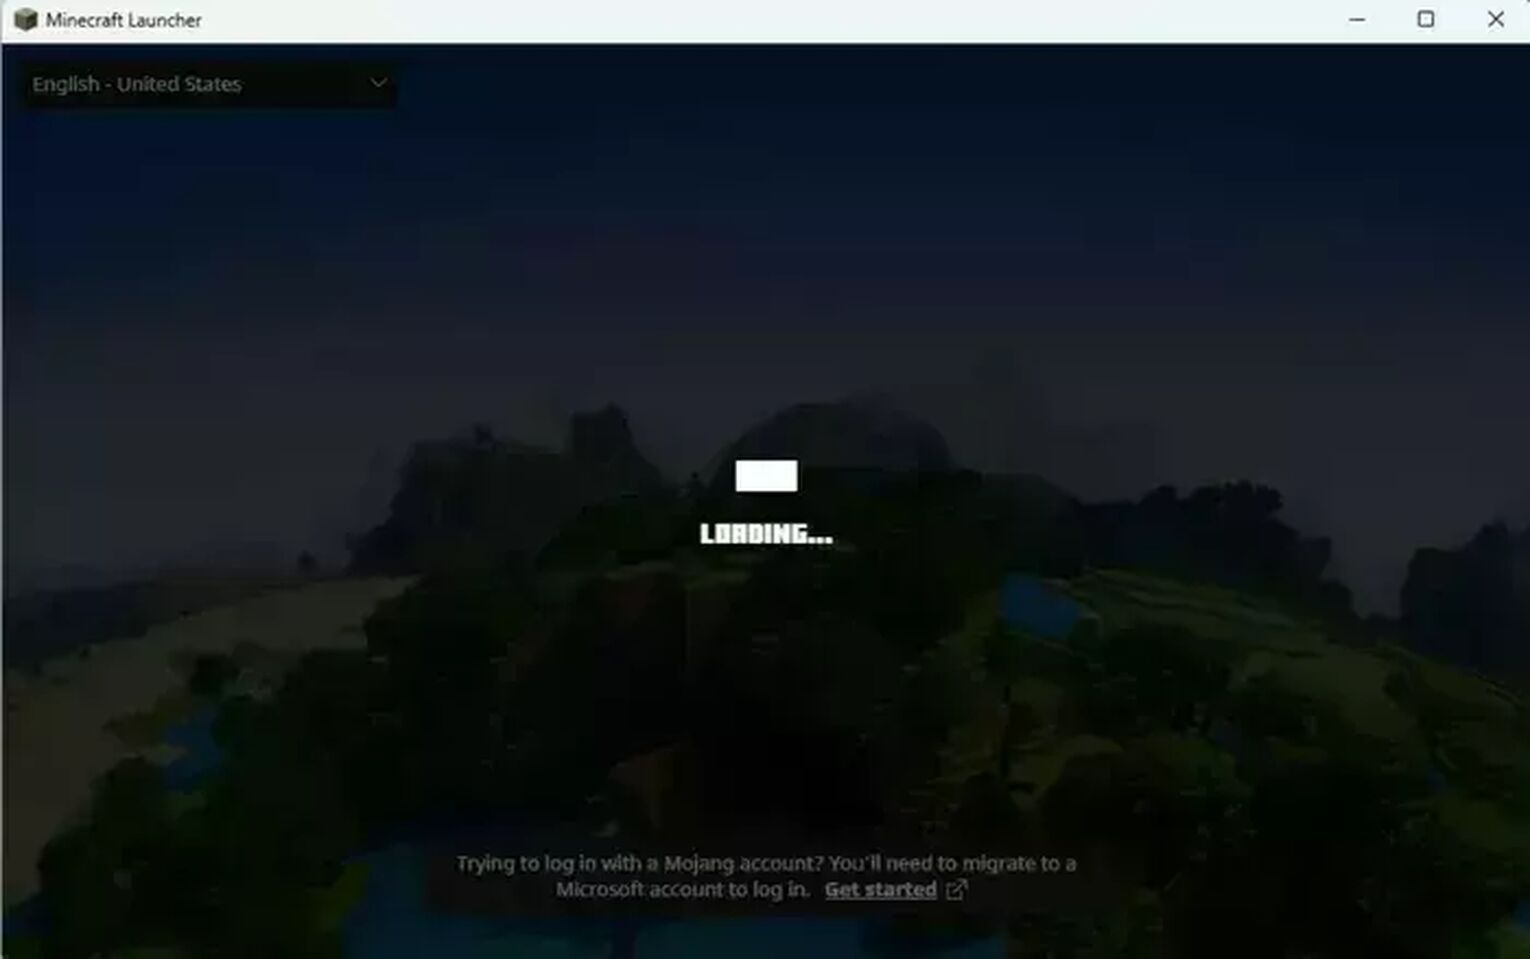
- Find the Installations tab in the launcher and click it.
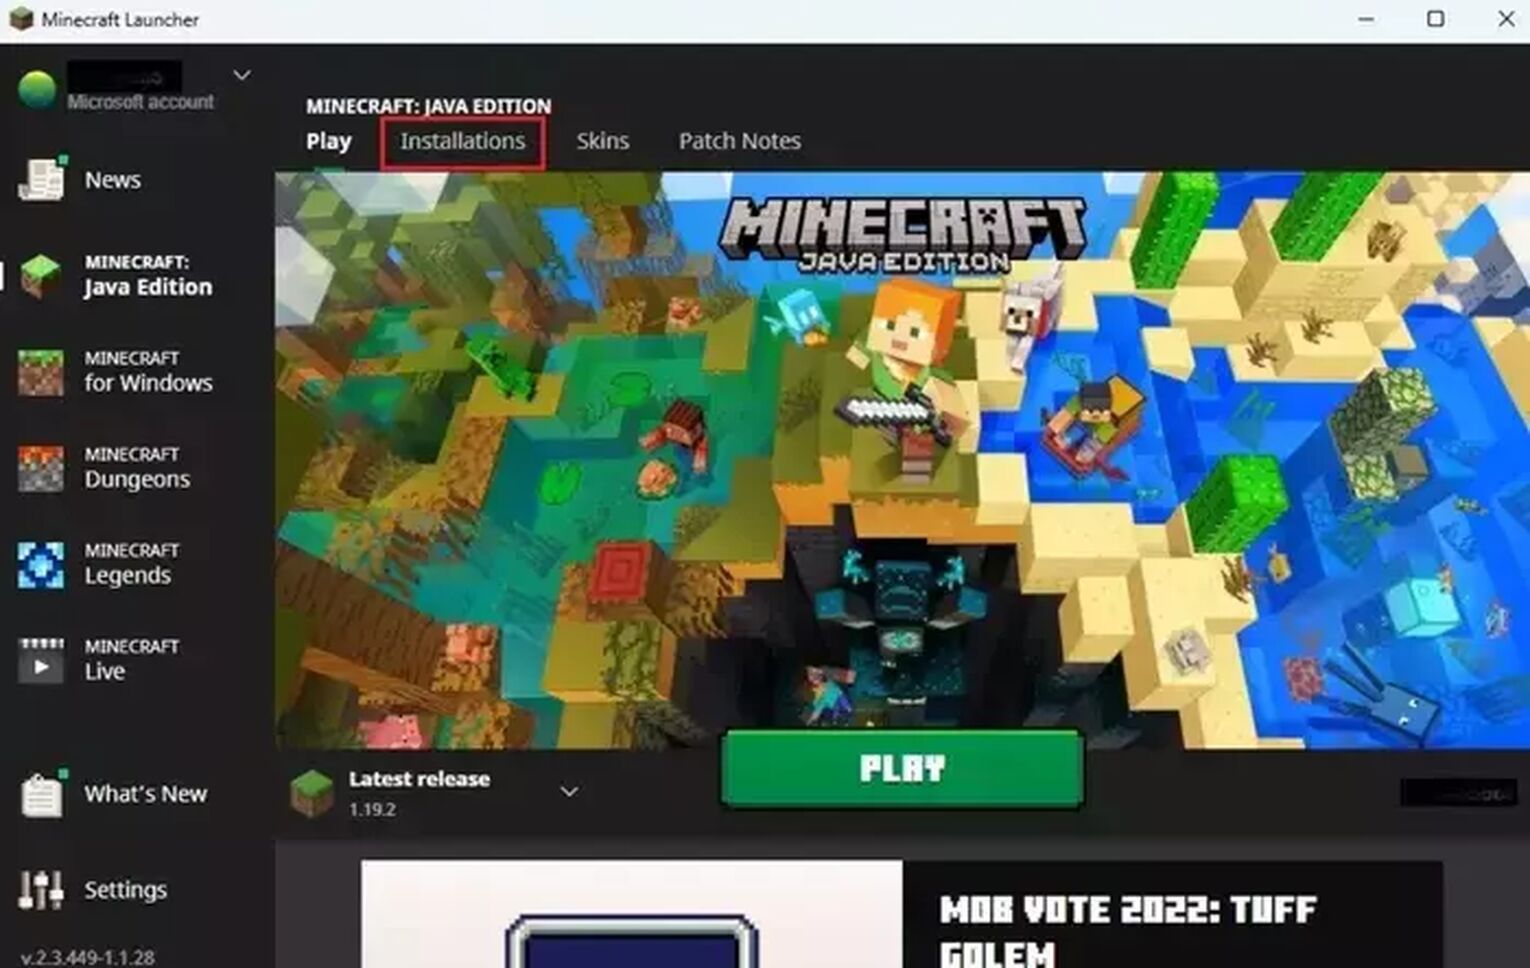
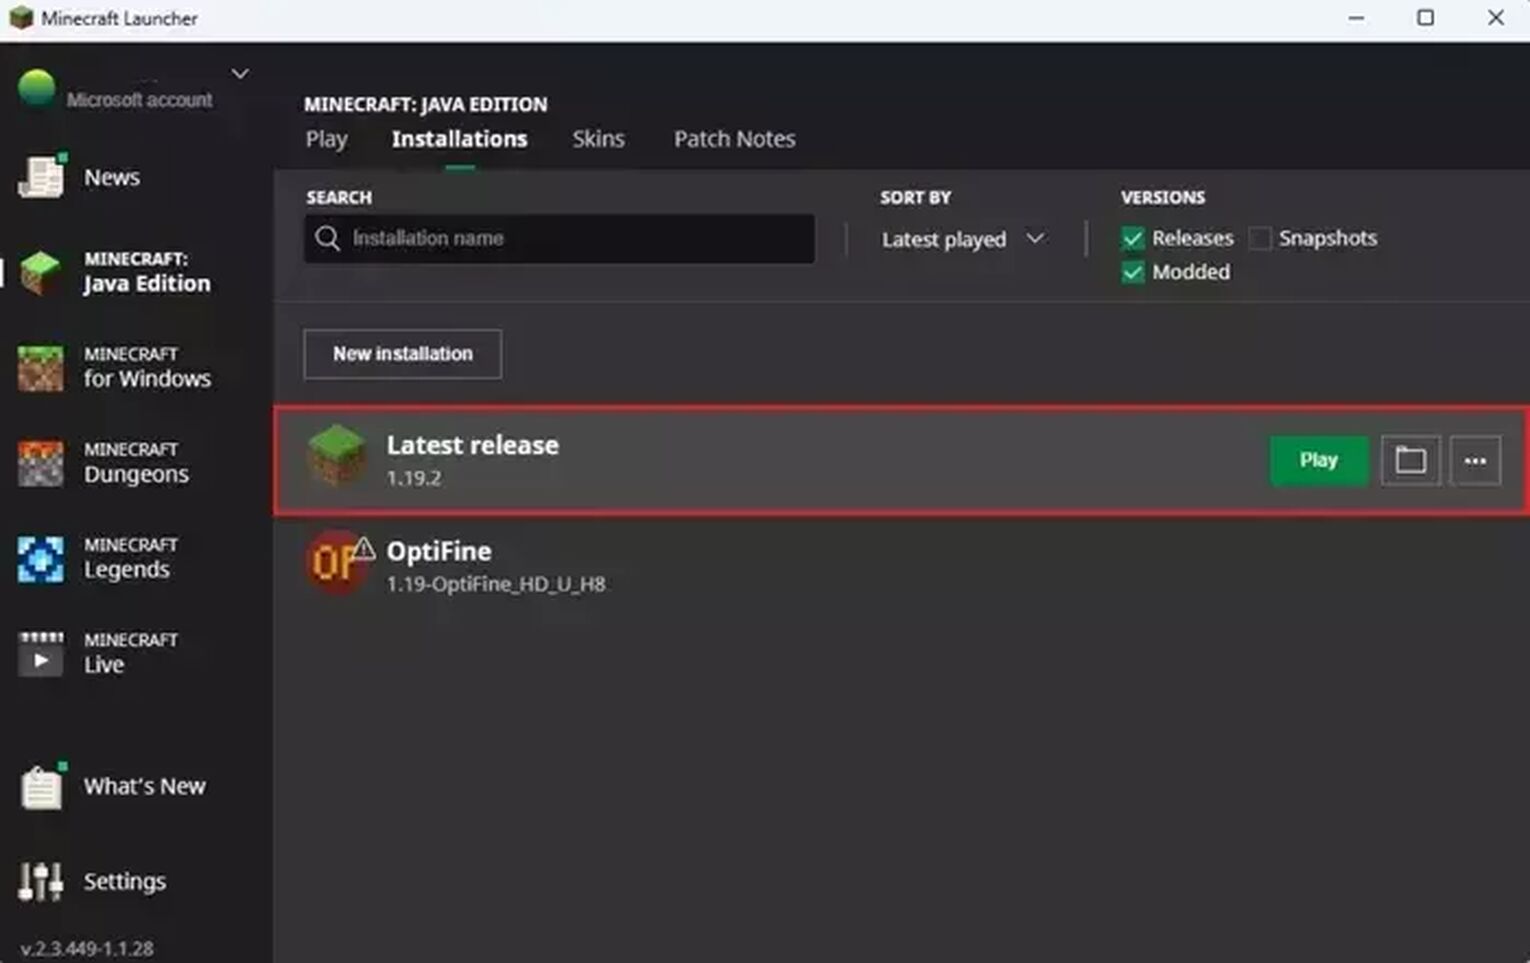
- Select your desired version. Usually, it is the latest version.
- Then, press the icon with 3 dots.
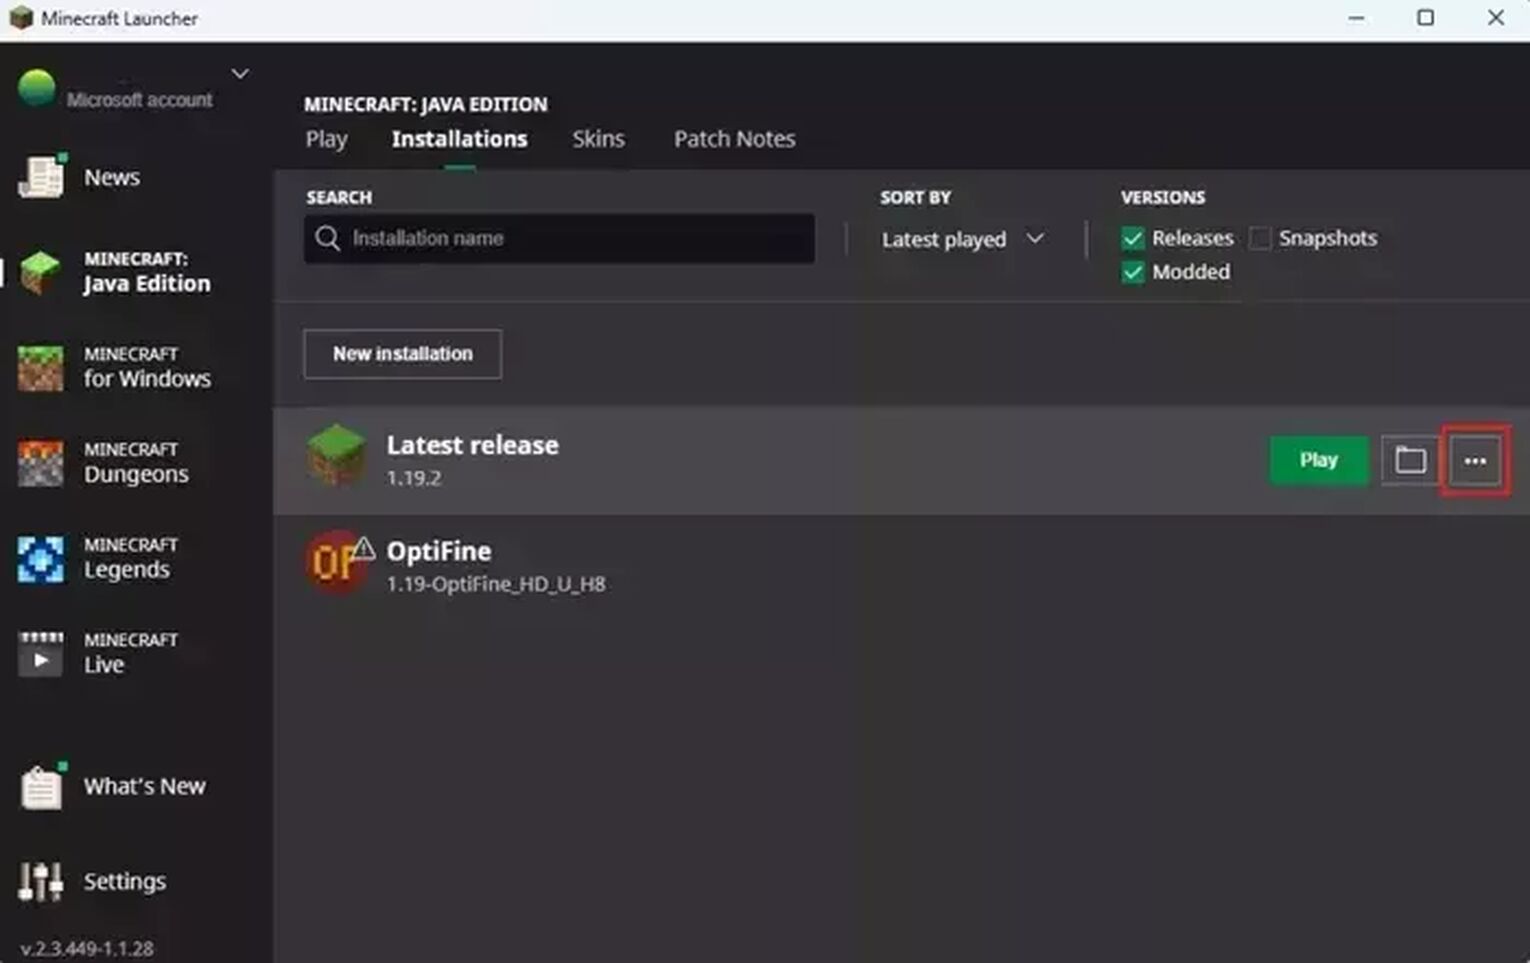
- After that, click edit.

- Click the More Options button to open the drop-down menu.
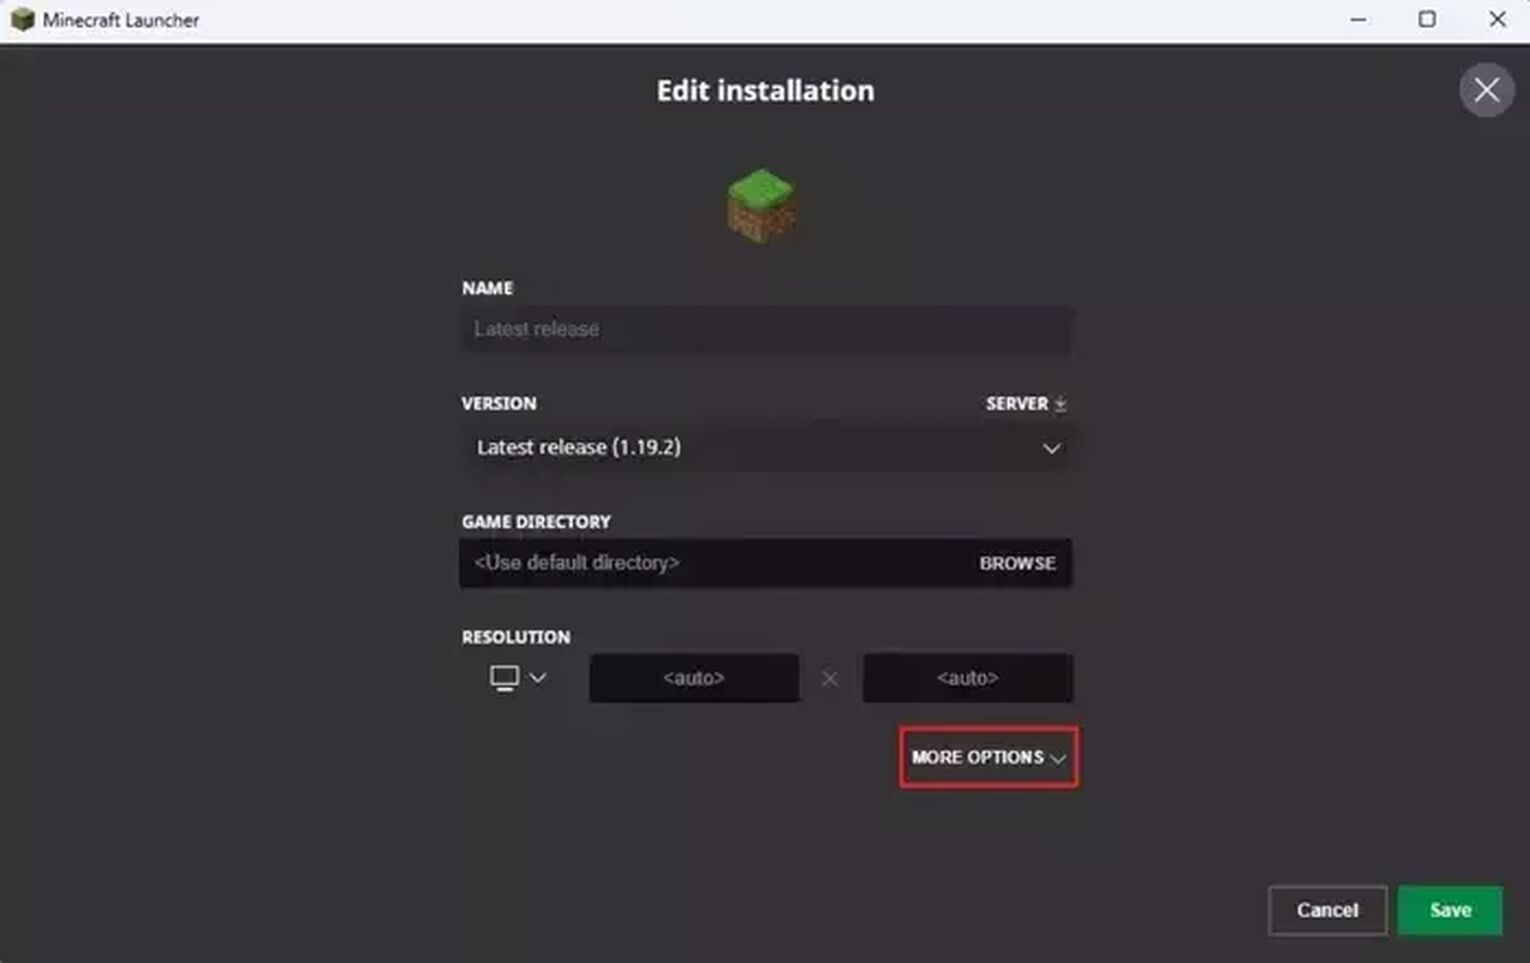
- Find the box with JVM ARGUMENTS. It will have something written like: “-Xmx2G-XX:+UnlockExperimentalVMOptions...”
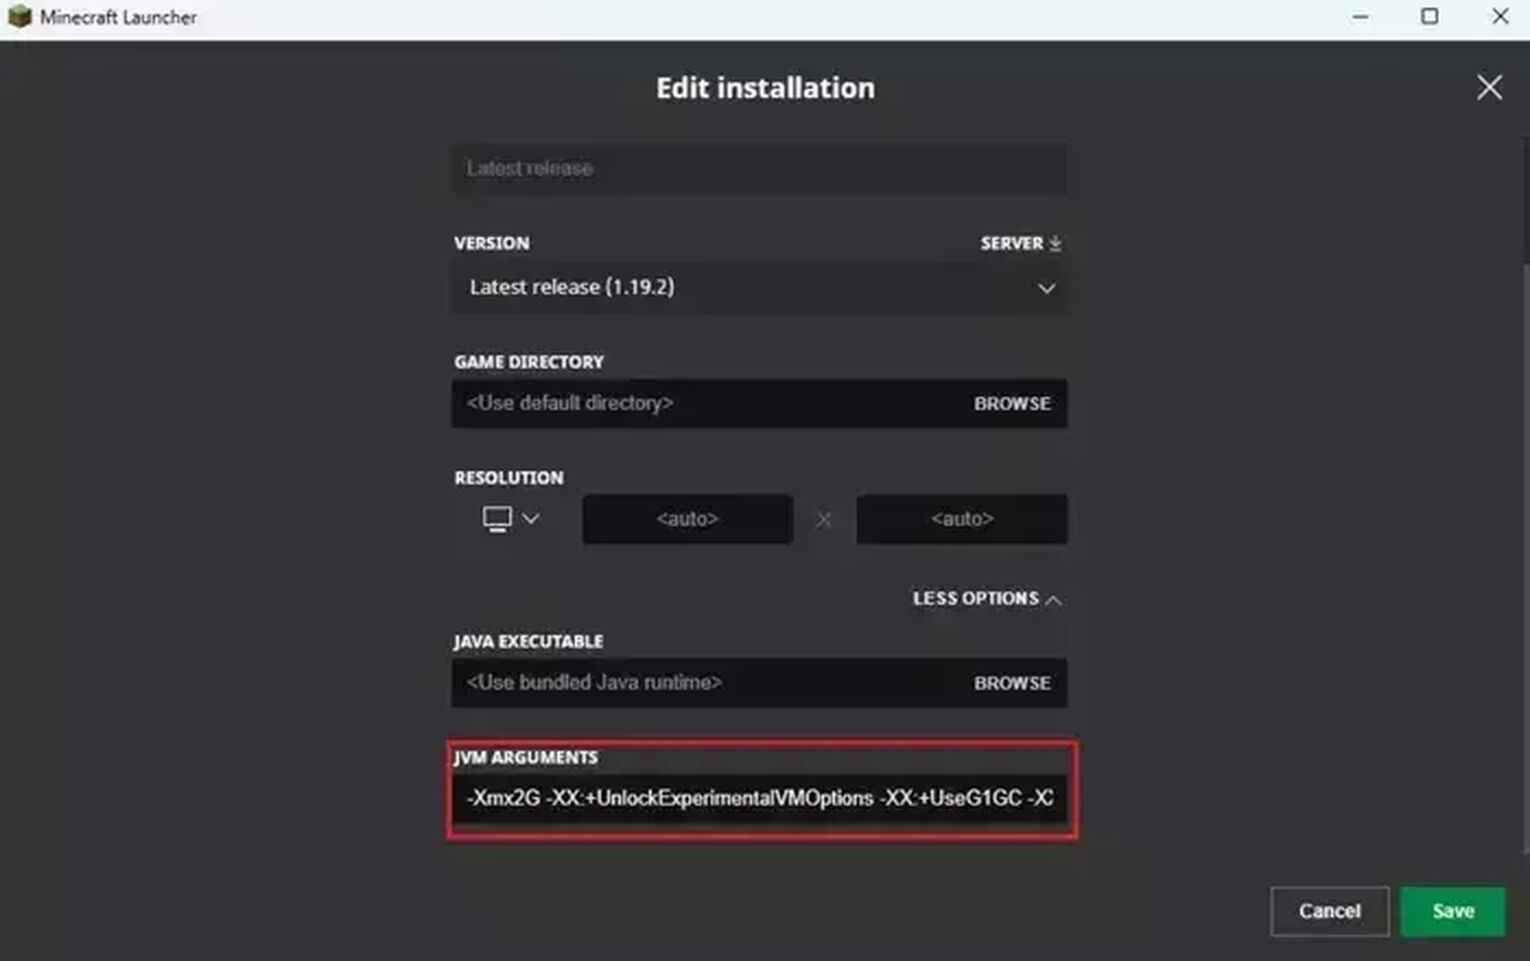
- Notice the first few characters in the box, which has the letters and numbers like this: -Xmx2G. The number 2 corresponds to the amount of currently allocated RAM to the game. In this case, it uses only 2 GB.

- You can change the amount of allocated RAM just by replacing the figure with your desired number. Remember that you should NOT allocate all the RAM that your computer has installed. This will affect other processes in the system if you go over the top.
- When you are satisfied with your allocated RAM amount, click save in the lower right corner.
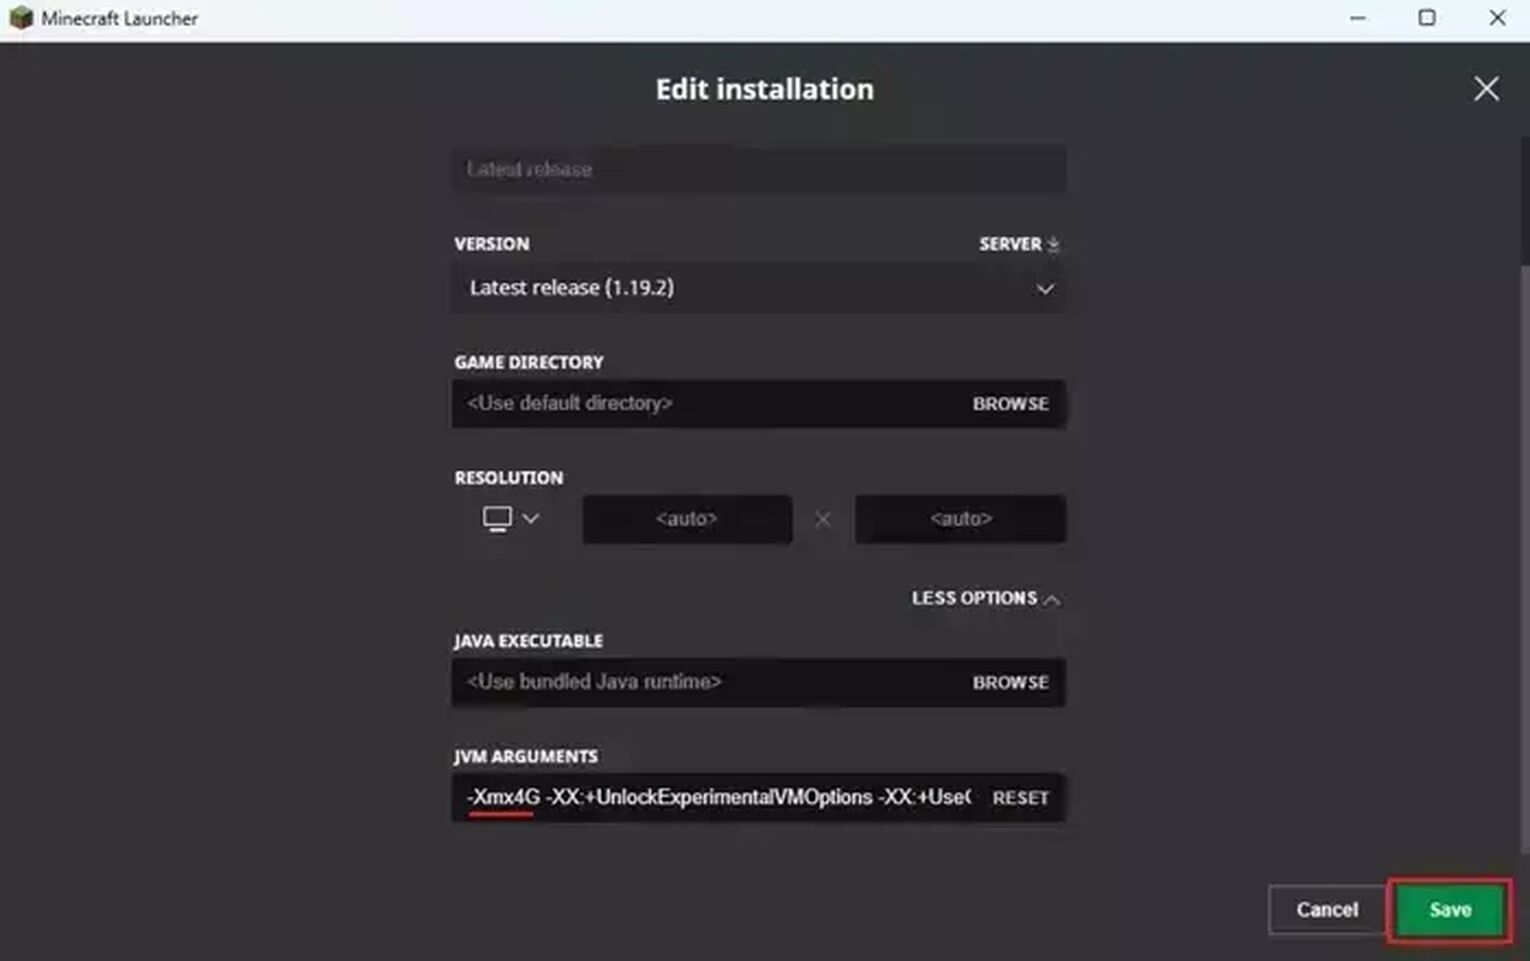
- Then, launch the game same as normal.
Using Third Party Launchers To Allocate More RAM
Other than the default launcher, you can also use your preferred third party launchers to change the RAM allocation to your Minecraft servers. One of the leading third party launchers is the CurseForge Minecraft game launcher. If you have any of these installed, you can use this also.
Follow these similar steps from earlier:
- Run the CurseForge Minecraft launcher.
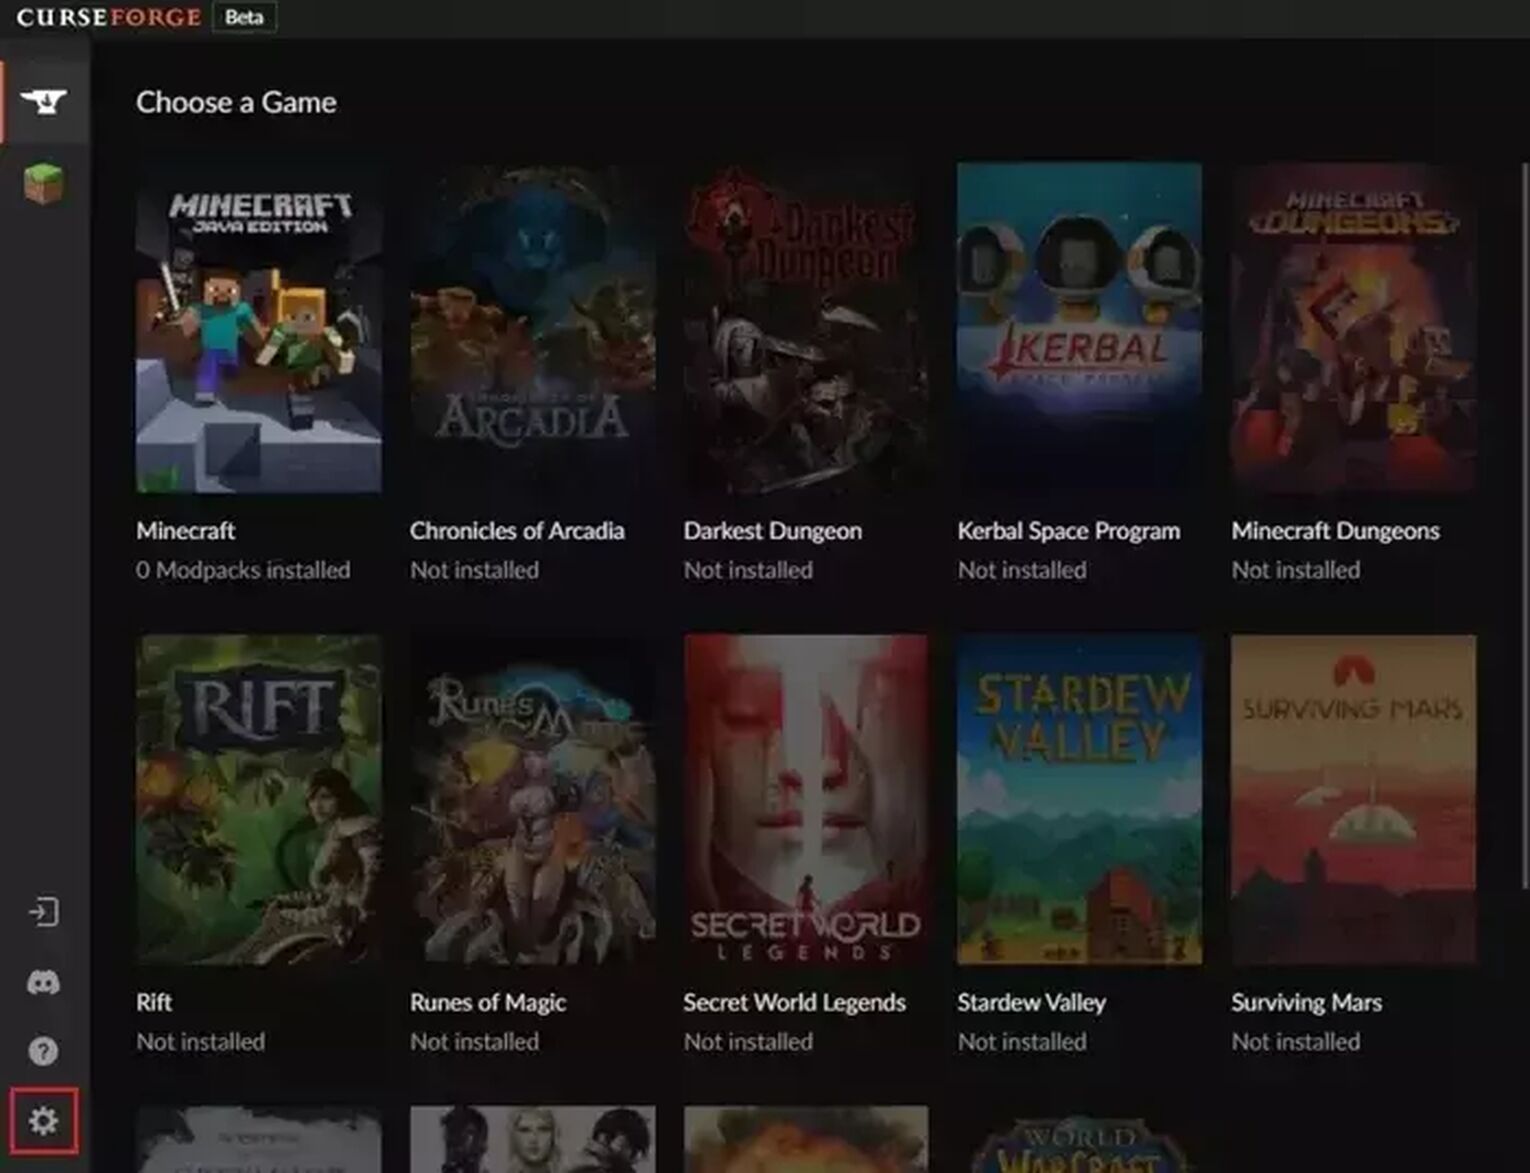
- Click the gear icon in the lower left corner of the window to open the Settings menu.
- A "Game Specific" section is available where you should select Minecraft. This should be on the left side of the settings page.
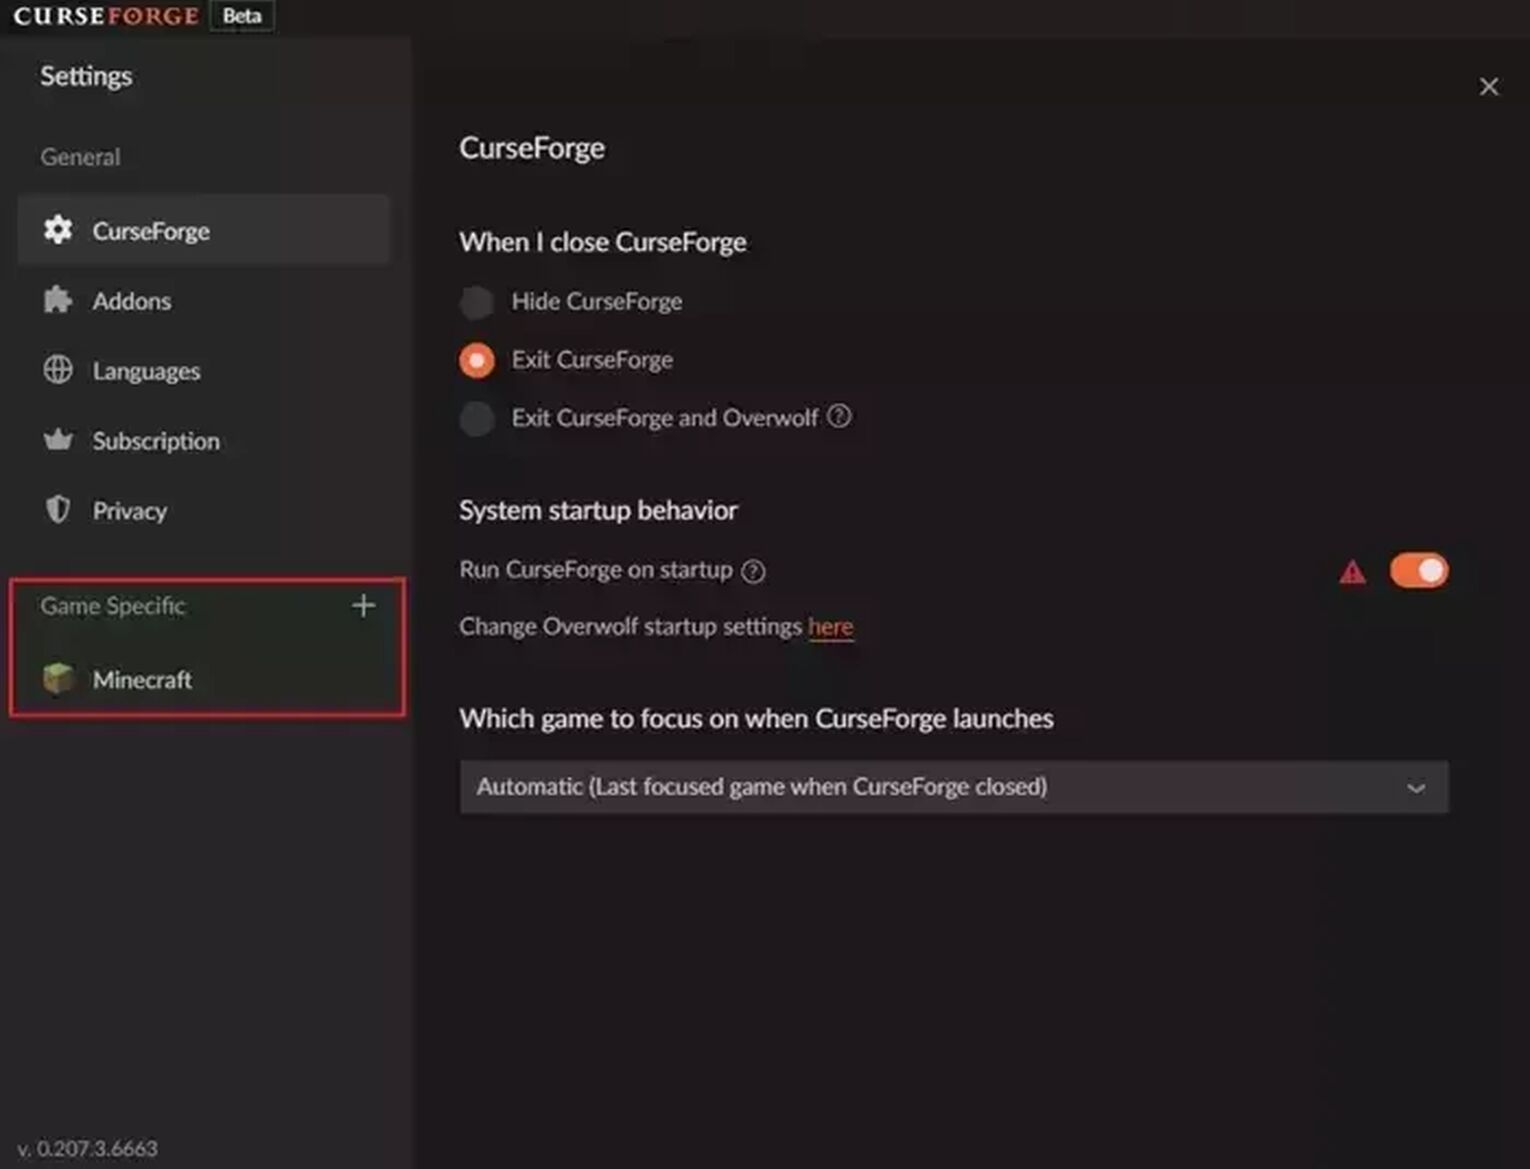
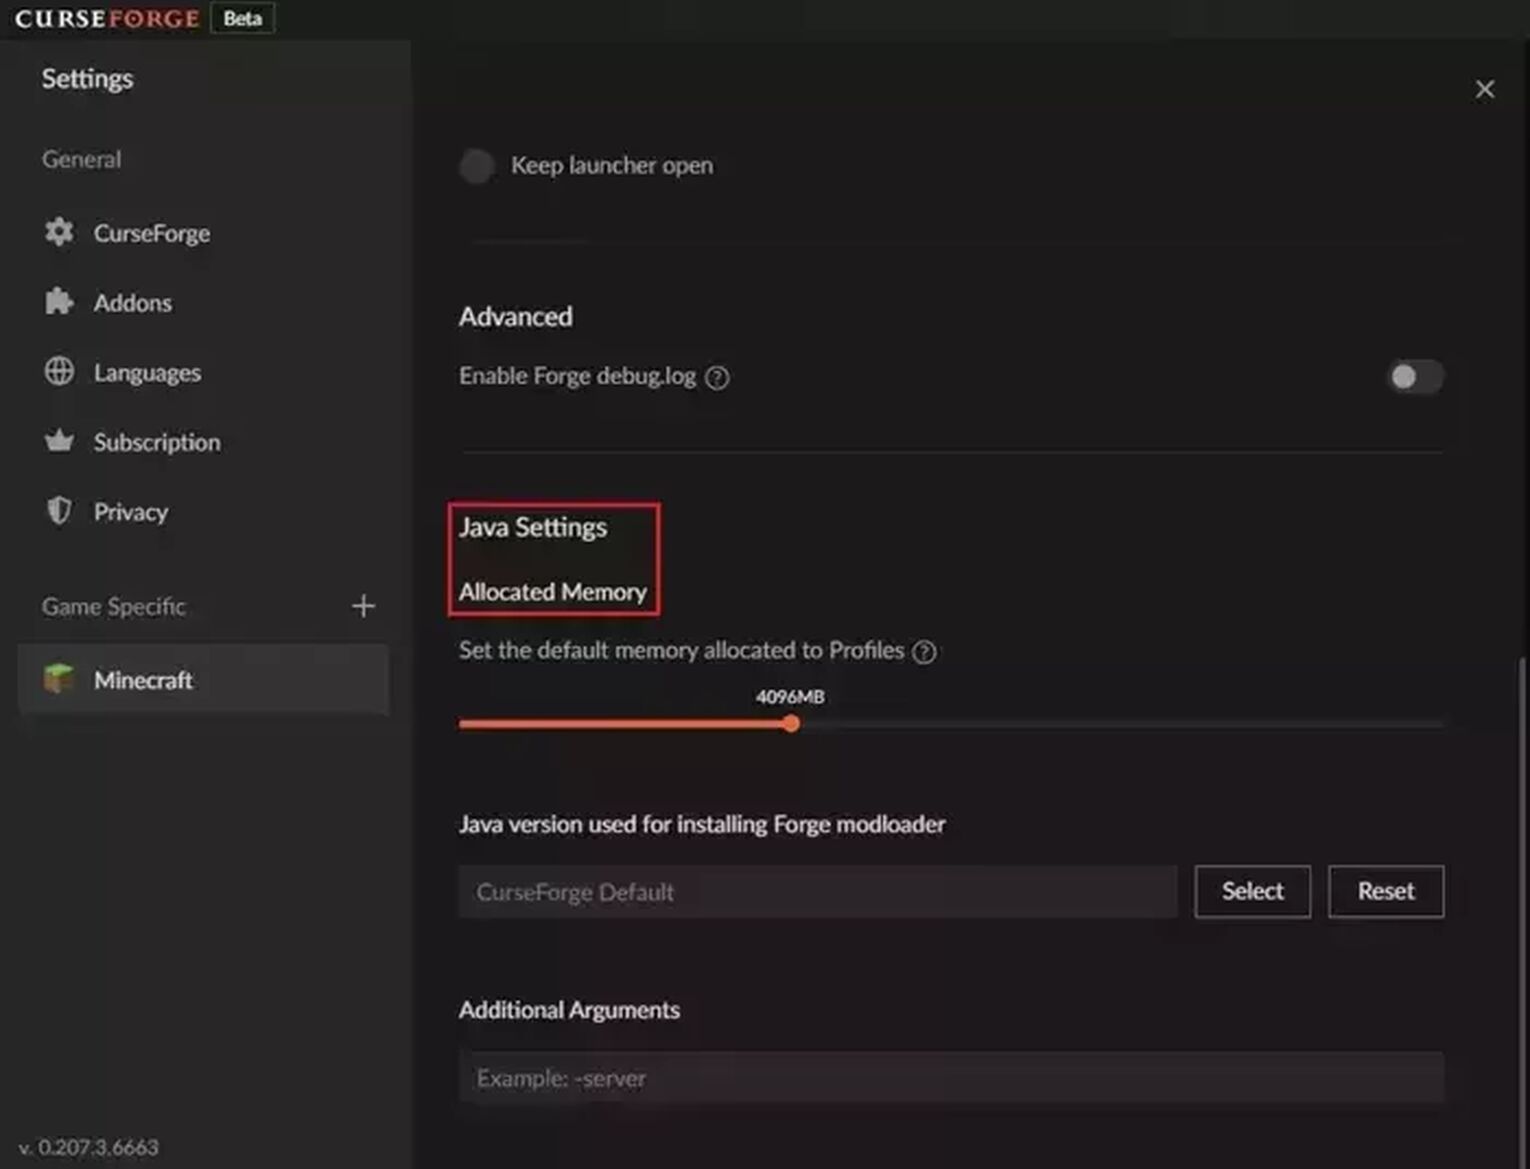
- After selecting Minecraft, navigate down to "Java Settings"
- You should be seeing an "Allocated Memory" option that has a slider.
- Simply drag the orange ball of the slider and drop it in your preferred number of allocated RAM.
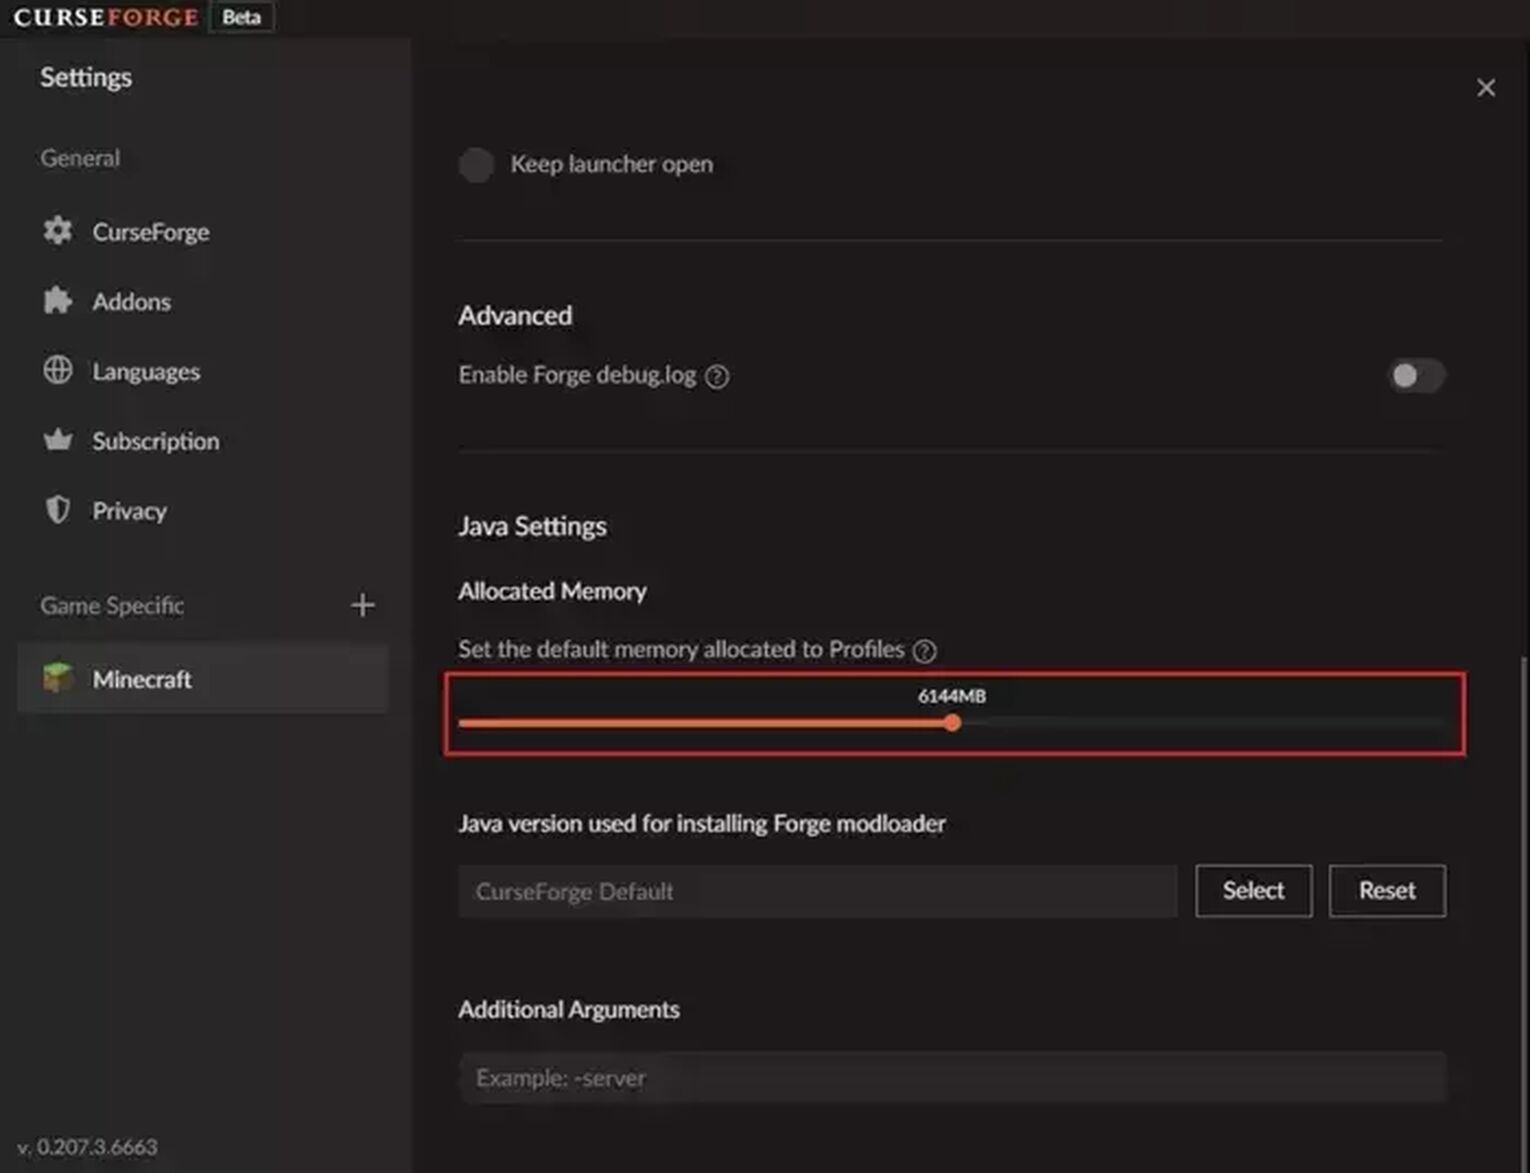
- Double check everything, even though any changes will be automatically saved.
Note: Most third part launchers, like CurseForge or the Technic launcher, does not measure RAM in gigabytes (GB) just like in the default launcher. RAM is measured using megabytes (MB) in these other launchers. In cases like these, remember that 1 GB is equal to 1024 MB.
Creating A Batch File In The Server Folder To Allocate More RAM
On the other hand, you can create a batch file or a simple text file that you will input in the server file folder to solve your RAM problem. The process looks intimidating, but it is relatively simple. Make sure to pay attention to every small detail to avoid any mishaps.
Follow the instructions below to allocate more RAM to your Minecraft servers:
- Access the Minecraft server directory folder on your system. It is the folder that has the executable file of your Minecraft server, usually Minecraft_server.exe. Make sure to get a hold of the server folder before we proceed to the next step.
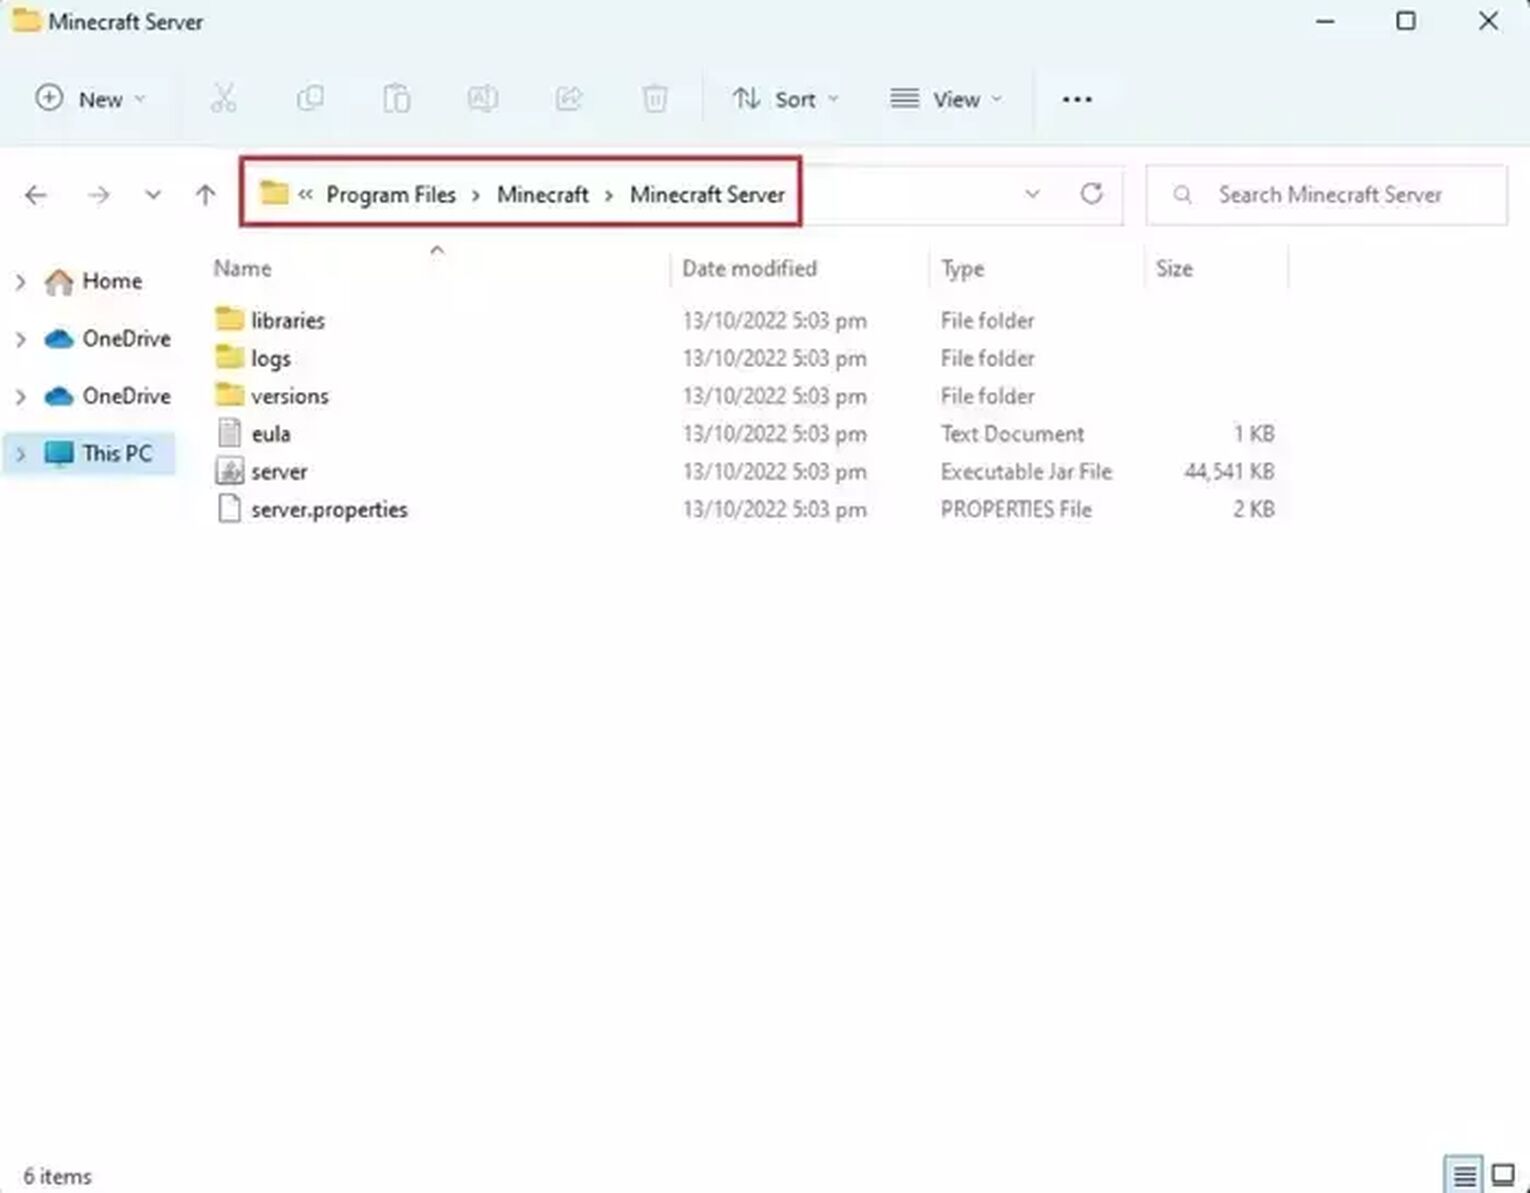
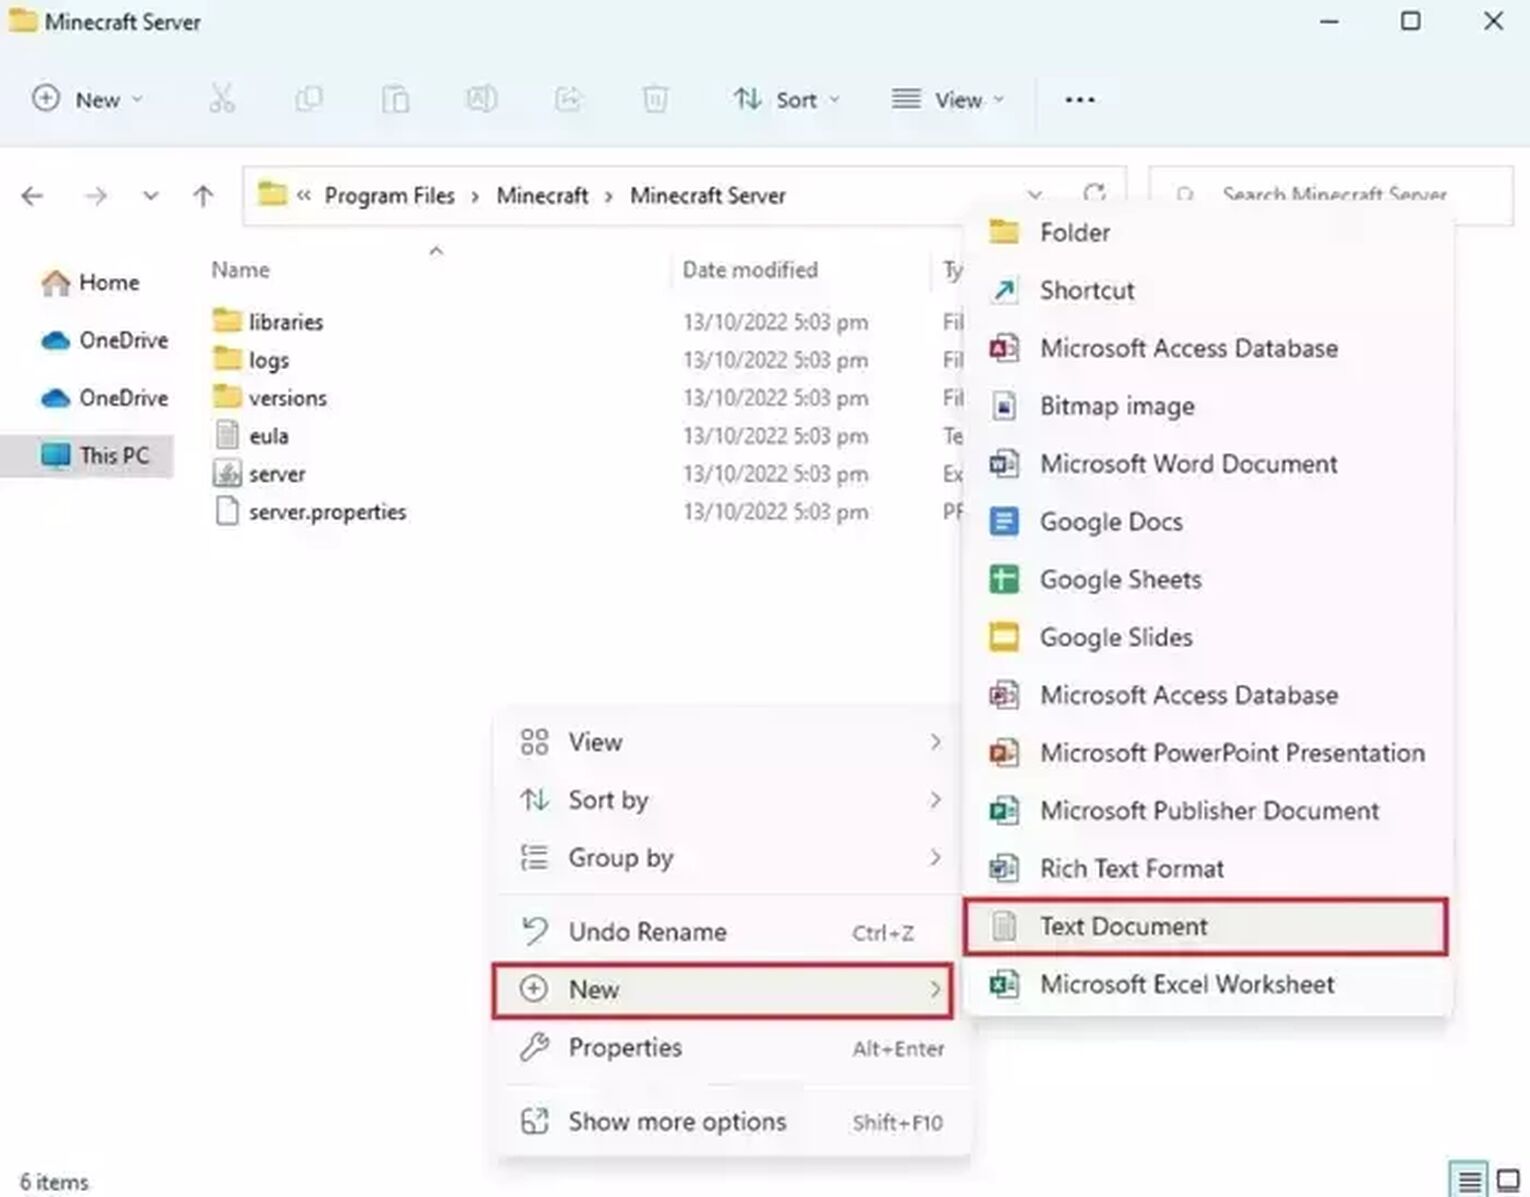
- Next, we right-click in the same folder. Hover on the New button and choose Text Document to create a new one.
- Once the Notepad opens, type in the following: java -Xmx****M -Xms****M-exe Minecraft_Server.exe -o true PAUSE
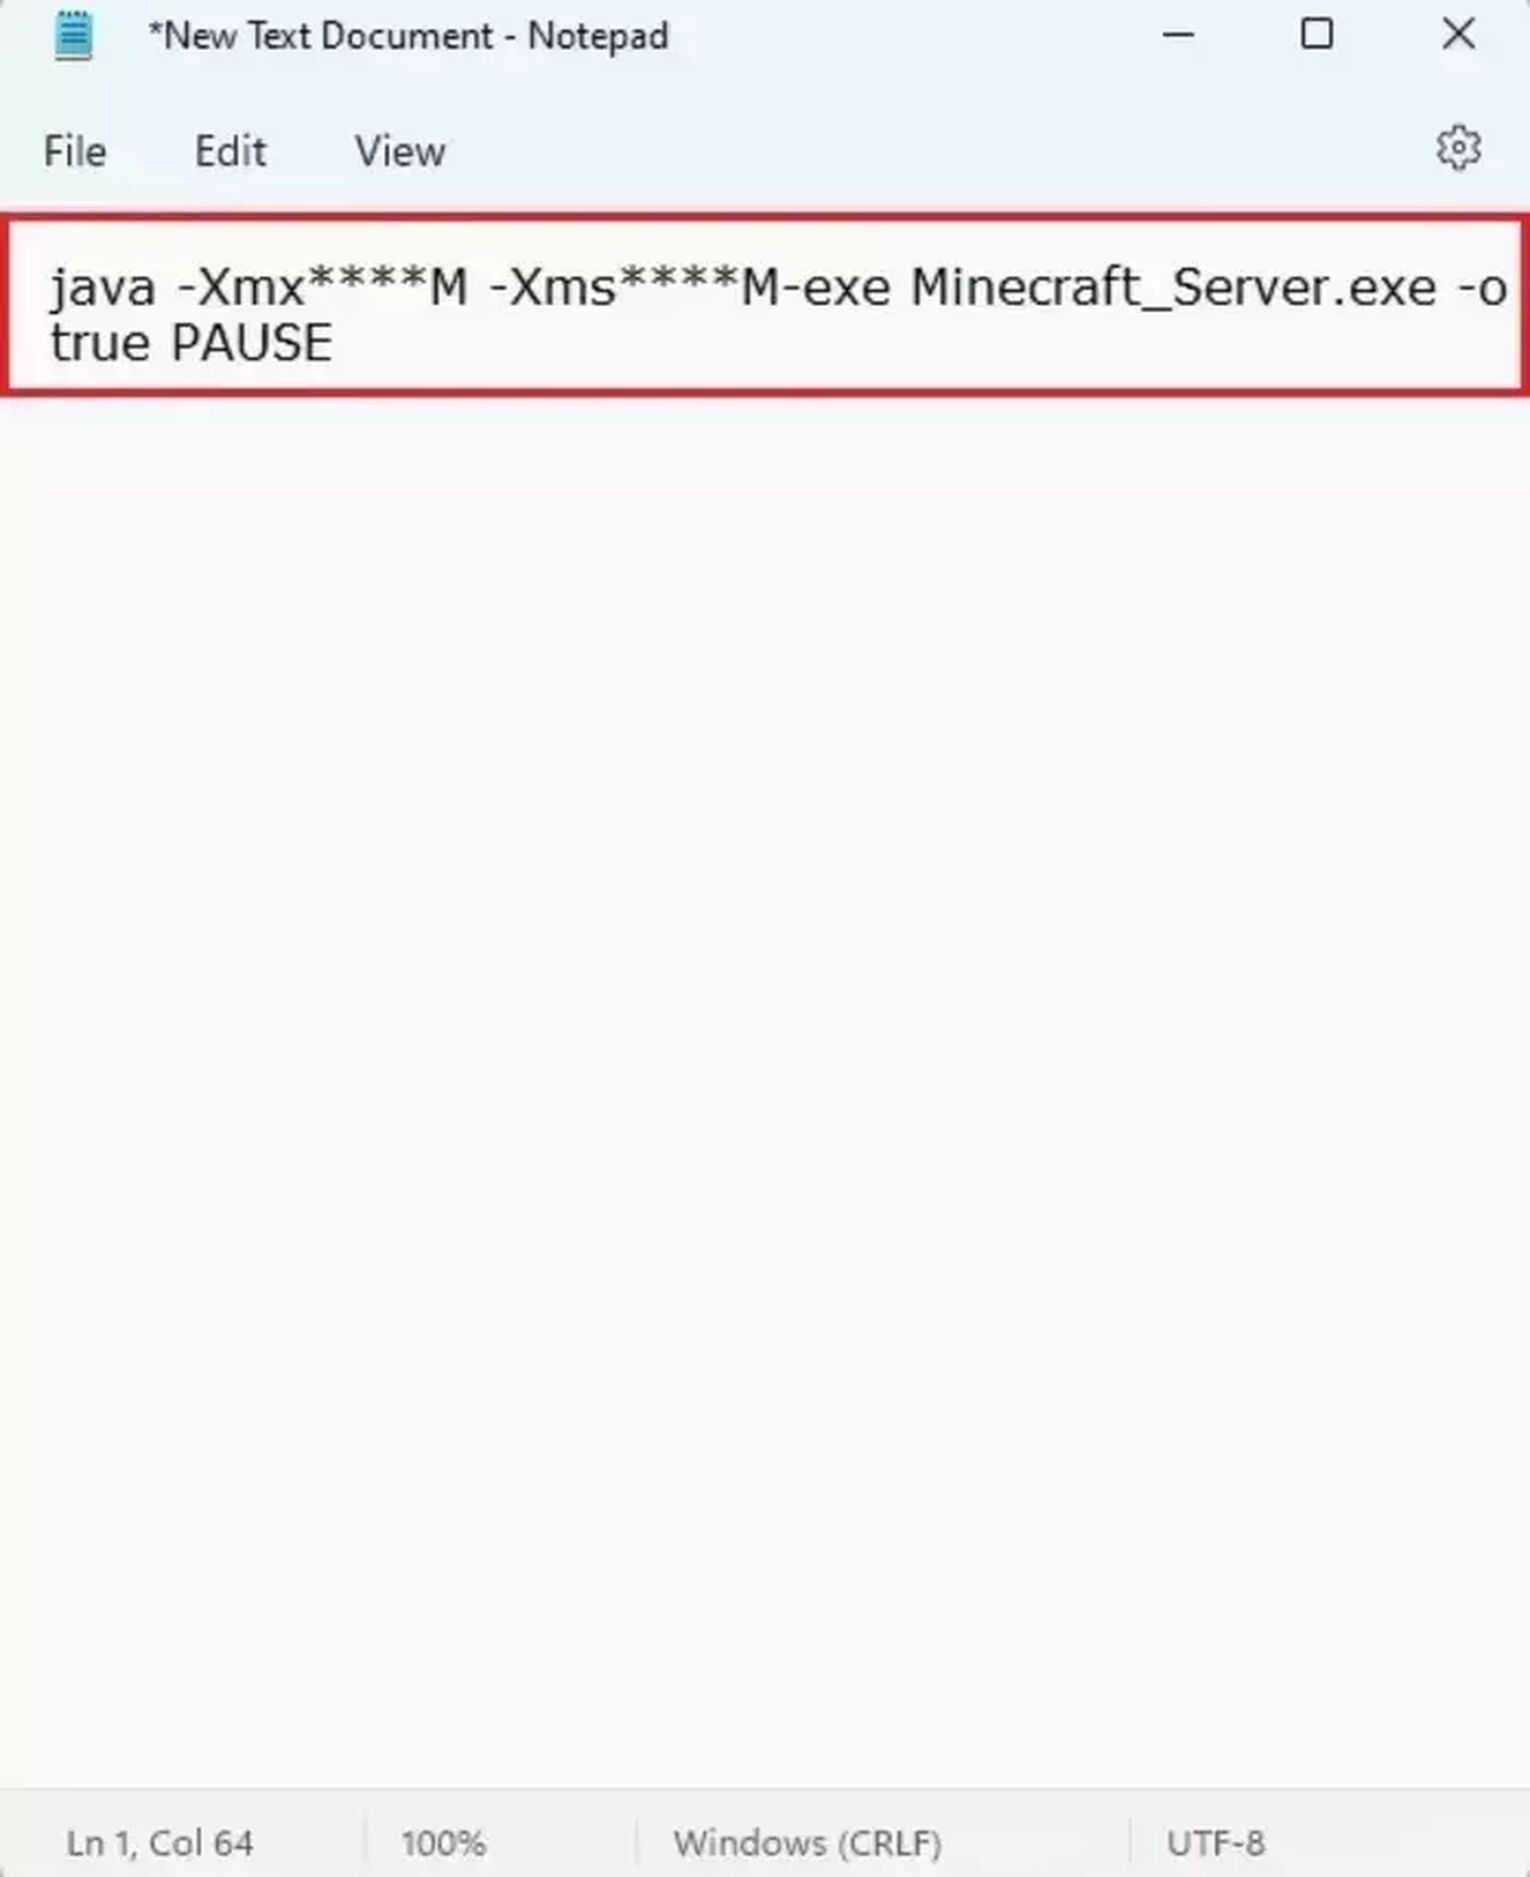
- After which, you should replace the four asterisks (****) with the amount of RAM you want to reallocate, but it should be in MB. For example, if you want to allocate 4 GB to the Minecraft server, you should input 4096. Always remember that 1 GB is equal to 1024 MB.

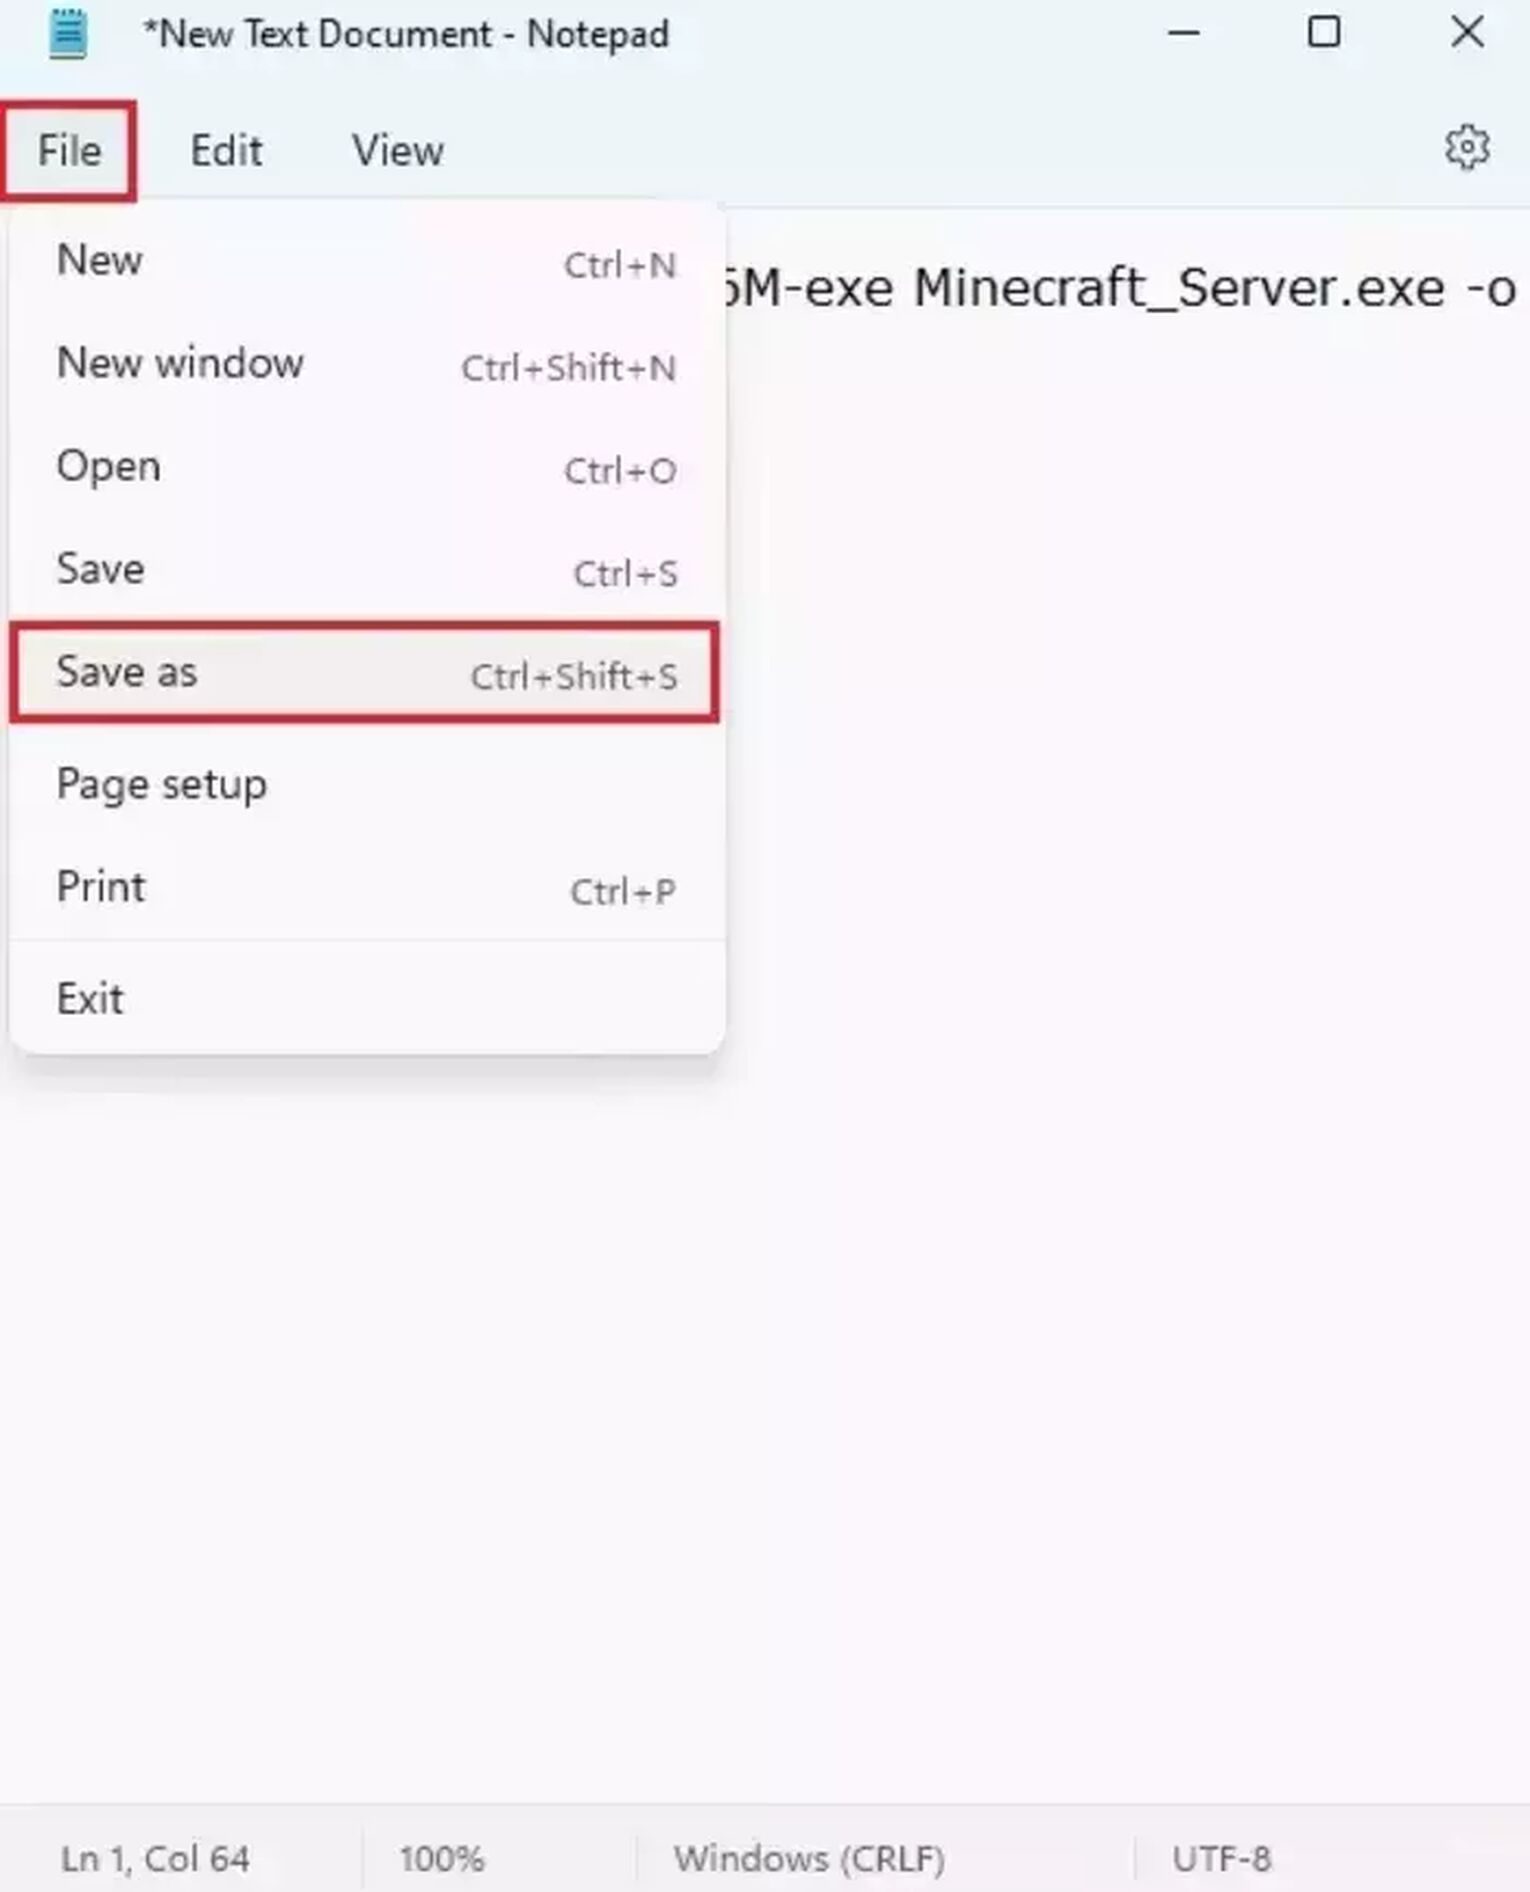
- After you have decided how much RAM to allocate, save the document by using Save As in the File drop-down menu.
- Change the file type to All Files.
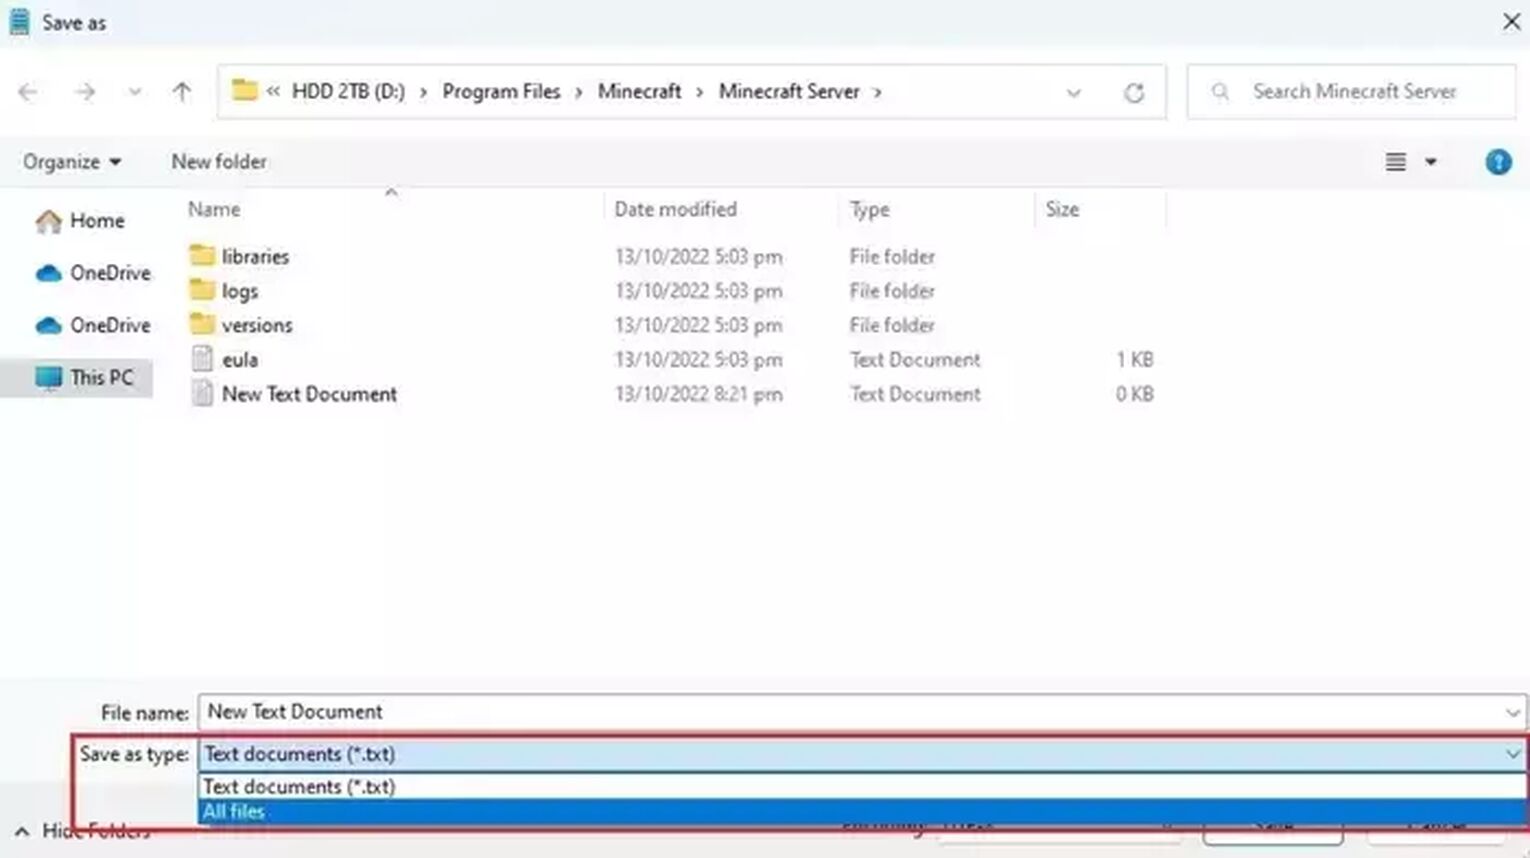
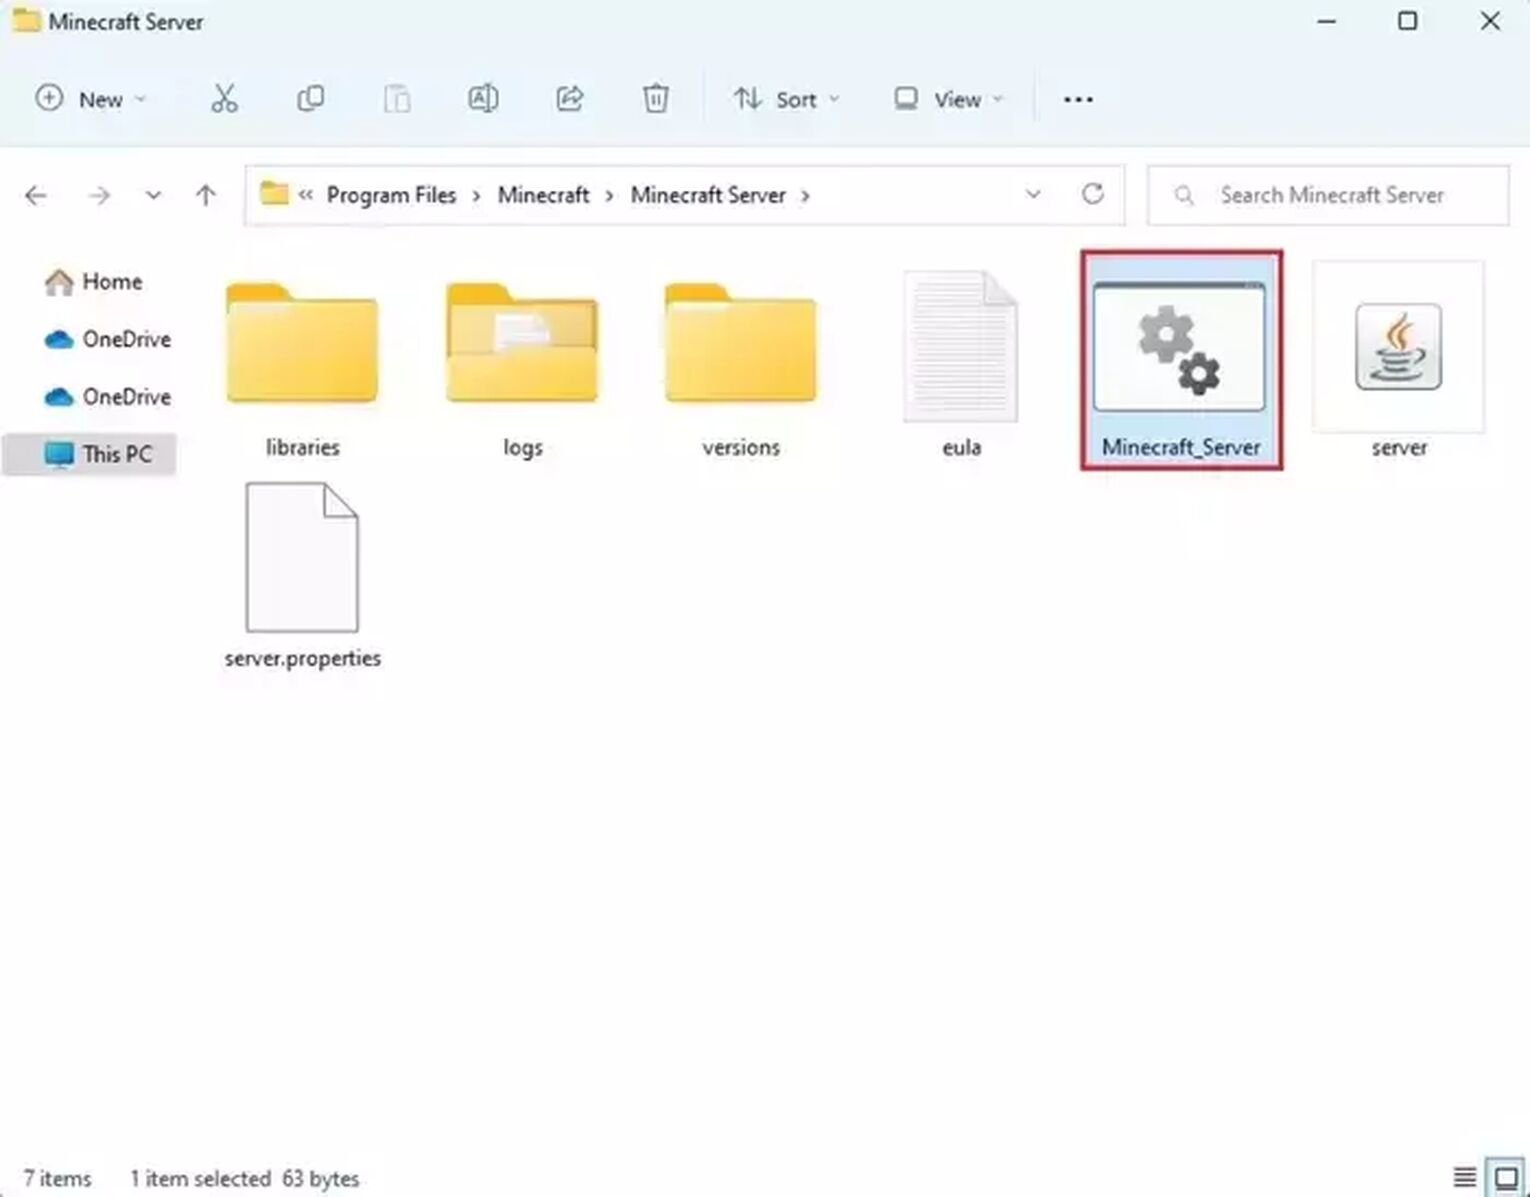
- Replace the file extension to a .bat file instead of .txt file. By doing this, the new text document will become an executable batch file that will serve as your Minecraft file server launcher.
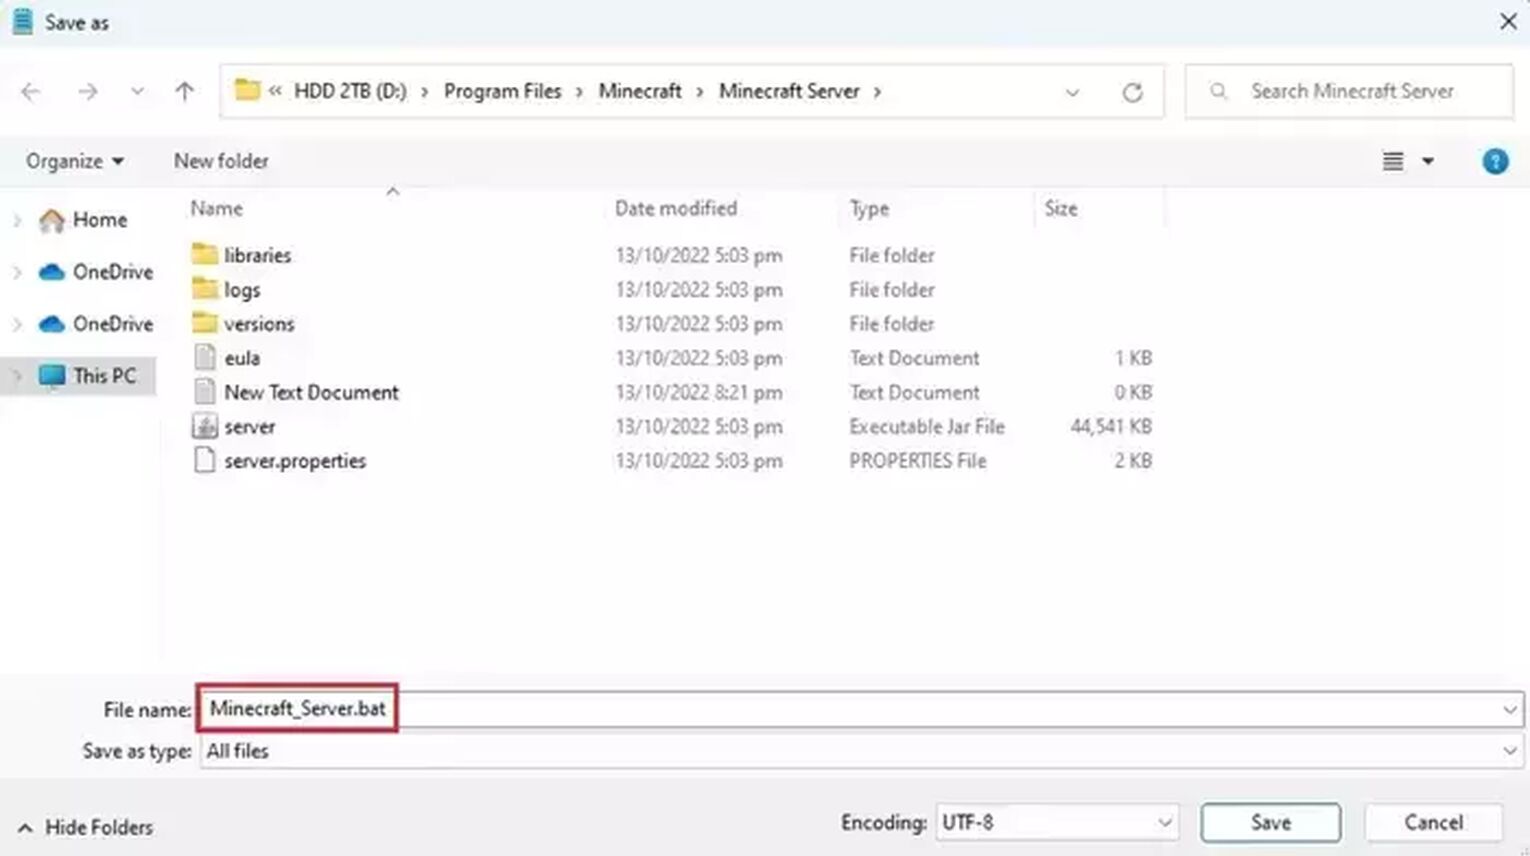
- Simply double-click the file to run the launcher and launch your Minecraft server with your desired amount of RAM.
We hope that this guide helped you in allocating more RAM to your Minecraft server. All we want is to have your Minecraft experience be smooth, without all the lagging and crashing.


.svg)


![Best HUD Mods in Minecraft [Top 10 List]](https://theglobalgaming.com/assets/images/_generated/thumbnails/4077159/best-hud-mods-minecraft_03b5a9d7fb07984fa16e839d57c21b54.jpeg)
![How to Join a LAN World in Minecraft [Java & Bedrock]](https://theglobalgaming.com/assets/images/_generated/thumbnails/4077161/how-to-join-a-lan-world-minecraft_03b5a9d7fb07984fa16e839d57c21b54.jpeg)
