

.svg)
How You Can Open Properties In Roblox Studio Effortlessly
Are you having trouble opening properties in Roblox studio? Well, this guide will help you understand how to open it and how to navigate it as well.
The properties menu in Roblox studio is the home to all the basic as well as some advanced edits to individual objects. A developer cannot hope to make their own game place without the properties menu bar, one of the most helpful panels in the studio. That is exactly what the new developers must familiarize themselves with it if they ever hope to create their own content. It's okay to try new stuff, and you can always delete a Roblox game if you mess up too much.
But the big question still stands. How do you open the properties menu in Roblox Studio? While we're at it, we shall also delve into why this menu bar is so important and talk about some of its settings. So without further ado, let's jump right into it.
What Is The Properties Windows In?
Every object that you create in Roblox Studio has its own set of defined properties, like color, material, and behavior. These are meant to be played around with and changed. Doing so will give the object a new look or make it perform a different action. This is important to instill variety in your game place and to keep objects from feeling lifeless. After all, you don't want your game falling into the worst Roblox game list.
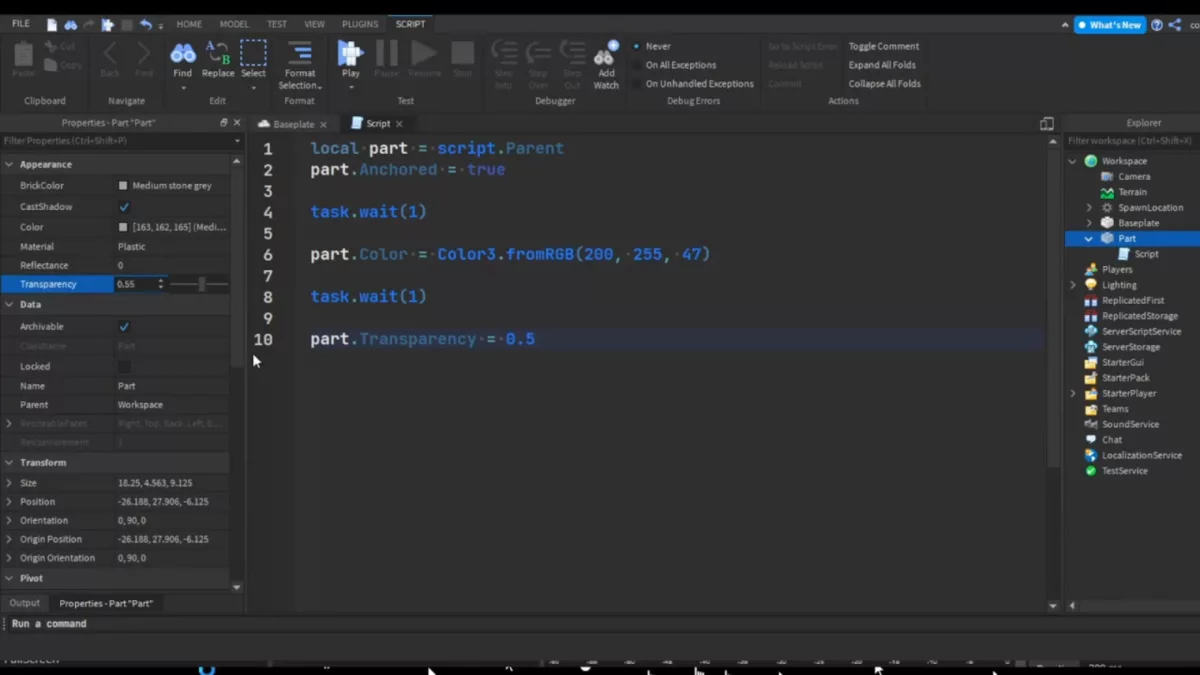
A developer can make use of this panel to create a unique and personalized object that they deem fit for their game place. This can be done using 2 methods. If they are proficient in Lua, the programming language commonly used in Roblox Studio, they can simply write code for the object. In the said script, they can use the commands that will allow them to manipulate the properties of the object according to their liking. This is the more professional way, and it allows for a higher degree of customization than using the properties tab.
On the contrary, a rookie developer should test their mettle with the properties window first before diving into the world of Lua. There is no shame in starting from the basics. Getting a good grip on how the basic properties affect an object will better prepare you for advanced selections in the future. This method has a certain advantage to it. Any changes that you make to an object's properties will be shown to you in real-time on your screen.
This allows for instant feedback on whatever change you have made. If you are unsure of your choice, you can easily judge its potency with the instant updating of the object's properties. Because some of the more advanced attributes rest under the cover of Lua and programming, the properties window is primarily used by new developers, or if you want quick feedback on the change you're about to make. This can be a change in position, color, and even the material of the object. More complex and case-sensitive changes in properties are handled through the use of Lua. If you think you have got what it takes, then publish your Roblox game.
How Do You Open The Properties Menu?
Getting to the properties menu is extremely easy and simple.
Open the Roblox Studio application from your computer or navigate to where you installed it using the Windows explorer menu.
Open the project that you have been working on or any template that strikes your fancy. If you can't find any template, then you may even face an error indicating corrupted or missing files.
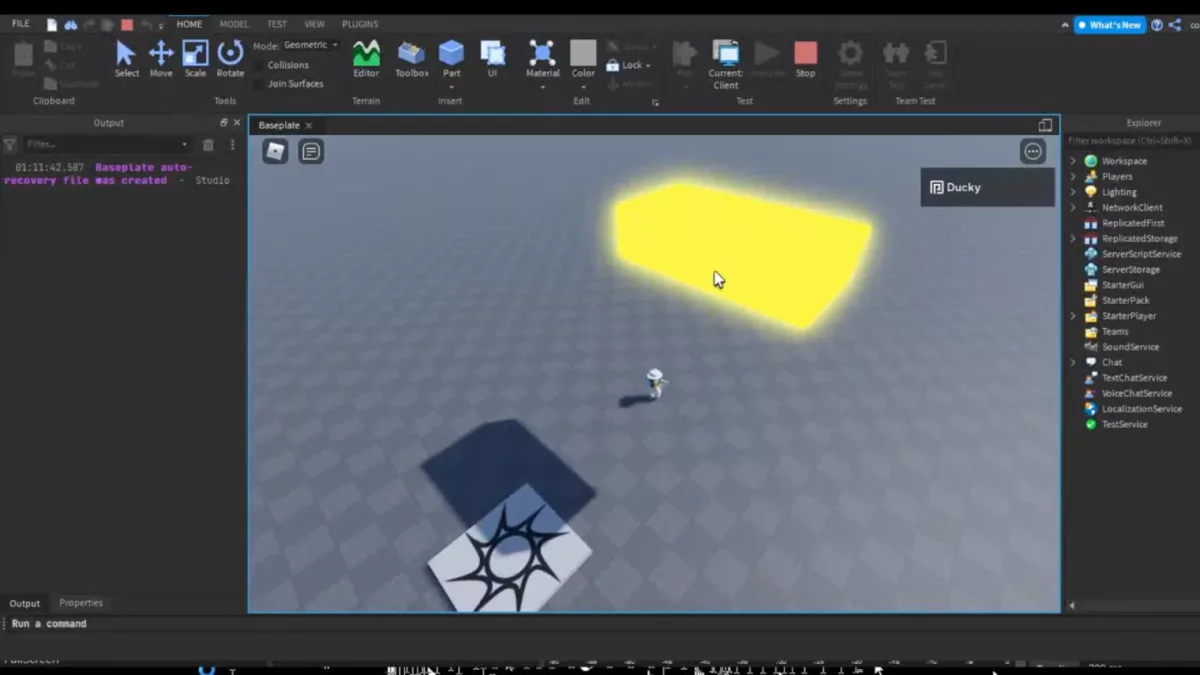
Click on any object in the world that opened up. If you don't have any object, click on the Part button on the top banner in the Home tab to spawn an object.
Once the object is selected, you'll note the properties panel automatically opens on the left-hand side of your display.
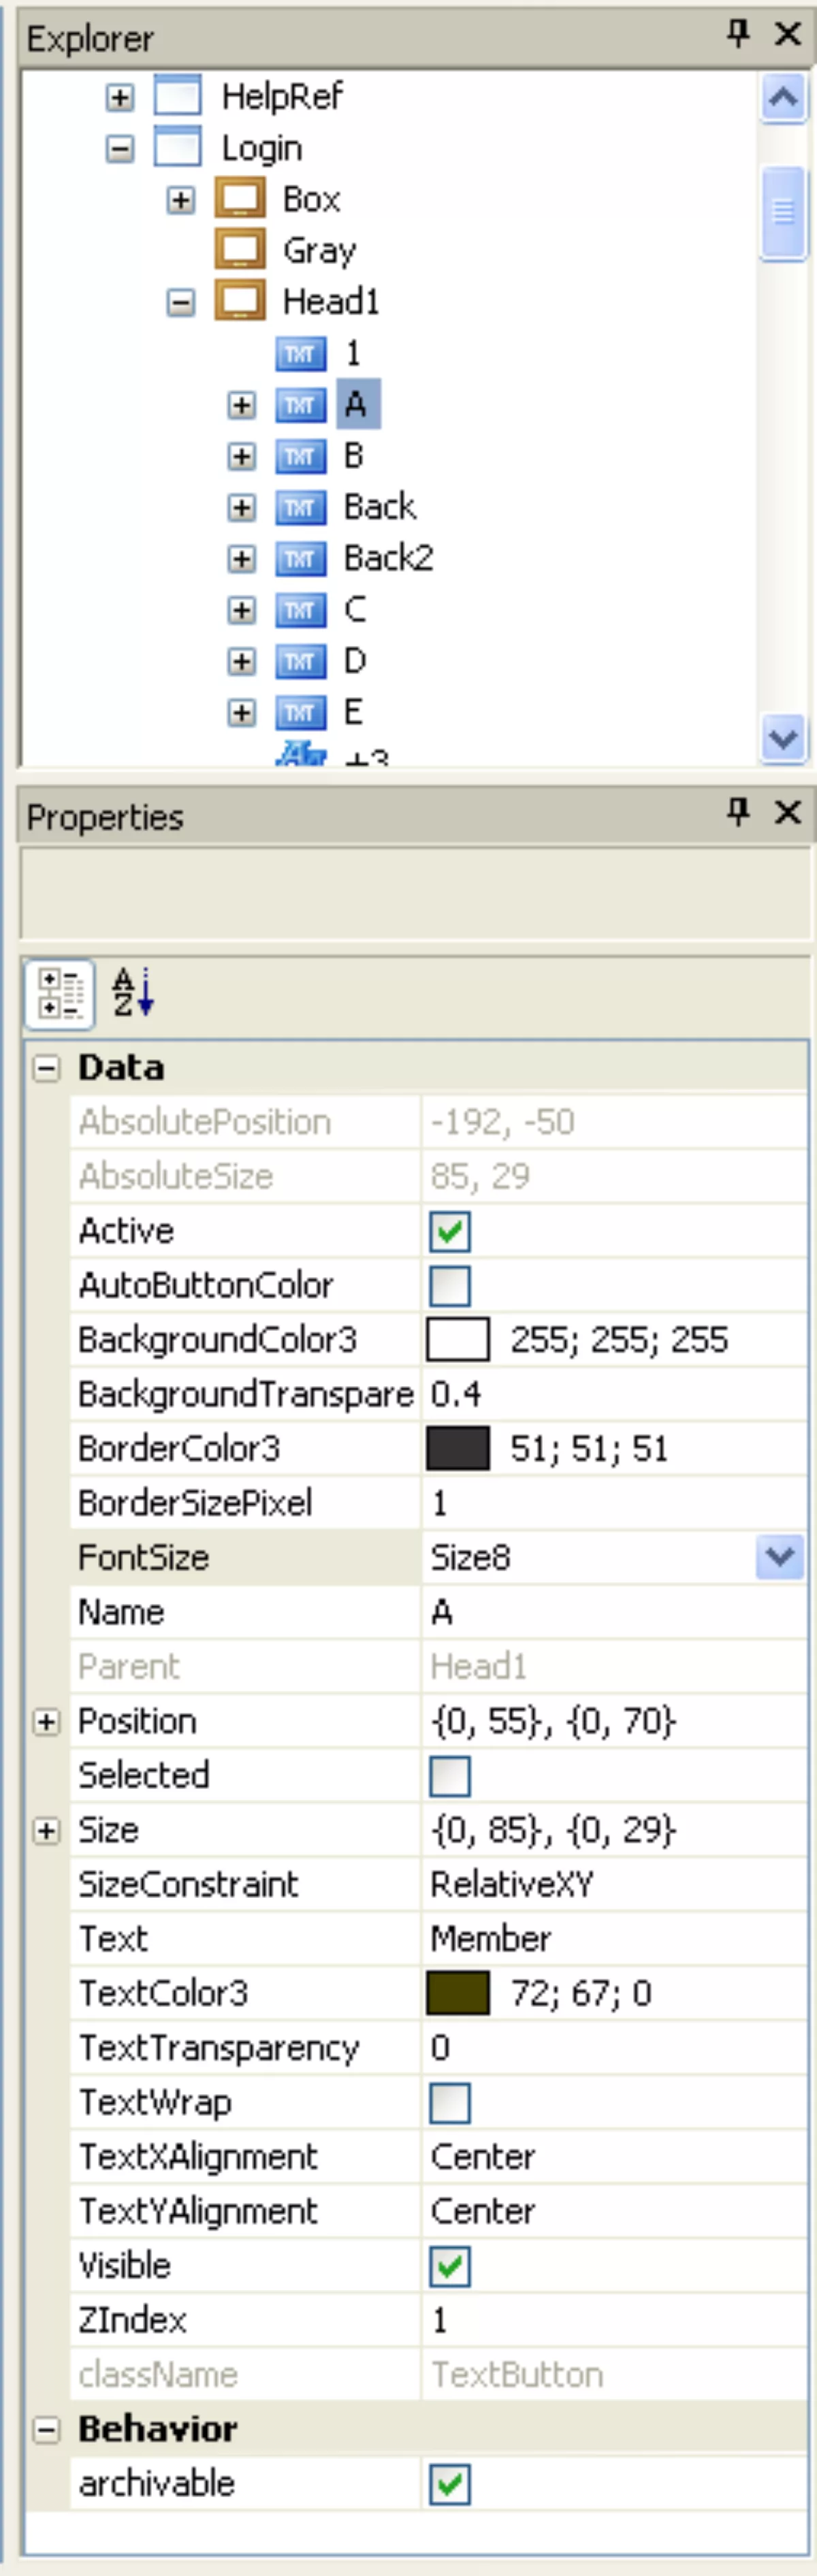
After successfully following these steps, you will notice a large scrollable properties menu with various attributes like the ones we mentioned above that you could interact with. You will also be able to search for a specific property by using the search bar on top of the panel or the Ctrl+Shift+P hotkey.
How To Unhide The Properties Menu
If you're unable to locate the property windows anywhere, despite following the instructions, then they must be hidden. In order to gain access to it, you must follow these steps:
After opening the application and a template, click on the view tab button. This is 2nd button from the right side of the banner at the top, next to Test.
Click on the large properties button visible on the left-hand side of the view tab, next to the explorer panel icon.
Doing this should grant you access to the properties panel so that you can easily edit any model or character to your liking.
What Can You Do By Using The Properties Window?
There are various attributes of an object that you can alter through the Properties window. Some of these are extremely basic, while others are more hidden and may require you to search for them. These can be added to a script if you want to change a property as a condition while the Roblox game is running. The appearance and transform are the two main attributes in the properties menu that are most commonly altered.
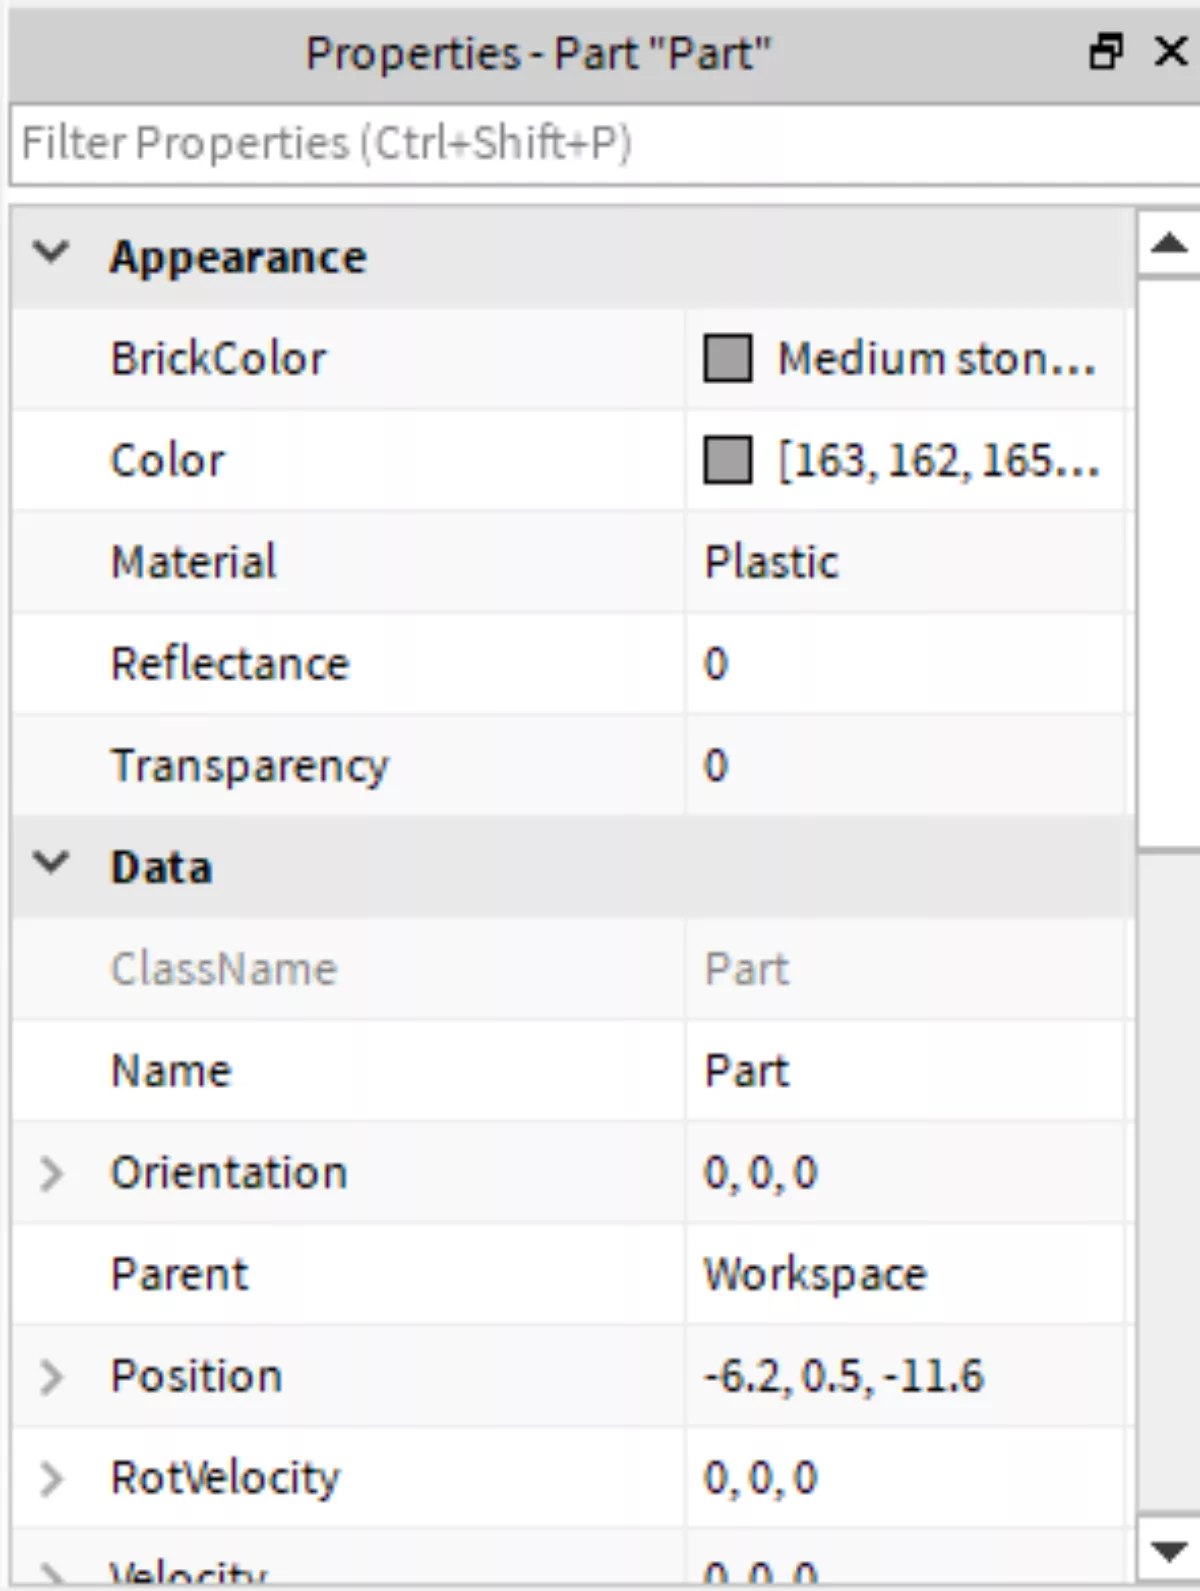
Appearance
This attribute corresponds to how the object will look on the screen when in the game. Appearance has further sub-properties like color, material, shadow, and transparency. Each of these can be altered to give your object an entirely different look. These are usually tested on the properties menu bar first to see if the object appears according to or desires before adding them to a script.
You can give your object a shiny look by increasing its reflectance in this appearance property menu bar. Reducing this will give a more matte feel. Similarly, if you're trying to imitate the look of glass, you need to increase the transparency of the object so that light can pass through it, making it see-through. Transparent objects can be difficult to render in large numbers and may give the player an error that says their graphics card is too weak to run Roblox. These as well as the other properties, can be used in conjunction to create a variety of new parts and objects to keep the user entertained when they play your games.
Transform
The transform attribute denotes the size and position of the object at the foremost, amongst a few other properties. You move the object around in the world on all three axes by changing the values on this tab. The rotation of an object is also controlled here and can be set to a precise value.
Scripting this attribute allows for a much broader range of control over your object. For example, you can script a platform to float up in the air. As soon as the player touches it by jumping on it, the platform will fall down, taking the player with it. This is one of the many examples of case-condition uses that only scripting can allow.
What Are Some Extremely Useful object Properties?
Let's talk about a few discrete settings that you can edit to make your games more engaging and fun for players.
CanCollide
This property allows you to change the collision attribute of the object, allowing it to exist in space and be visible to the player, but they will pass right through it. By changing properties that enhance this effect to use it to hide a secret area in your game, that will reward the explorers.
Anchored
Anchored property denotes if the object is affected by gravity or not. As an example, you can put an object above a path that a player has to take and anchor it. With the help of scripts, you can set it to fall down as soon as the player gets under it, effectively making a trap.