![How to Host a Private GTA Server [3 Best Methods]](https://theglobalgaming.com/assets/images/_generated/thumbnails/4083399/how-to-host-a-gta-server-gta_94948129f3d674eb46f0eebb5e6b8018.jpeg)
By Using ZAP-Hosting
- Go to the ZAP-Hosting website and either sign up for an account or log in to an existing one if you have one.
- At the top left of the screen, choose the option to ‘rent a server’.
- At this point, a dialogue box should have popped up. Select the ‘choose your product’ option > ‘gameserver’ > ‘cloud gameserver’.
- Once the next page loads, scroll down to the search bar for games and search for ‘FiveM’ > ‘FiveM Mod for Windows’.
- Next, you’ll need to choose your server location; this is just the location where you’re located.
- Scroll down to the customization section and begin customizing your preferences for your server.
- Of the choices on the next screen, select which payment method you want to use. You’ll also need to agree to the terms and conditions at this point.
- Click ‘confirm’ > ‘install’.
- By now, your server should be set up, and you should have gotten an IP address to copy. You can use one of the best VPNs for GTA to keep this safe.
- Start FiveM; once the application opens, press F8 on your computer and type in ‘connect [your IP address]. After this, your server should connect and be up and running.
By Using txAdmin
Steps for Downloading the Server Folder
- Go to the list of server-build artifacts for Windows
- Start a download for the most recommended build on the list.
- Access the ‘server.7z’ file you just downloaded. You’ll need to use 7-Zip or a similar tool to unzip it.
- Extract it and save it somewhere on your computer.
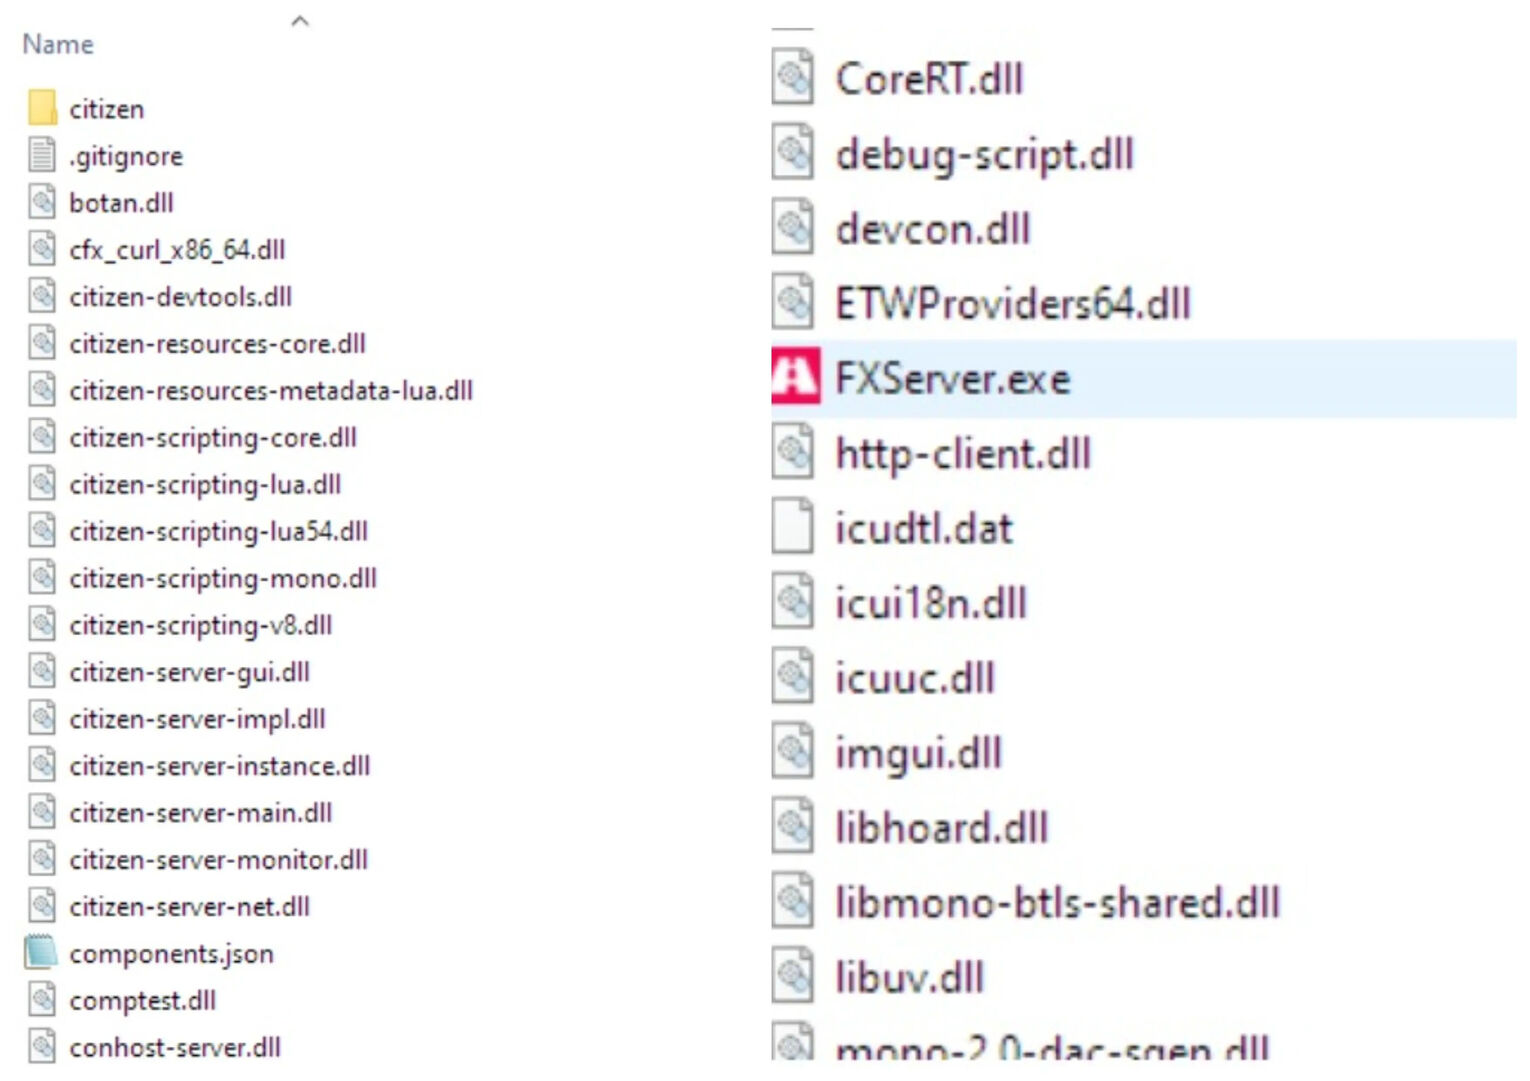
- Go to the server folder and open it to view the contents. This is what it will look like:

Steps for Starting the Server
- Within the extracted files, double-click on the ‘FXServer.exe’ file. The file should then open in a browser tab.
- If the PIN section is completed, click the ‘link account’ option.
- On the Cfx.re website, log into your account and select ‘allow’. Make sure you set a password for the server’s admin account.
- Select ‘next’ and insert the name in which you want to name your private server into the field box. Select ‘next’ again.
- On the next page, choose the ‘popular recipes’ option and click on the server template labeled ‘CFX Default’. This one doesn’t require a database like other templates would.
- Select 'save' and go to the 'recipe deployer’ option.
- With the key you created prior to choosing a setup method, insert the key in the field and select ‘run recipe’.
- Look over the recipe to ensure everything is correct before clicking ‘next’ > select ‘next’ again >'save and run server’.
Through a Vanilla FXServer for GTA

- Create a new folder to store the coding for your private server. For example, you could name it FXServer or Server.
- Go to list of server-build artifacts for Windows and download the recommended server version build.
- Once the build has finished downloading, use a tool such as 7-Zip to extract it into your newly created folder.
- Create a clone for the cfx-server-data and transfer it to a separate folder outside of your new folder.
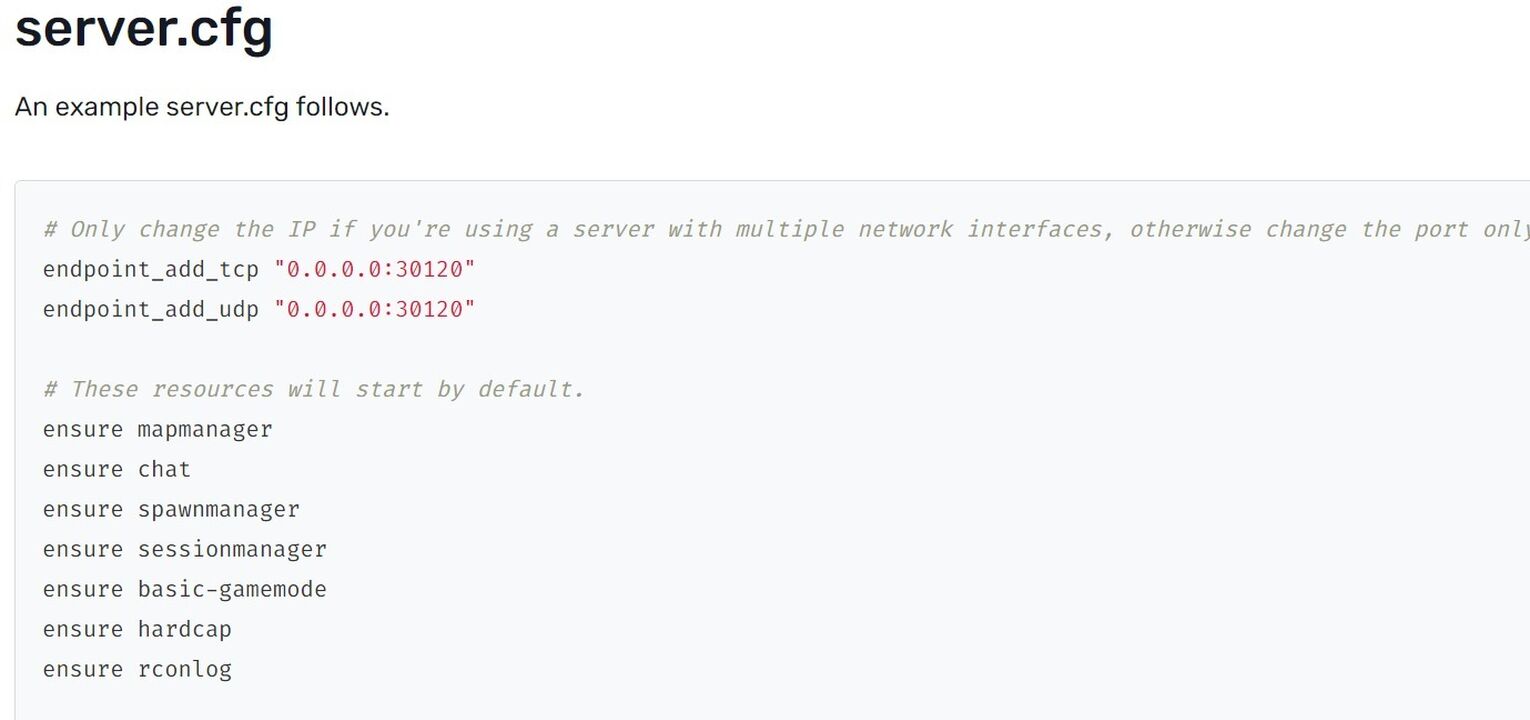
- Create a file in that second server-data folder and place the server.cfg file into it.
- With the key you created earlier use ‘sv_licensekey’ and insert your license key there.
- All you should have to do now is click to run the server from that second folder.
Things to Know Before Hosting Your Own GTA V Server
Creating and hosting GTA servers allows players to do more than just expand gameplay to a larger server. It also allows them to mod everything from the cars and weapons with GTA RP Mods to the scripts and game modes, and tons more. By hosting your own FiveM server, you’re able to take the Grand Theft Auto experience and revamp it to how you’d like it to be—a whole new GTA experience.
Here are a few things you should know before you host a private FiveM server:
- FiveM servers are not free; you’ll be required to arrange a license with them and pay a monthly fee of either $15 for a 64-player server or $50 for a 128-player server.
- FiveM will ban any GTA servers they don’t like or servers that don’t follow the rules.
- Despite being a private server, GTA bots, hacking and bans on players are still possible.
There are some requirements that need to be met before you can create your own GTA server on FiveM. Of course, things like coming up with an approved server name or creating a logo for the server are optional aspects of hosting a GTA server. Here are the requirements you’ll need to meet:
- You’ll need a hosting service for your server; there are multiple services to choose from, and ZAP-Hosting is one of the easiest ones to use.
- You’ll need to pick a database server, such as MySQL or MongoDB. Note: If you’re using the ZAP-Hosting route when creating a server, the hosting package will already include this part.
- If your PC is running on Windows, you’ll likely need to install Visual C++.
- You’ll need to have all the necessary server files needed to create the server. If you’re using server templates, this will usually be included.


.svg)


![Best GTA Missions of All Time [Top 5 List]](https://theglobalgaming.com/assets/images/_generated/thumbnails/4083397/best-missions-of-all-time-gta_03b5a9d7fb07984fa16e839d57c21b54.jpeg)
![The 10 Best Quotes of All Time GTA [Iconic]](https://theglobalgaming.com/assets/images/_generated/thumbnails/4083437/best-quotes-of-all-time-gta_03b5a9d7fb07984fa16e839d57c21b54.jpeg)
![Best Easter Eggs in GTA [Top 5 All-Time List]](https://theglobalgaming.com/assets/images/_generated/thumbnails/4083432/best-easter-eggs-of-all-time-gta_03b5a9d7fb07984fa16e839d57c21b54.jpeg)
![Rarest Cars of All Time in GTA [Top 10 List]](https://theglobalgaming.com/assets/images/_generated/thumbnails/4083434/rarest-cars-of-all-time-gta_03b5a9d7fb07984fa16e839d57c21b54.jpeg)