![How to Make a TNT Cannon in Minecraft [Complete Guide]](https://theglobalgaming.com/assets/images/_generated/thumbnails/2997618/how-to-make-a-tnt-cannon-minecraft_94948129f3d674eb46f0eebb5e6b8018.jpeg)
How to make a TNT Cannon
There are many designs for making a TNT cannon in Minecraft, and this one is a sniper cannon. This means the TNT cannon will shoot 1 TNT block very far away in a single direction on your command! Here are the items you'll need to build this simple TNT cannon in Minecraft:
- 17 Solid blocks, like wood planks
- 5 Dispensers
- 2 Redstone repeaters
- 9 Redstone dust
- 1 Button
- 1 Pressure plate
- 1 Wood fence
- 1 Bucket of water
- A minimum of 5 TNT blocks
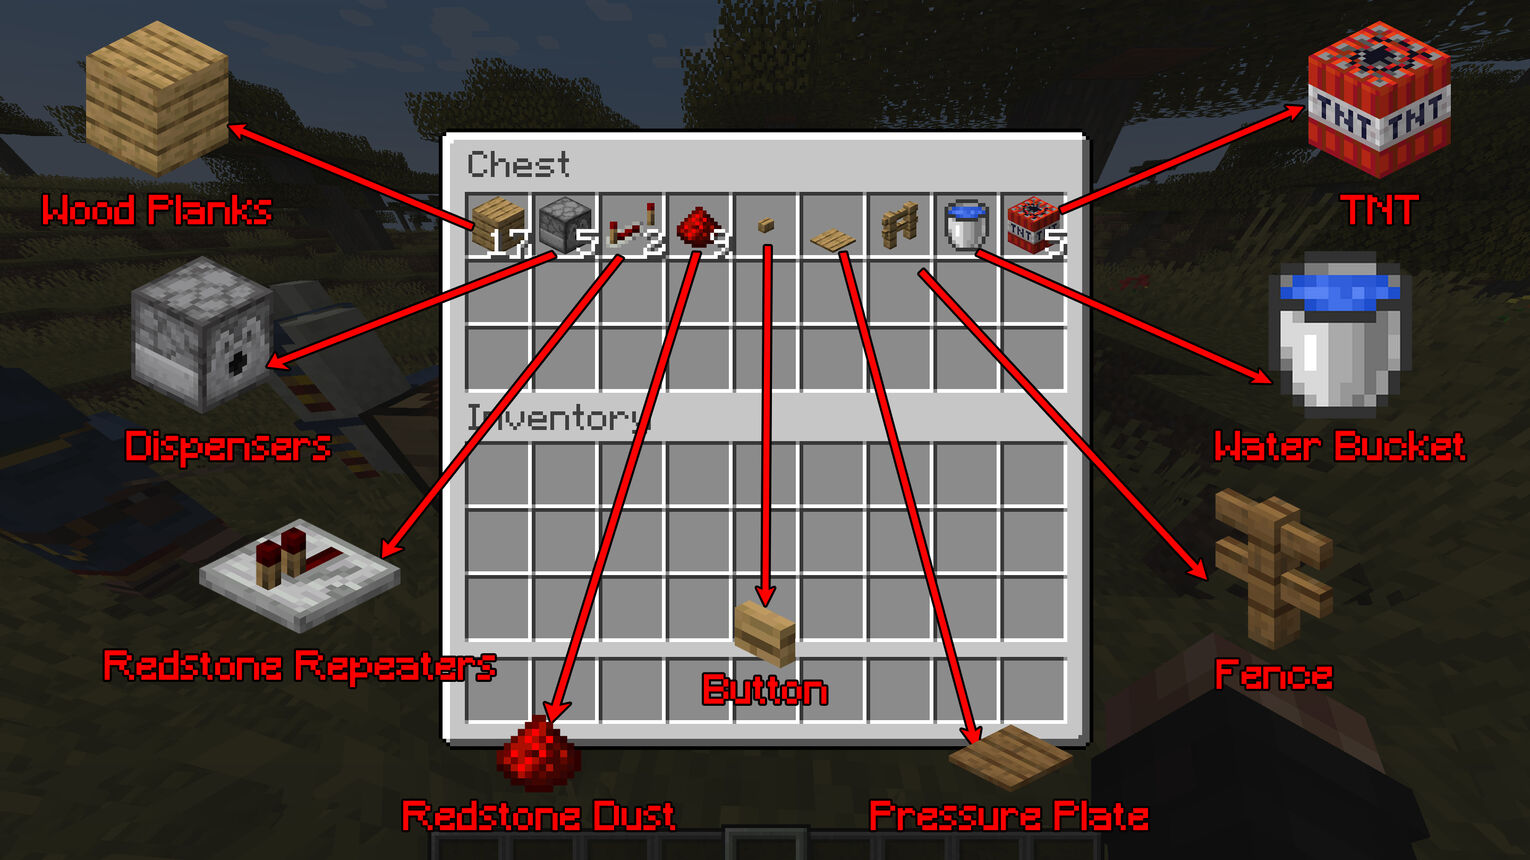
These items will be enough to build a simple TNT cannon, though you can expand it with the same materials and make it launch TNT even faster. So let's go ahead and see a step-by-step guide on how to build this Minecraft TNT cannon!
Place 4 Dispensers in Front of Each Other
First, find the location where you want to build your TNT cannon. There you'll want to place 2 dispensers on top of each other facing themselves while leaving 1 empty block space between them.
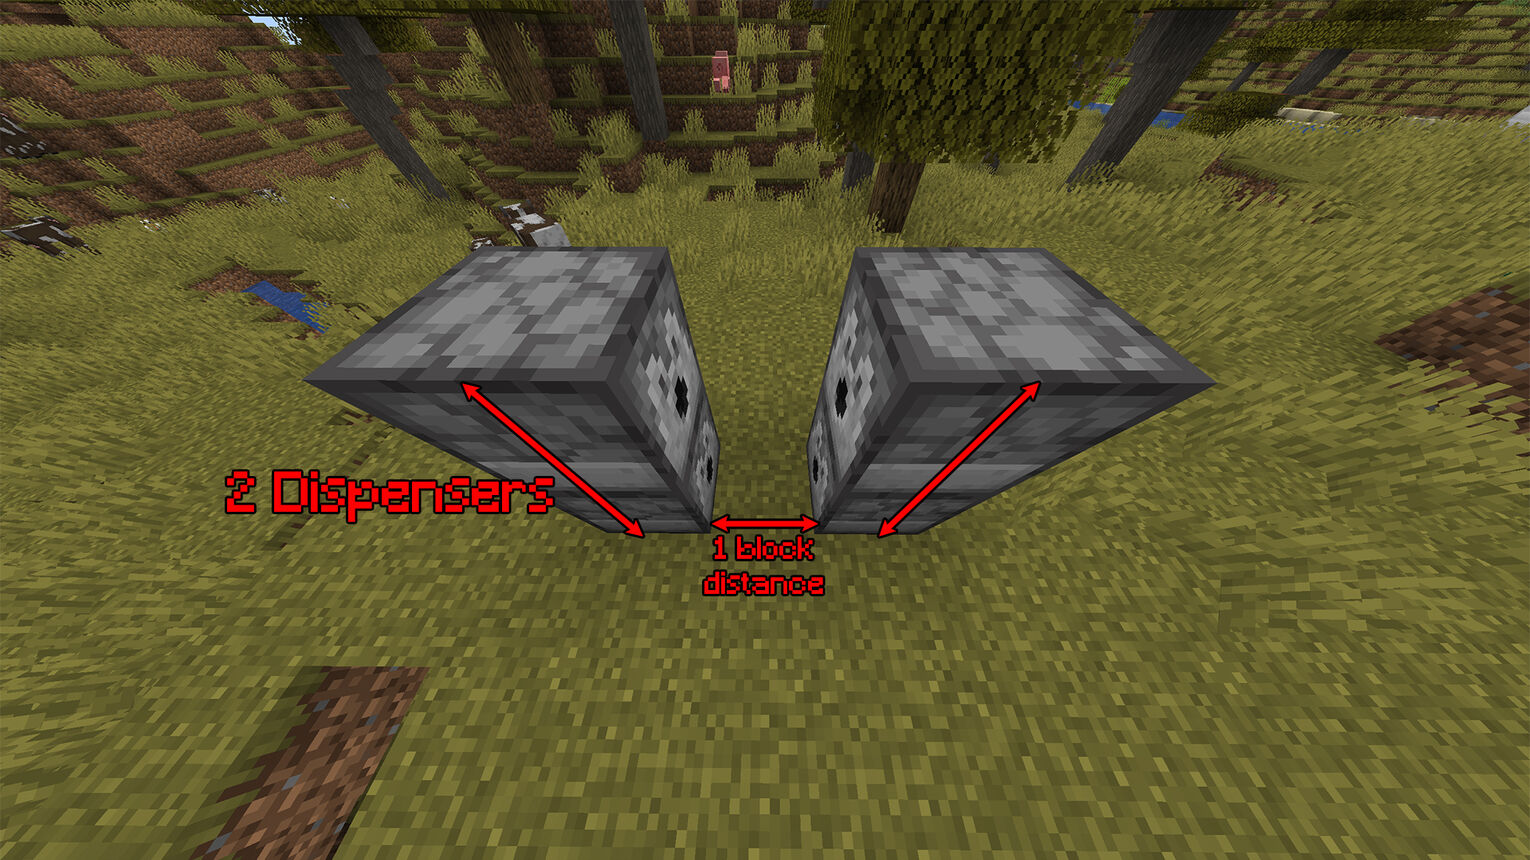
To place a dispenser on top of another one without opening it up, all you have to do is hold the Shift crouch buttonwhile placing it. These are the dispensers that will store and launch TNT blocks!
Cover the Dispensers with Solid Blocks
Once you place the dispensers, you'll want to build around them with some kind of solid block from all the sides except the one you want the cannon to shoot from. We'll be using wooden planks, but you can also use iron blocks. You can see how to cover the dispensers for the TNT cannon in the image below.
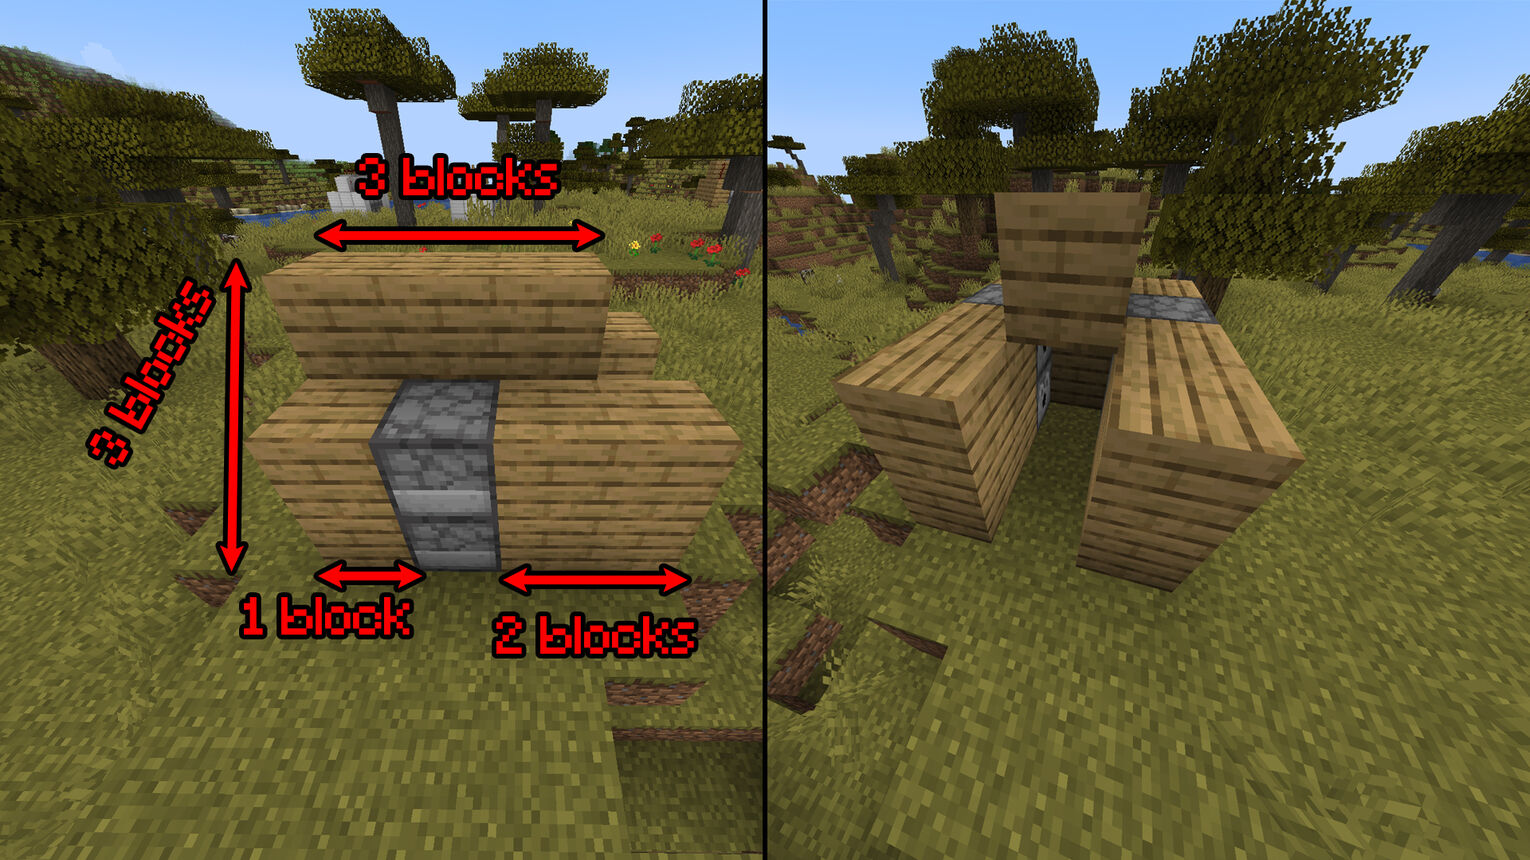
Make sure there's coverage of 2 blocks in distance on the side from the dispenser of which you'll want the cannon to launch TNT blocks. Also in the middle empty space, make sure to cover the top at a 2-block height so you can fit in it as well!
Add an Upside-Down Dispenser at the End of the Cannon
At the end of the side on which you want the TNT cannon to shoot, you'll want to place your last dispenser upside-down pointing toward the ground instead of placing another solid block on the top. To do this, you'll want to crouch, aim at the upper side of the top wooden plank, and place the dispenser.
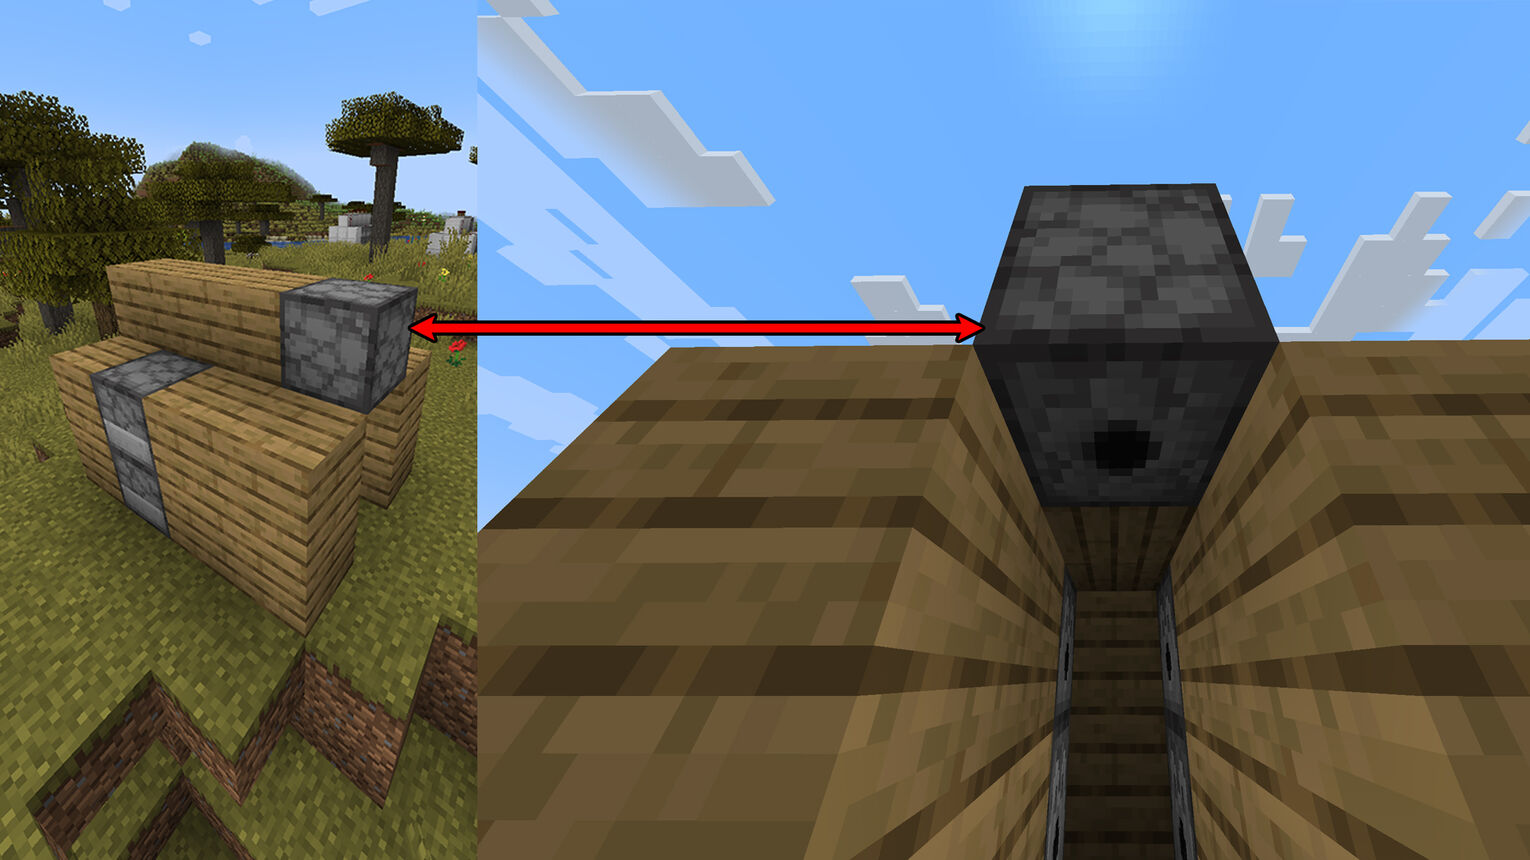
This is the dispenser that will shoot out the TNT blocks far and wide. So make sure you place it correctly pointing downward so it won't explode anything unnecessary!
Place the Fence and Pressure Underneath Upside-Down Dispenser
Now you'll want to break the ground block that is located underneath the upside-down dispenser you just placed. Then add a fence and a pressure plate on top of the fence.
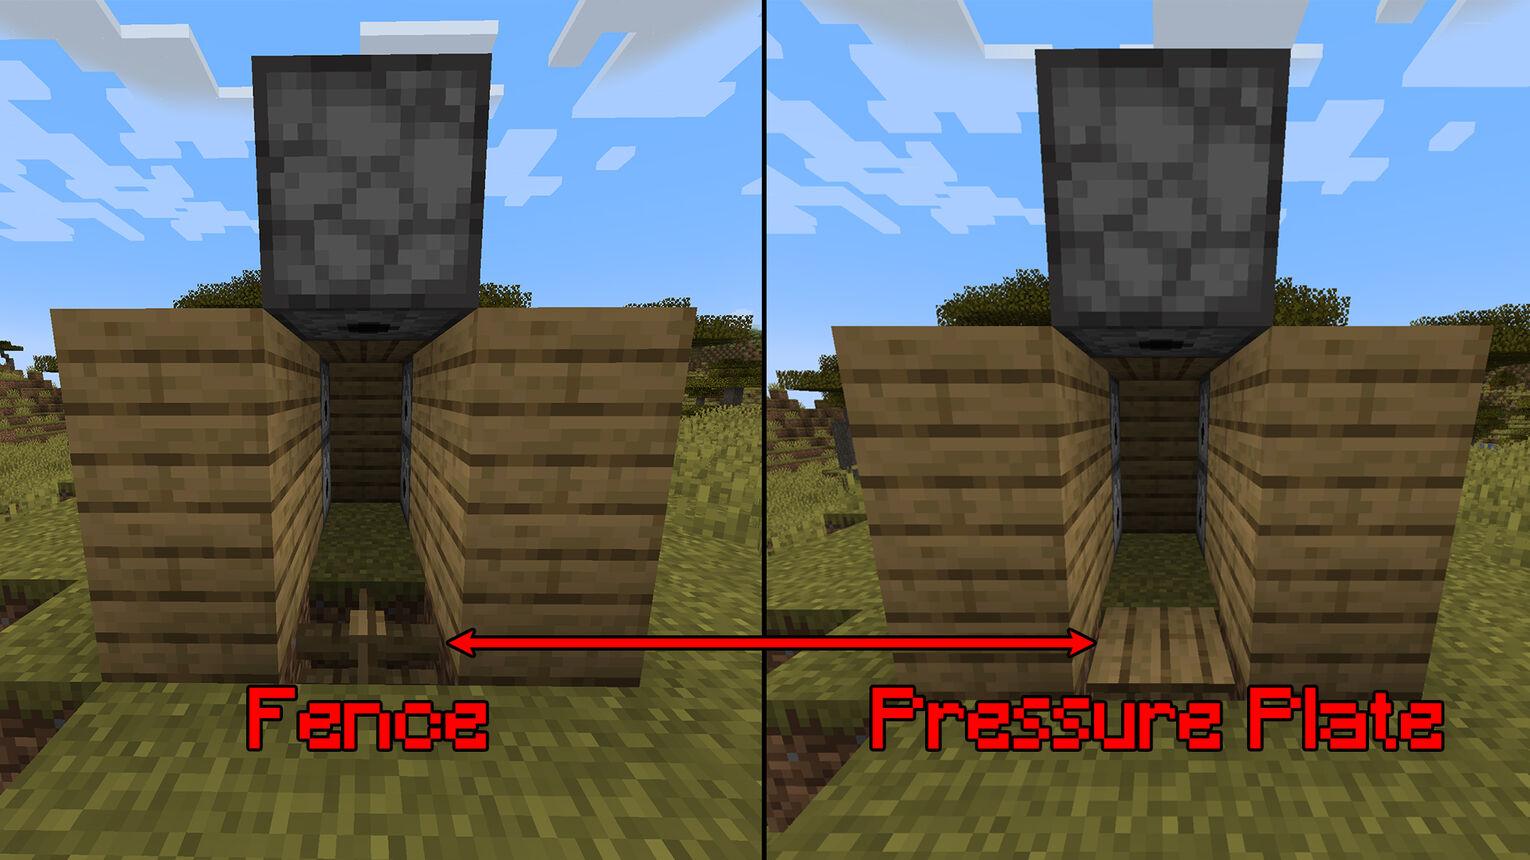
This pressure plate will serve as a landing point for the TNT blocks for the dispenser above it. It will block the way to enter the insides of the TNT cannon, but you can get in anyway by pressing Shift to crouch and enter! But after this point, you won't need to enter the TNT cannon as you'll finish building it only from the outside.
Place Redstone Dust and Redstone Repeaters on Top of the Build
Next up you'll want to go on top of the TNT cannon and surround the right and left side with Redstone dust. This means you'll have to place the Redstone dust on top of the dispensers as well. And as we saw previously, you can place Redstone dust on top of the dispensers by Shift crouching!
Then on the very top, you'll want to place the Redstone repeaters facing toward the upside-down dispenser. Make sure the Redstone repeaters connect with the Redstone dust at the other end of the TNT cannon. And finally, right-click all the repeaters 3 times.
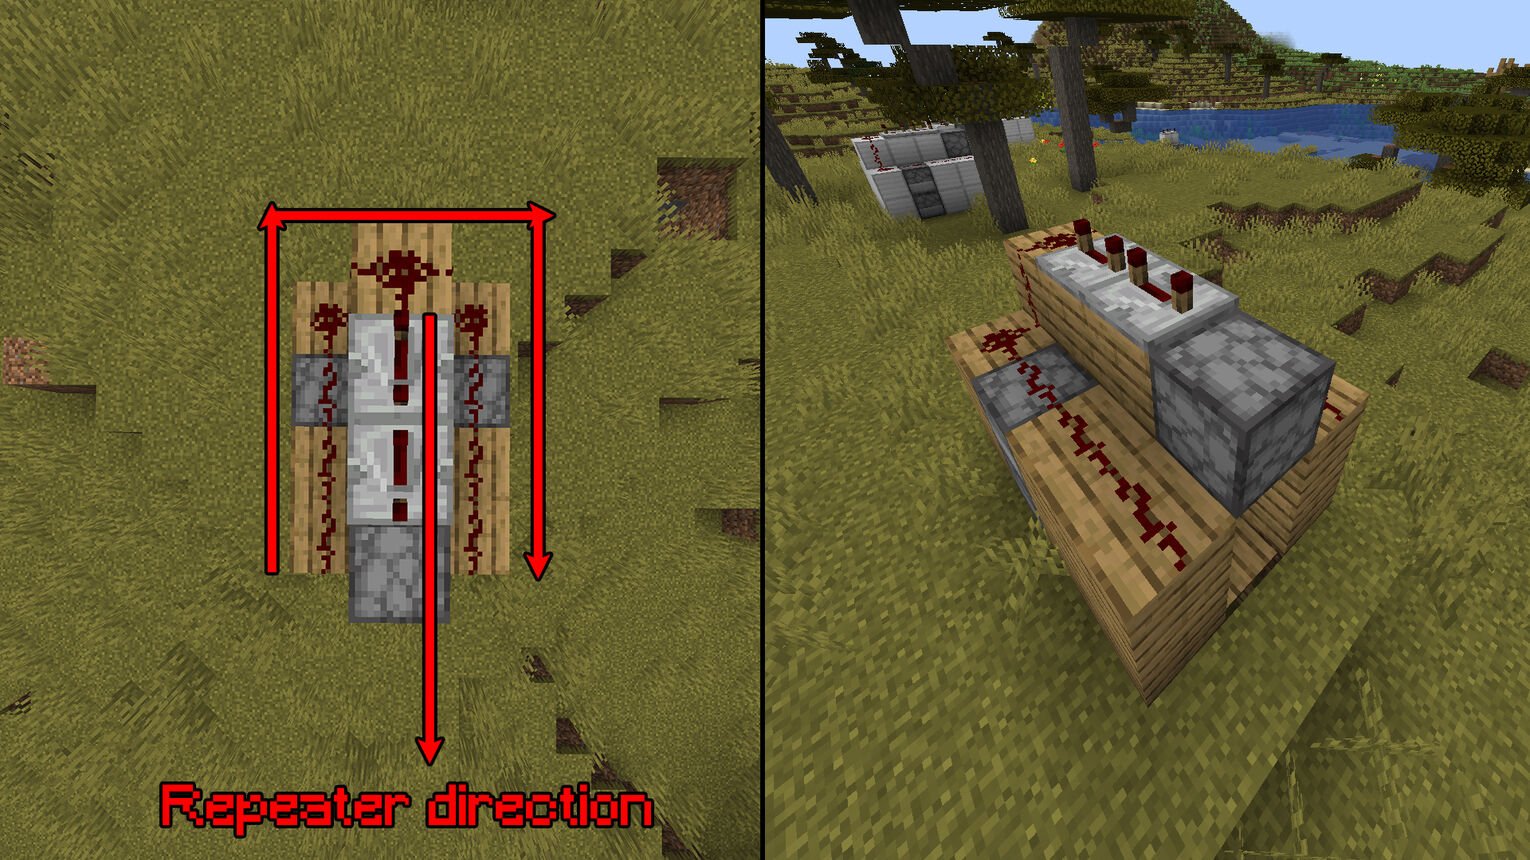
Placing this Redstone wire and repeaters connecting all the dispensers is the last complicating thing you'll have to do regarding this TNT cannon. Don't forget to set the Redstone repeaters to 3 ticks as well, because they'll dictate when the TNT block will shoot out!
Add the Button and Place the Bucket of Water in the TNT Cannon
You can use a Redstone torch or even a lever, but the best way to go about activating the TNT cannon is by using a button . So place a buttonon one side of the TNT cannon, and press it at the end to shoot out TNT blocks.
After you place the button , fill in the insides of the TNT cannon with the water bucket. This bucket of water will make sure your whole TNT cannon doesn't explode to a crisp!
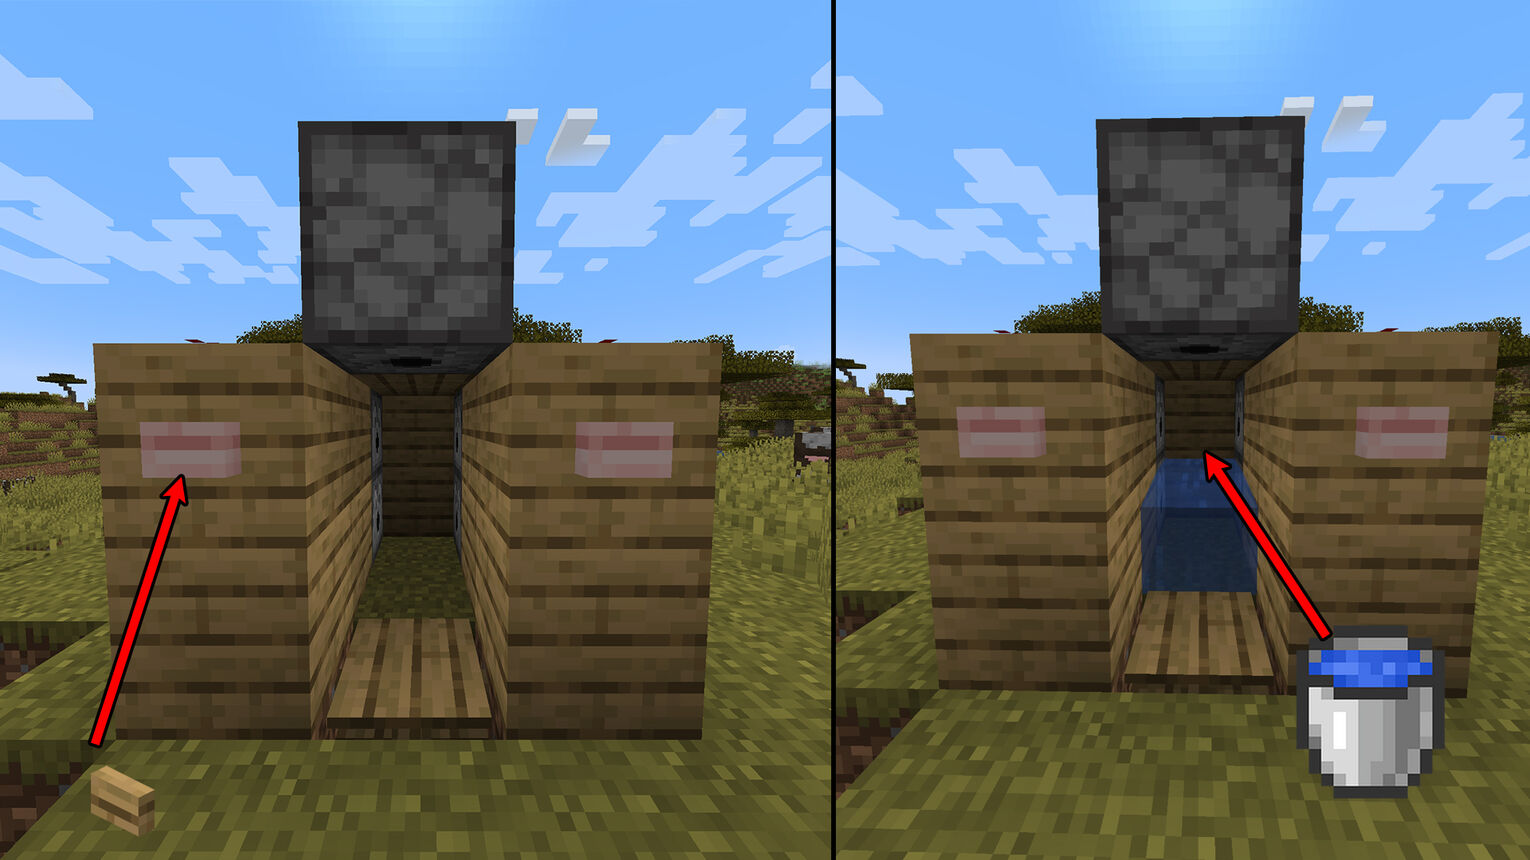
Now you're all finished building this sniper TNT cannon in Minecraft. All that's left to do is load it and fire it up with the final block - the TNT!
Fill in the Dispensers with TNT Blocks
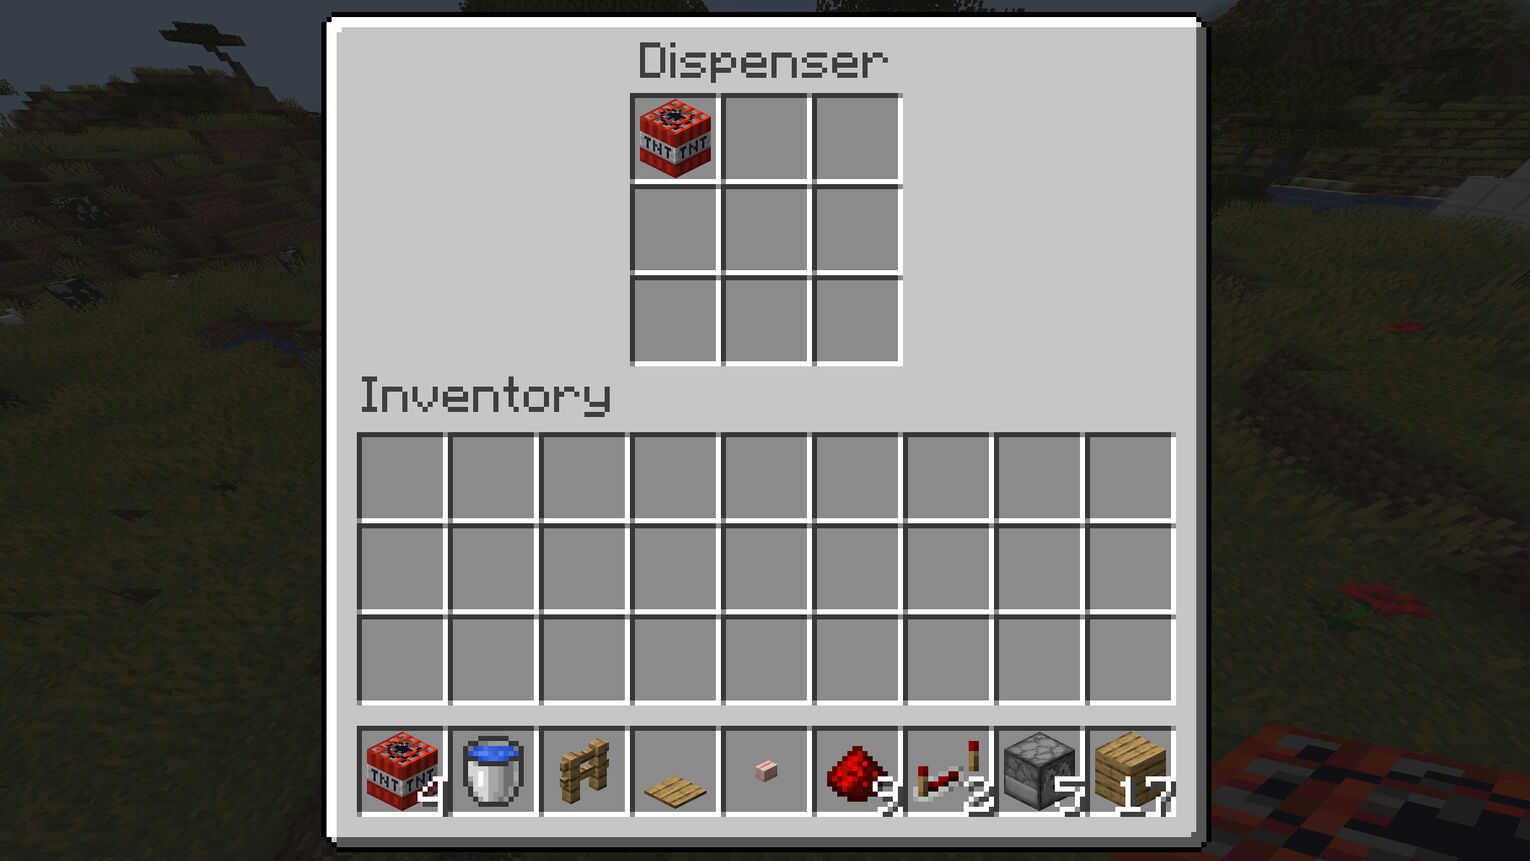
The last step to completing this TNT cannon in Minecraft is to place TNT blocks inside the dispensers. You can open the dispensers by right-clicking them.
At minimum, you'll have to place 1 TNT block per dispenser to make 1 shot. So for this cannon, you'll need 5 TNT blocks per 1 shot. You can add however many TNT blocks you want though depending on how many shots you'll need to destroy your friends' base!
Now you can press the buttonto activate the TNT cannon. If you followed the guide thoroughly, everything should go smoothly.


.svg)


![How to Make a Sliding Door in Minecraft [Redstone Guide]](https://theglobalgaming.com/assets/images/_generated/thumbnails/2997607/how-to-make-a-sliding-door-minecraft_03b5a9d7fb07984fa16e839d57c21b54.jpeg)
![Best HUD Mods in Minecraft [Top 10 List]](https://theglobalgaming.com/assets/images/_generated/thumbnails/4077159/best-hud-mods-minecraft_03b5a9d7fb07984fa16e839d57c21b54.jpeg)
![How to Join a LAN World in Minecraft [Java & Bedrock]](https://theglobalgaming.com/assets/images/_generated/thumbnails/4077161/how-to-join-a-lan-world-minecraft_03b5a9d7fb07984fa16e839d57c21b54.jpeg)
