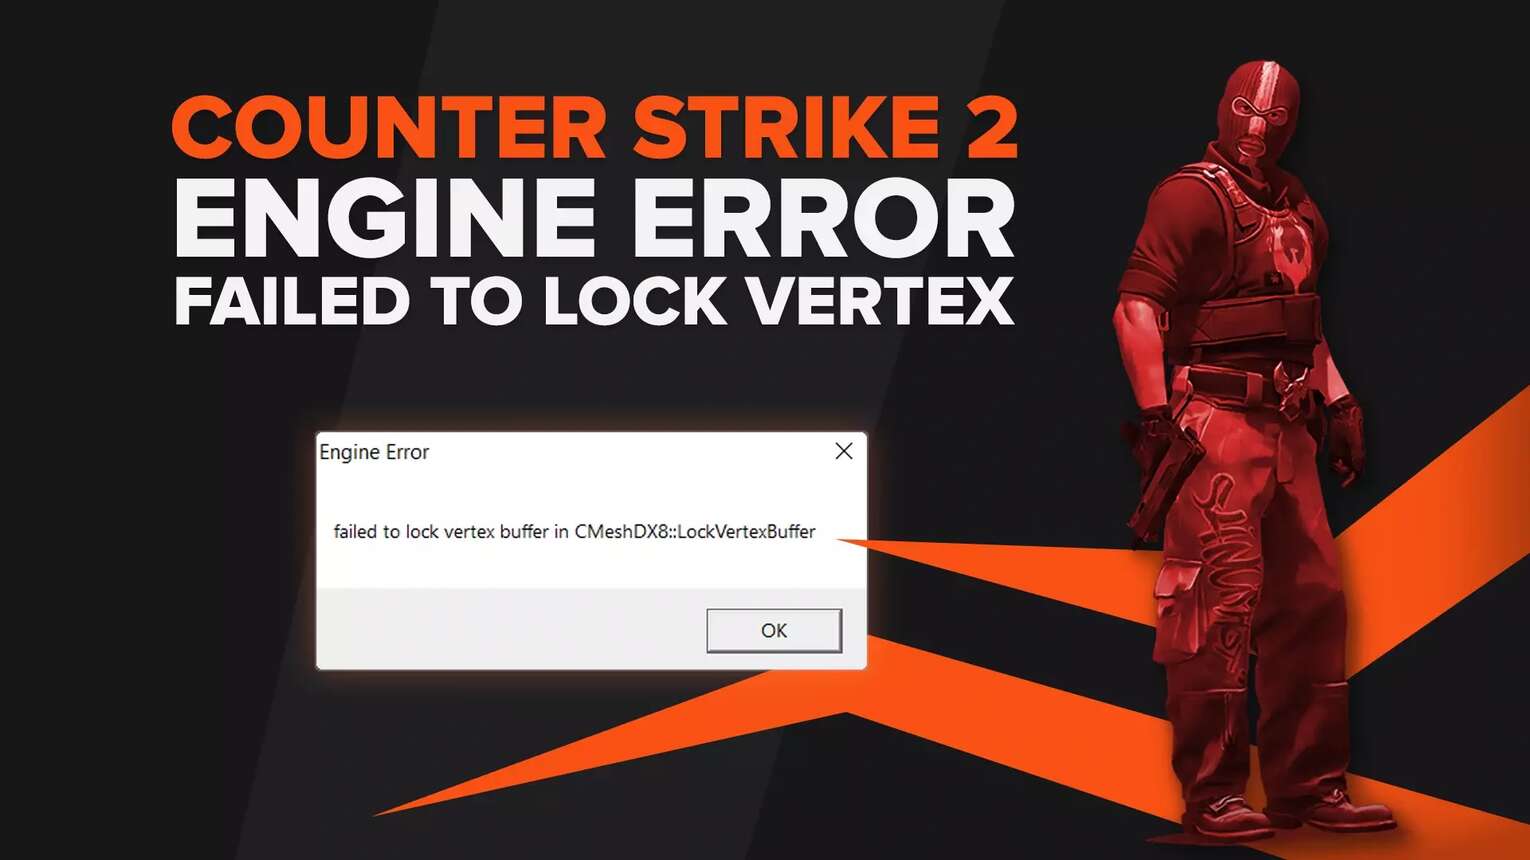
Verify Integrity of Game Files
The first solution will fix the issue if your game files are corrupted. To verify the integrity of your CS2 (CSGO) game files, follow the instructions below:
Head over to your Steam Library in your Steam Client
Right-click CS2 (CSGO) and click on Properties
Go to the Installed Files section
Click on the button that says Verify integrity of game files
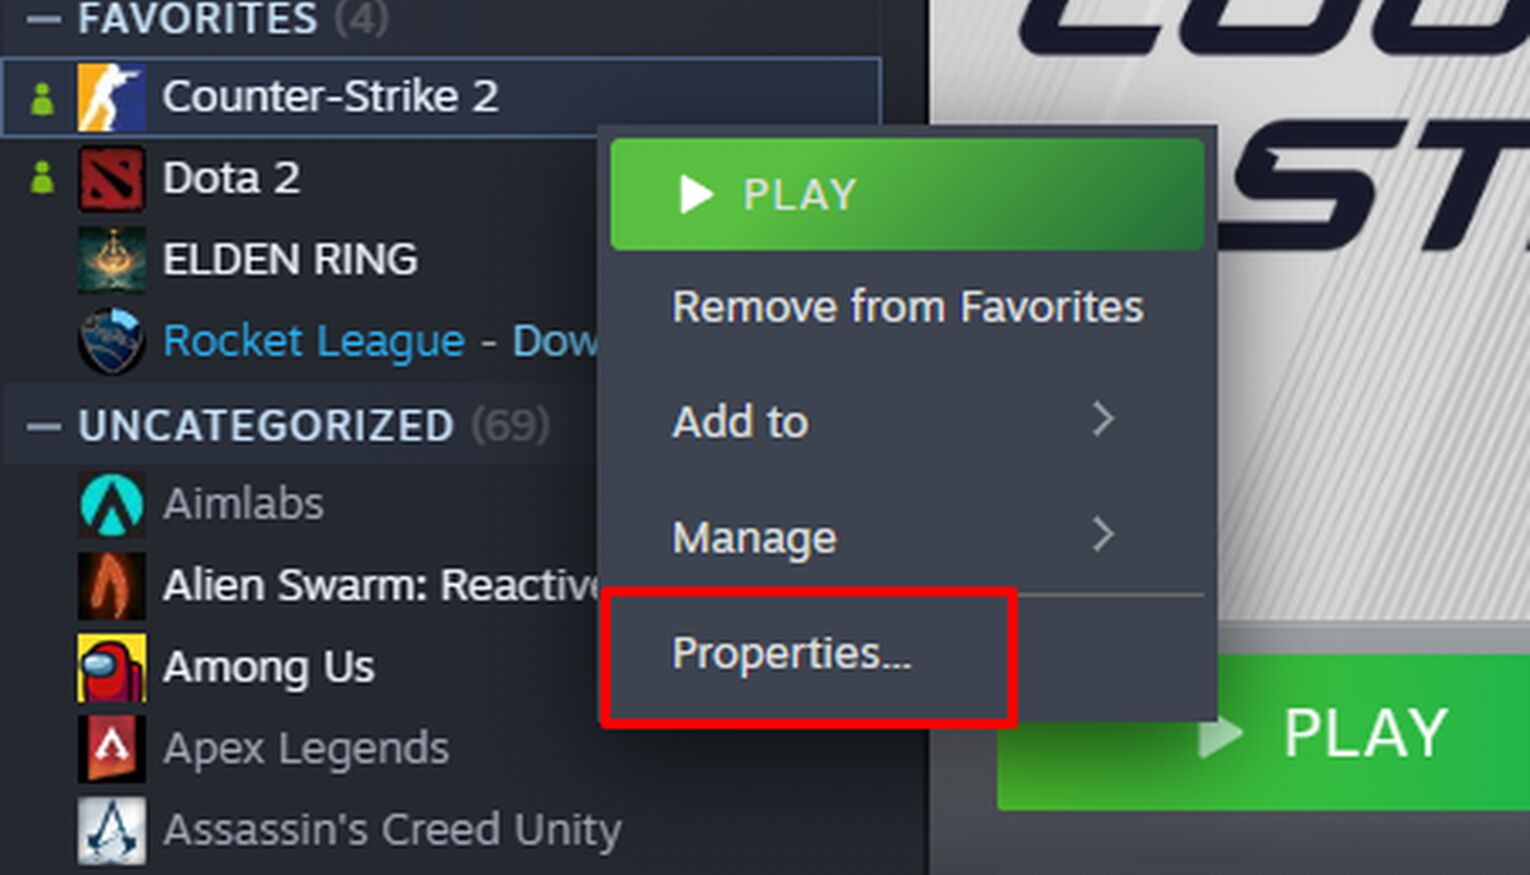
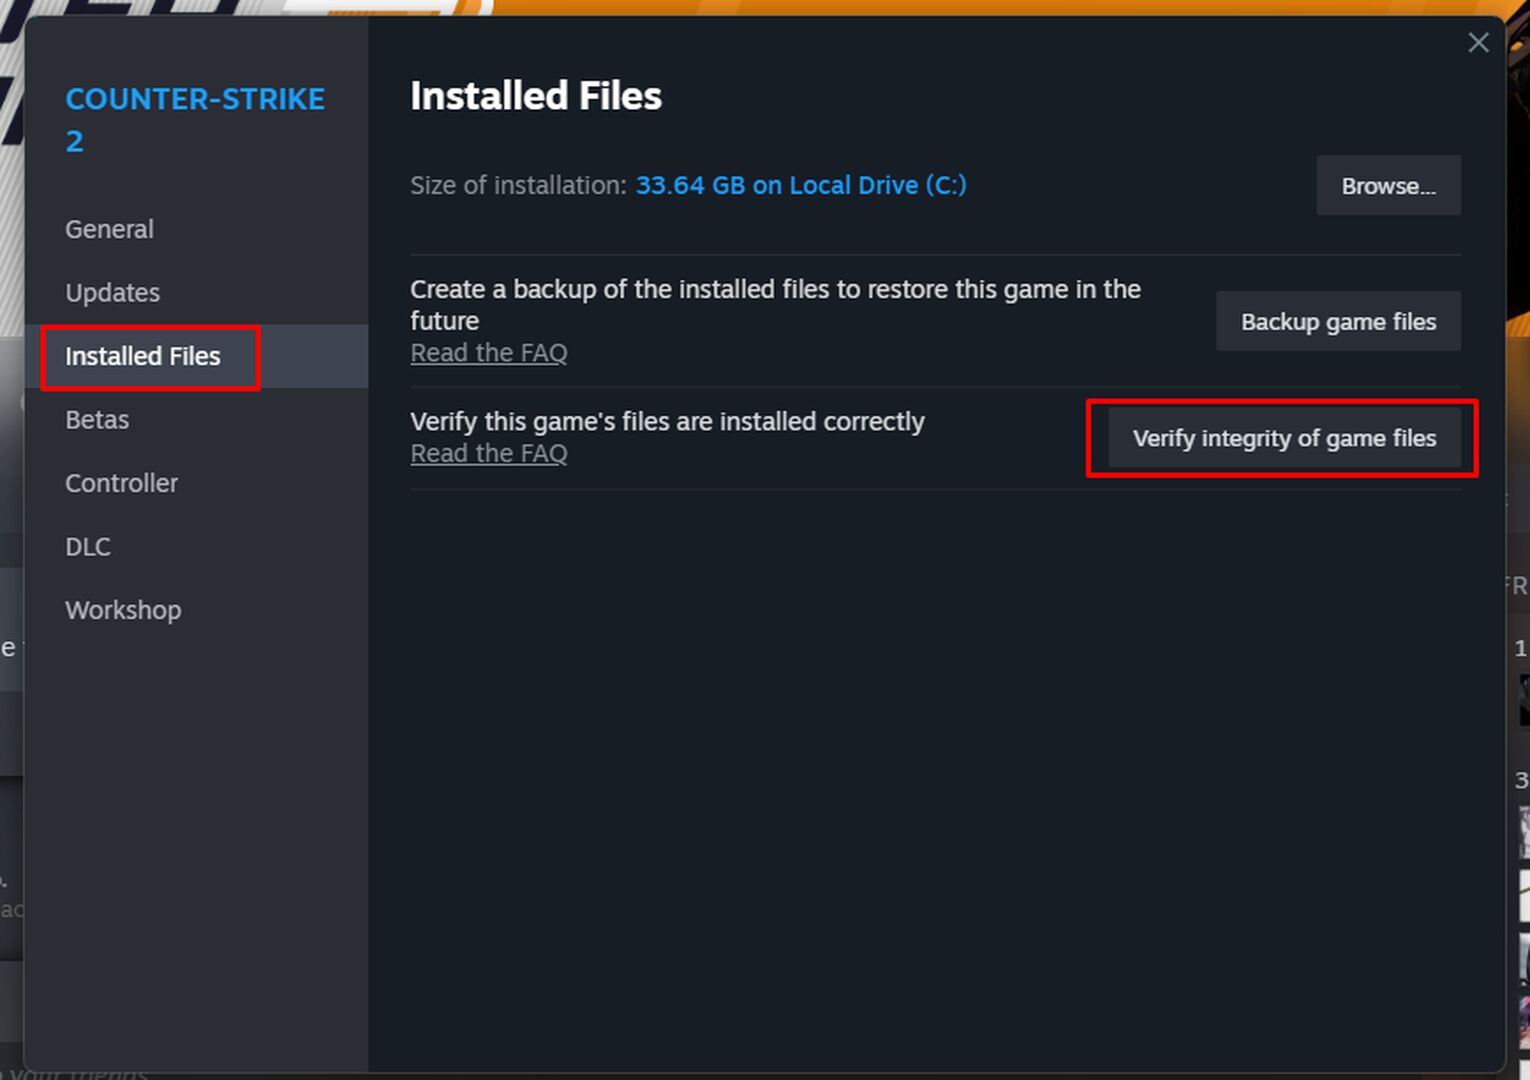
Steam will automatically check for any corrupted game files and fix them if there are any. This process can take 2-10 minutes, so wait patiently. Once completed, try playing CS2 (CSGO) to see if the issue is resolved. This solution can also fix CS2 (CSGO) not launching.
Lowering Your Video Settings
One of the most common reasons players get the Failed To Lock Vertex Buffer In Cmeshdx8 Lockvertexbuffer error is their gaming rig being too weak to run CS2 (CSGO) properly.
If you feel like your setup does not meet the system requirements to play CS2 (CSGO), consider turning down your video graphics settings to the lowest possible options.
To lower your video settings, follow the steps below:
Launch CS2 (CSGO)
Click on the Settings menu on the top left
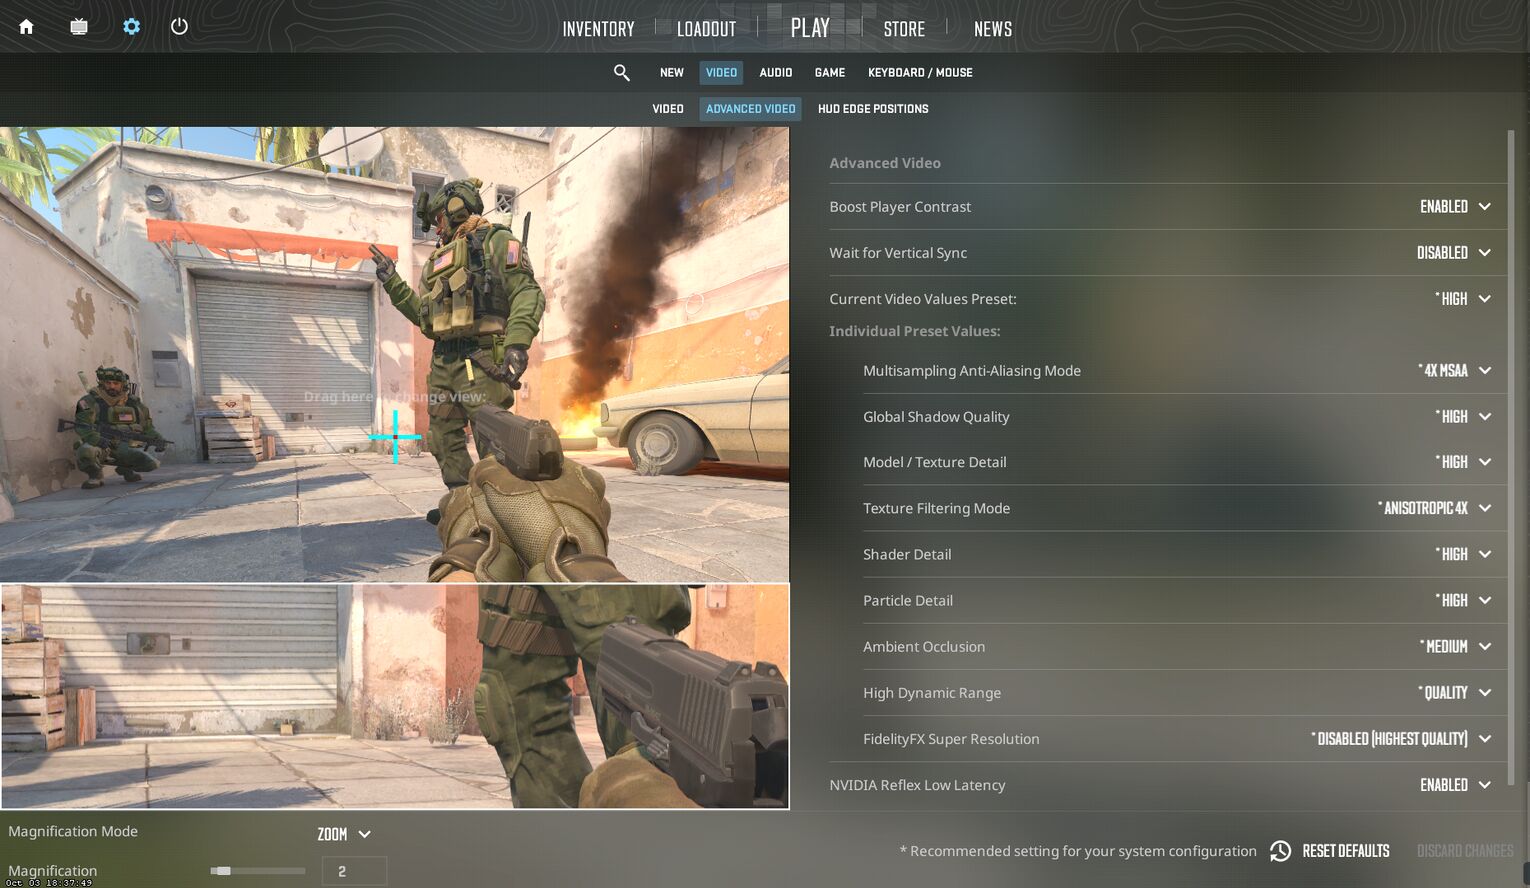
Go to Video Settings and click on Advanced Video
Make sure every setting is set to the lowest option
Toning down video settings will also help you get more frames per second with additional CS2 (CSGO) performance commands.
Update Your Graphics Card Driver
Your graphics card is a crucial hardware component to how well your setup can run Counter Strike 2, as playing CS2 (CSGO) without a graphics card is not ideal. To ensure you are playing CS2 (CSGO) on maximum performance capability, you must keep your graphics card drivers up to date.
We highly recommend checking your graphics card driver by following the steps below:
Press your Windows button and search for Device Manager
Make your way to Display Adapters and press the drop-down menu
The name of your graphics card should be visible
Right-click on your graphics card and press Update Driver
Finally, click on Search automatically for drivers
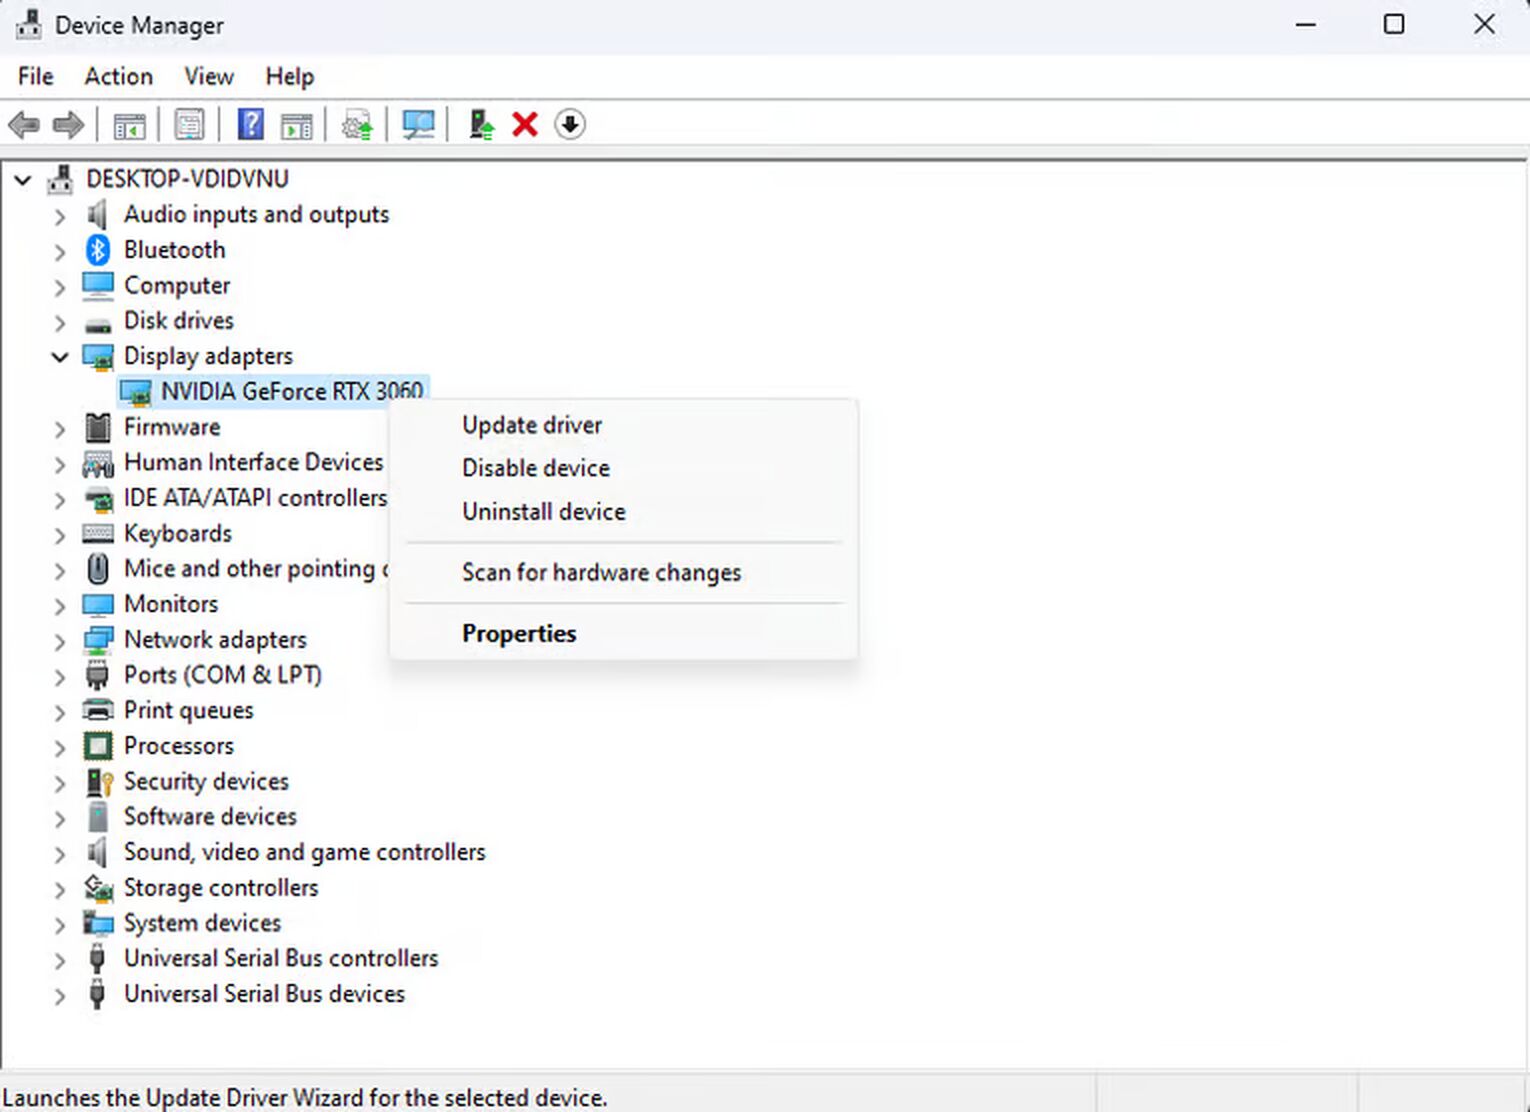
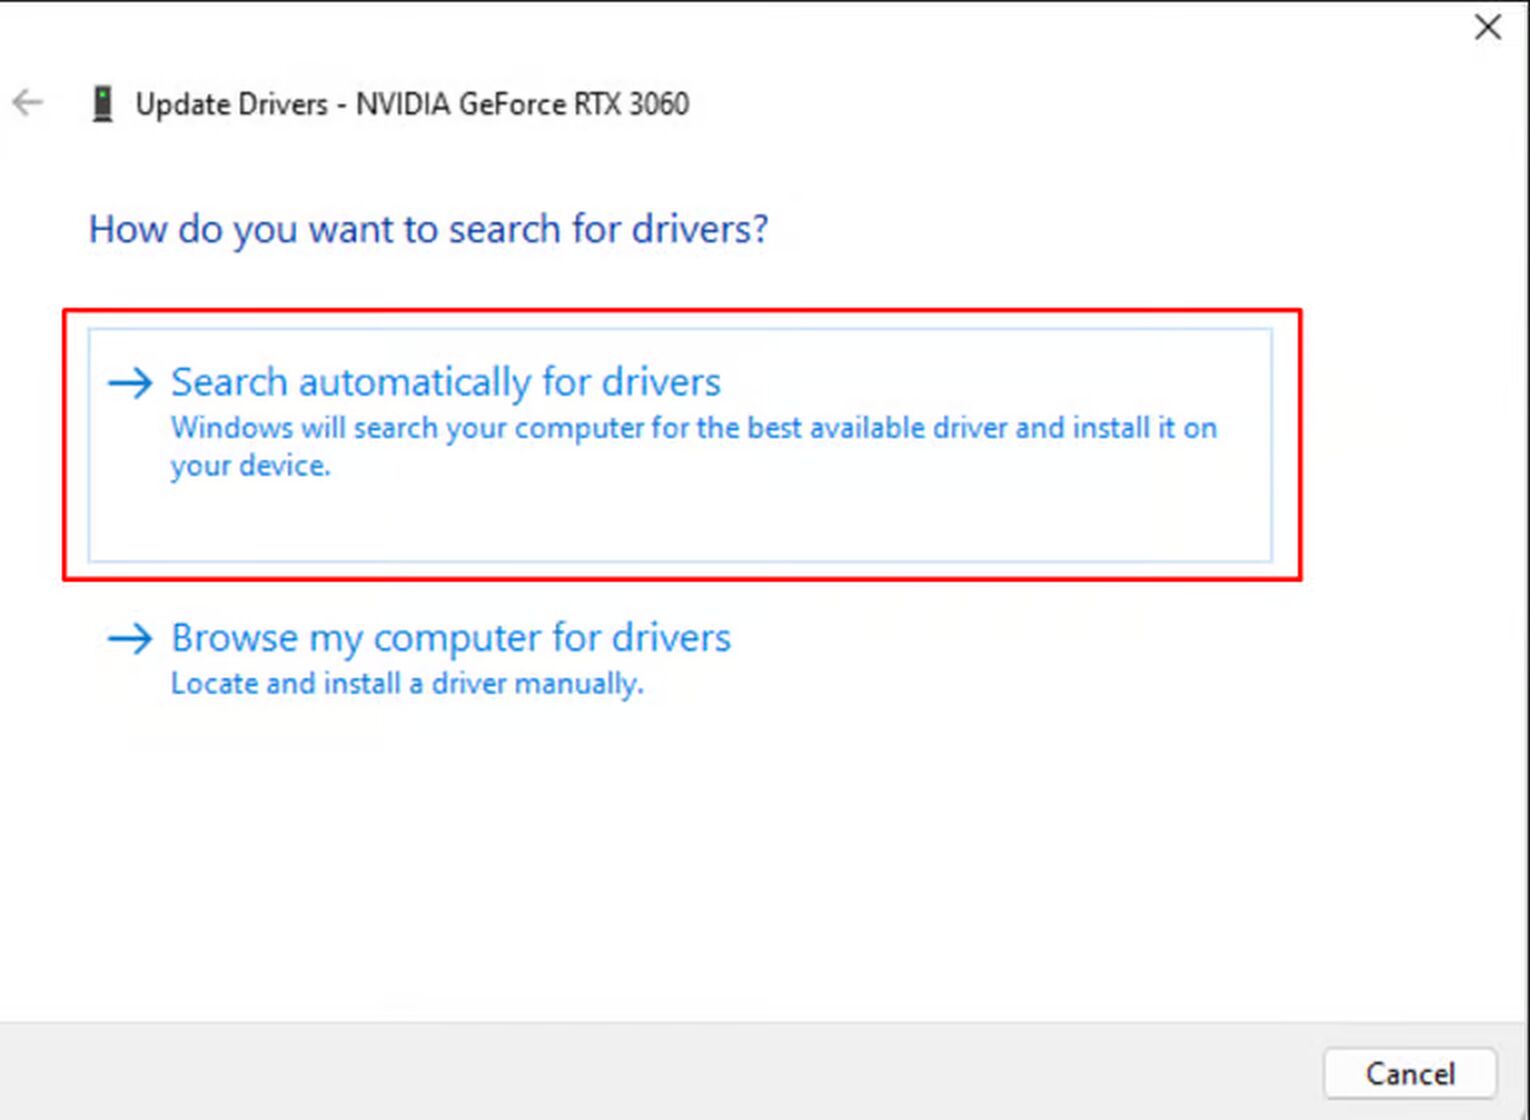
If your graphics card is outdated, the system will automatically search for the updated version, and you can follow the on-screen instructions to install it.
If the system says your drivers are up-to-date, your graphics card driver isn’t causing the issue, but maybe the graphics card itself.
Disable Overclocking
For those unfamiliar, overclocking is when you run your computer’s processor at a higher speed than it can run. You can imagine what happens if you force your processor to exceed its capabilities. So, let’s make sure you have overclocking disabled.
Here’s how you make sure no overclocking happens:
Press your Windows key, type Power Option, and hit Enter
Click Change advanced power settings
Look for Processor power management, and click on the + button next to it
You will notice that the minimum and maximum processor state is set to 100% by default
Change both of them to 99%
Finally, click Apply
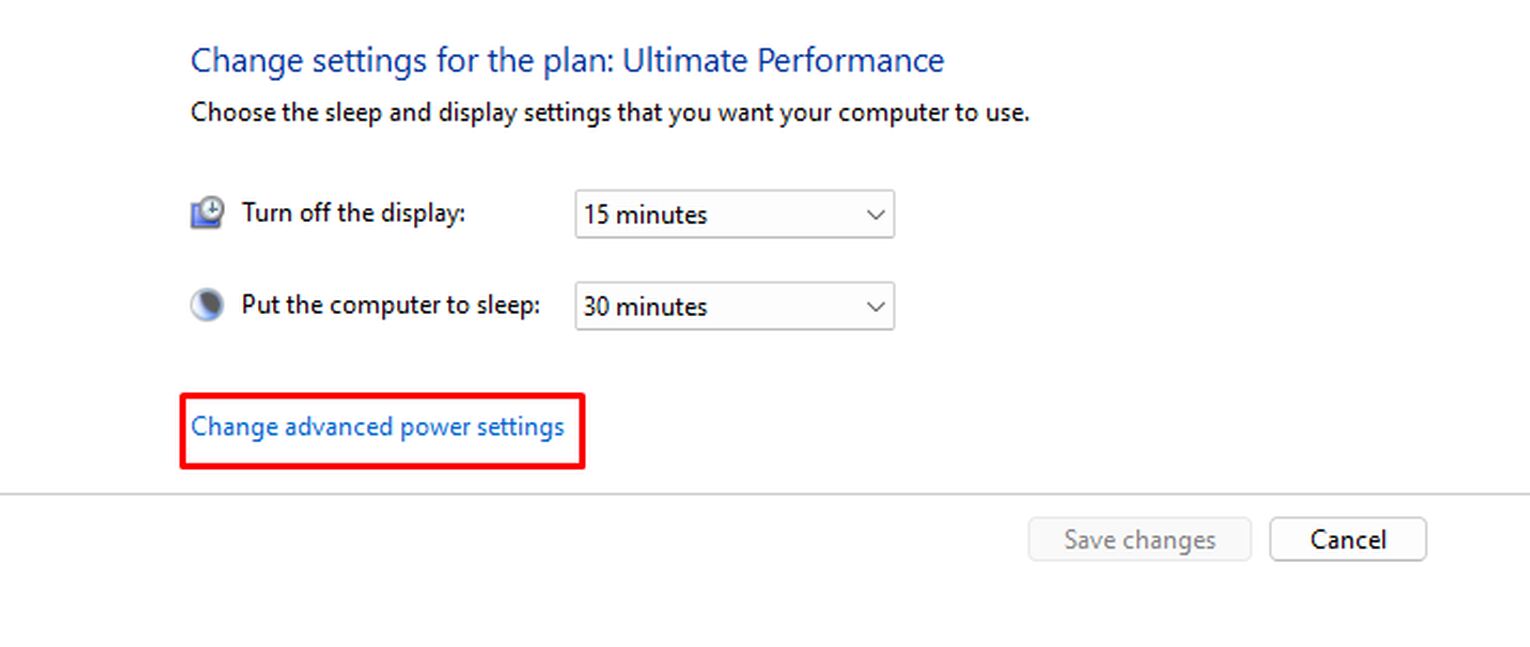
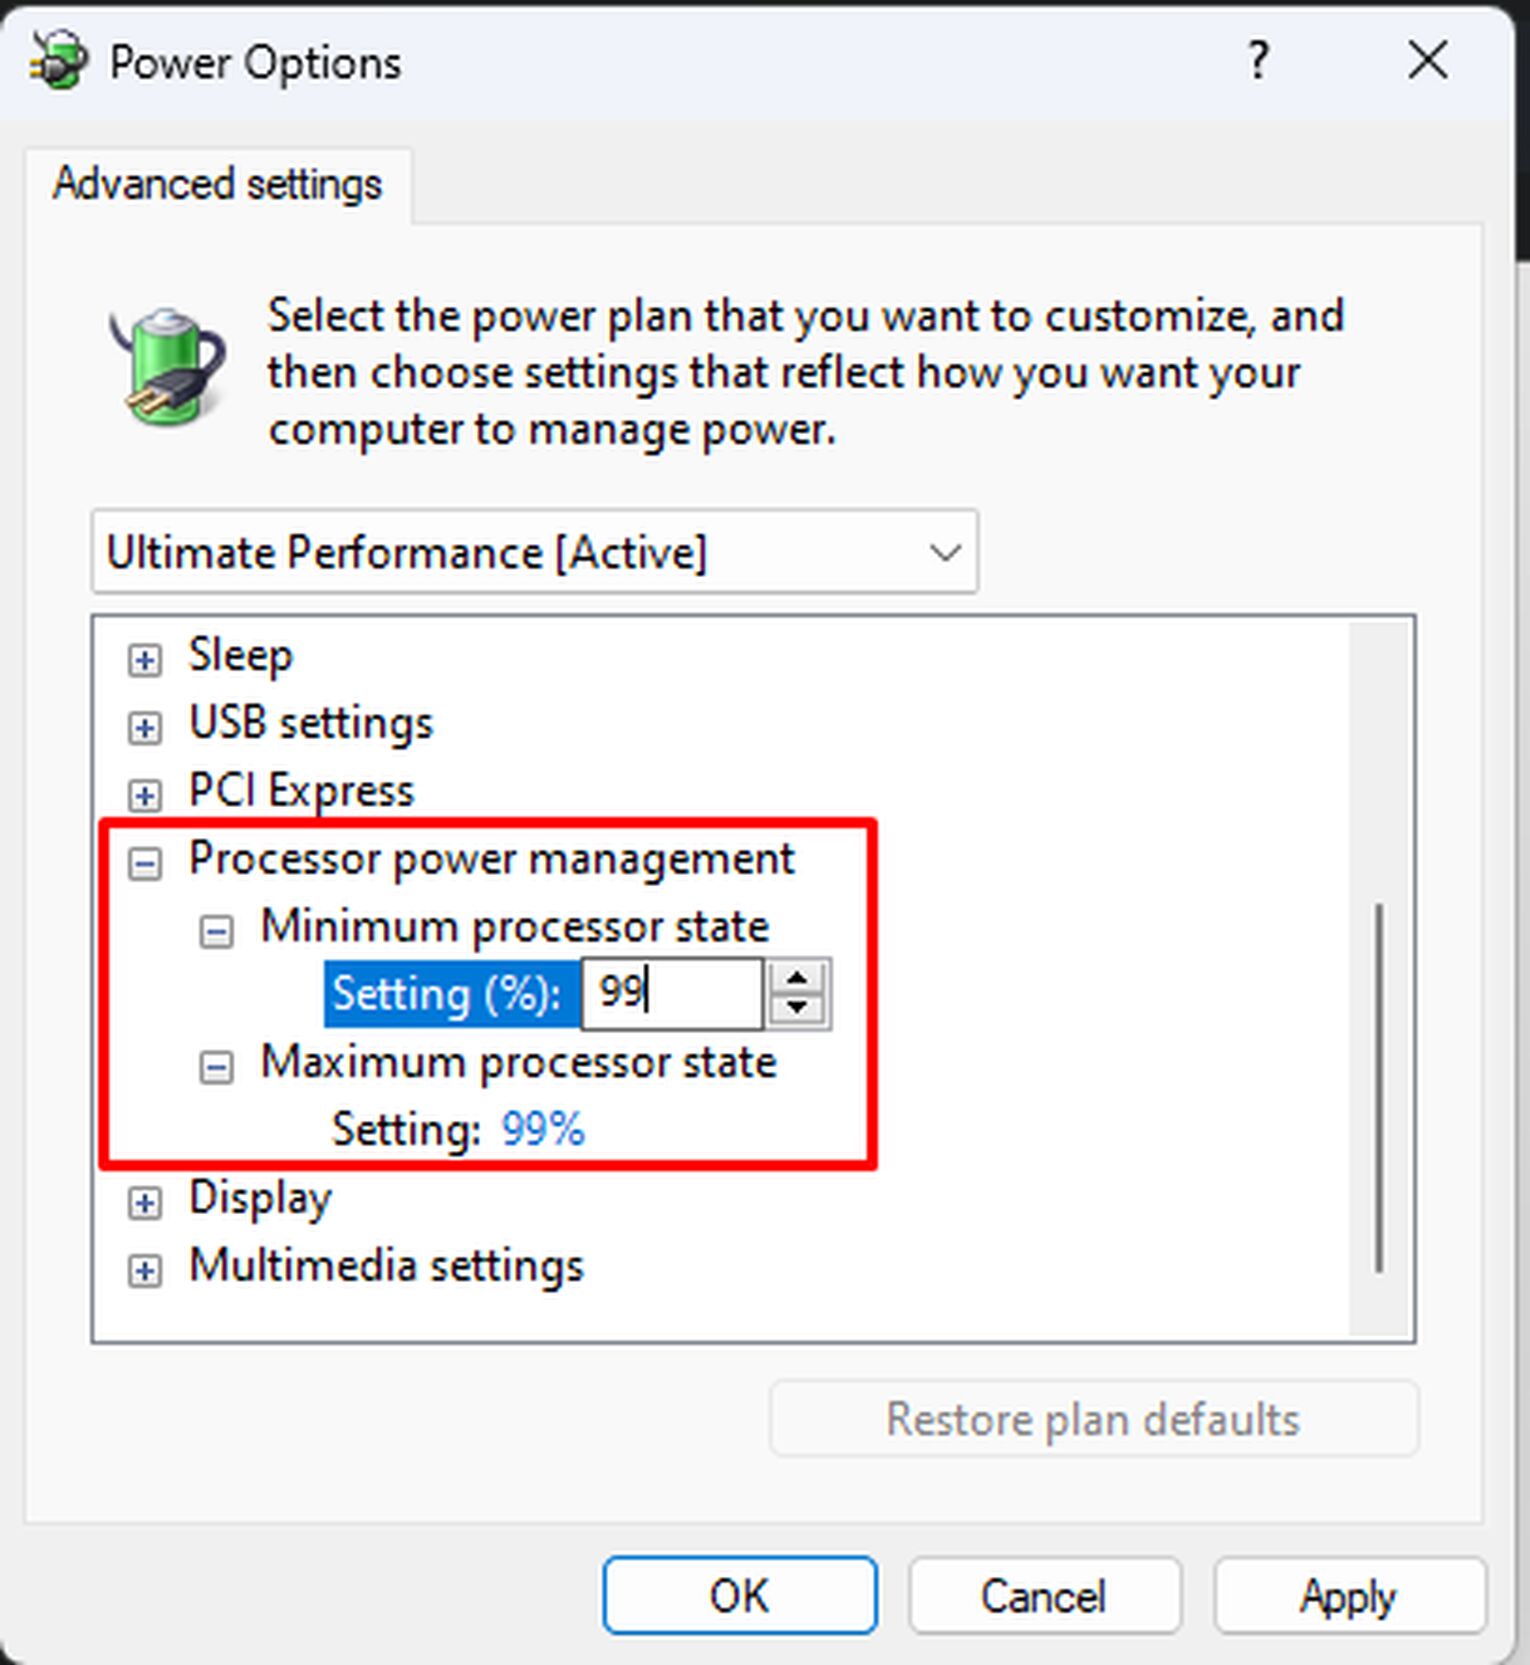
By doing this, your processor will run at 99%, ensuring it does not go overboard or cause any issues. Preventing overclocking is also a good solution to CS2 (CSGO) black screen issues.
Check And Update DirectX
DirectX is an essential set of components in your computer that will allow games to work directly with your audio and video hardware. It is critical that your DirectX is up-to-date and running at full capacity.
Checking DirectX Version
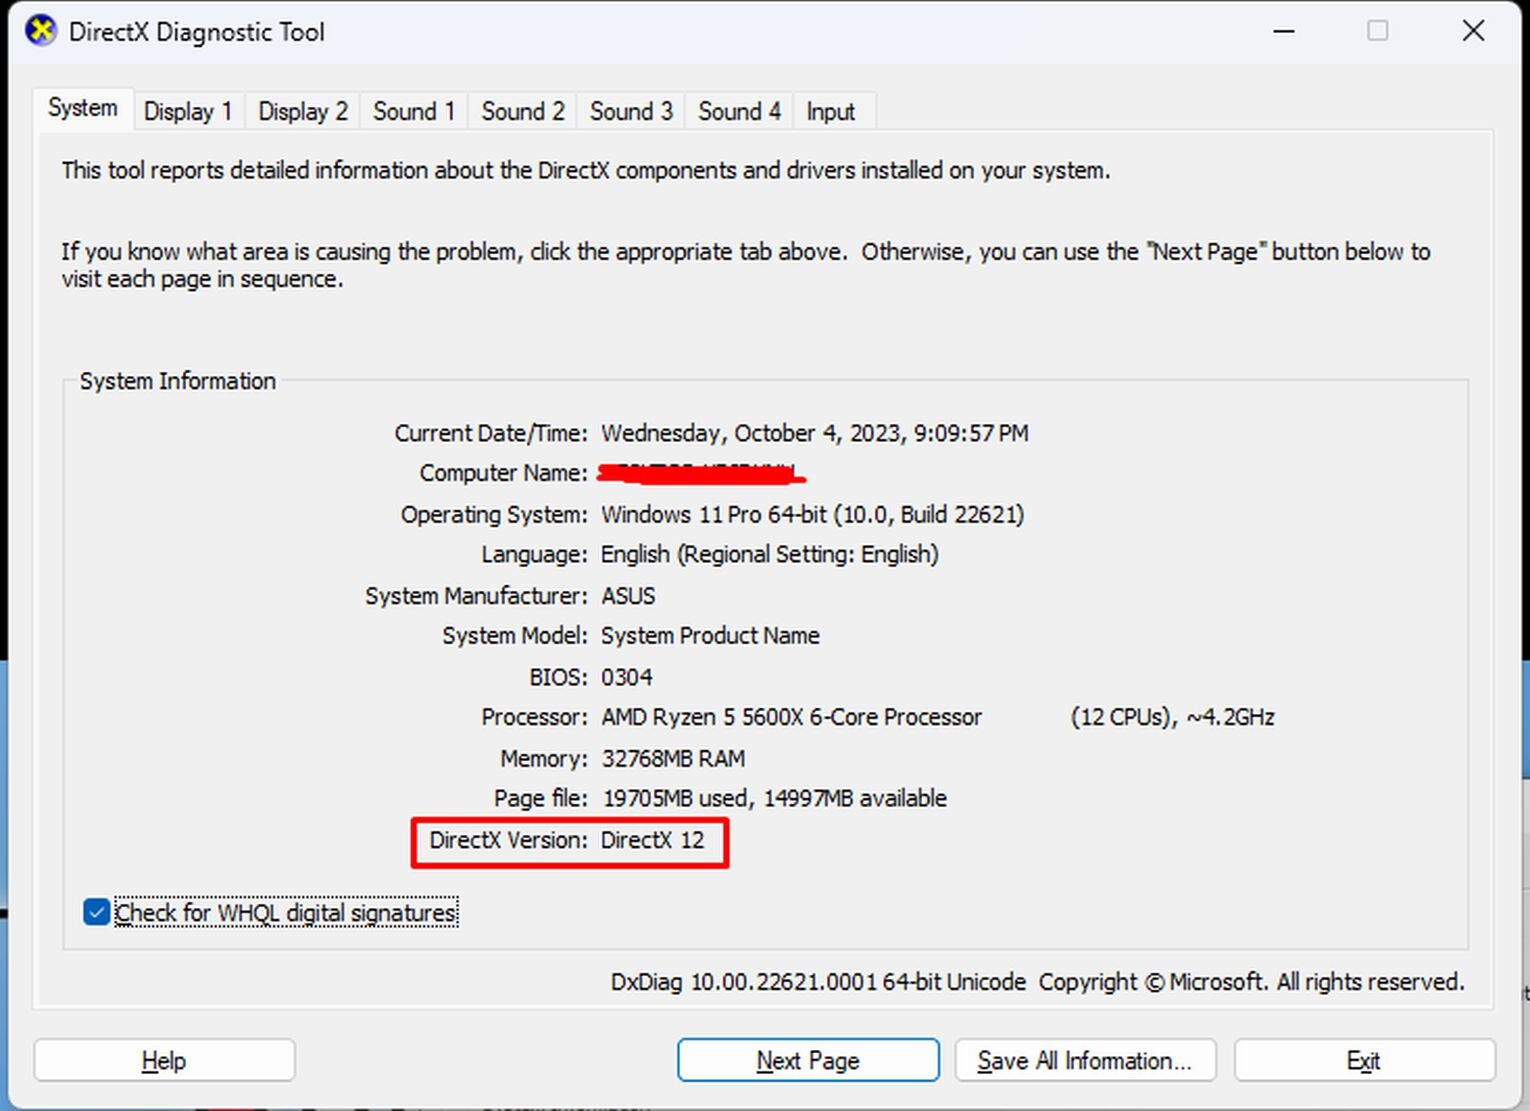
Hit your Windows key, type dxdiag and hit Enter
Doing this will open up the DirectX Diagnostic Tool
At the bottom of System Information, your DirectX version should be visible
If you are on the DirectX 12 version, you’re up to date. If you aren’t, you will need to update it.
Getting The Latest DirectX Version
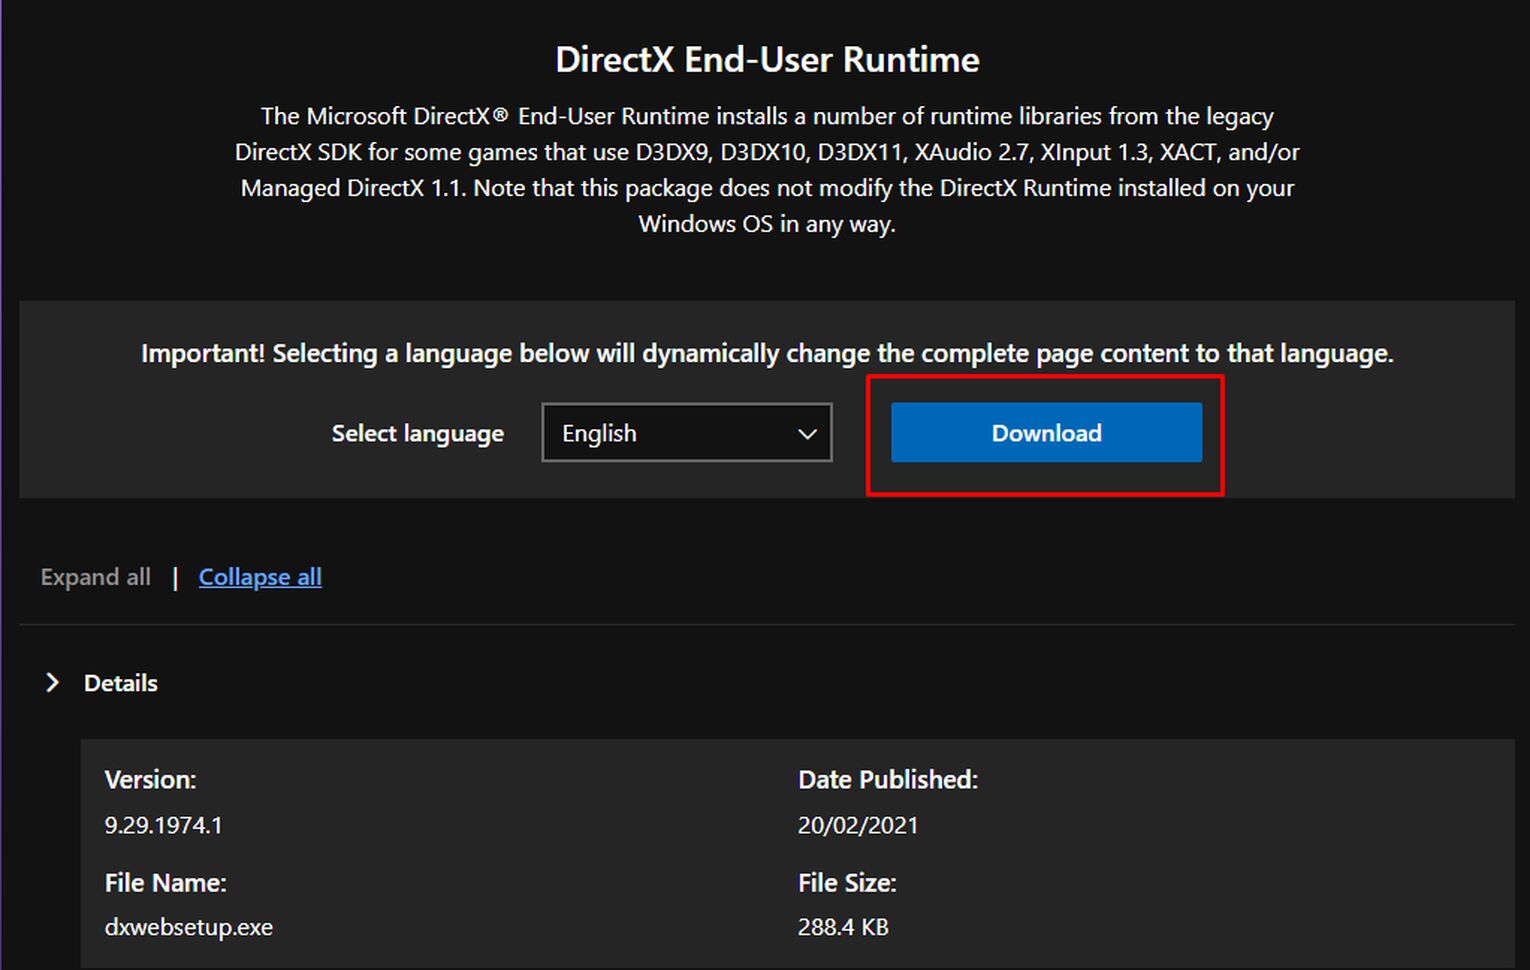
You can download the latest DirectX version from the official Microsoft website.
Click on this link that will lead you to Microsoft’s website
Once on the website, click on the Download button
The latest DirectX version will begin downloading
Follow the on-screen instructions to complete the installation


.svg)



![6 Best CS2 Case Opening Sites [Tested]](https://theglobalgaming.com/assets/images/_generated/thumbnails/60622/61a89b86b5c485795ebc8586_Best-CSGO-Case-Opening-Sites_03b5a9d7fb07984fa16e839d57c21b54.jpeg)
![6 Best CS2 Case Battle Sites [All Tested]](https://theglobalgaming.com/assets/images/_generated/thumbnails/2751109/best-case-battle-sites-2_03b5a9d7fb07984fa16e839d57c21b54.jpeg)