Your PC space is essential and managing it properly will make your computer run much smoother. At times it can even increase FPS in games! But players often make mistakes by downloading games such as Valorant to the wrong drives and folders.
If you want to change the drive and folder for Valorant, there is a way. So here we’ll check out how to change directory drive Valorant!
How to Move Valorant to Another Folder and Drive
To move Valorant to another drive and folder may prove difficult. Some folder locations for Valorant and Riot Client alongside are embedded in files, so you’ll have to change some values within the game files manually. Though you won’t be able to move the Riot Vanguard because of its specifications.
Note that the Valorant and Riot Client are 2 separate programs, so it’s your choice if you want to only move Valorant to another drive or move Valorant alongside its best skins and Riot Client altogether.
Open Valorant Location and Move to Another Drive
Firstly you’ll open some essential Valorant files that will show you the exact location of the game. You’ll also have to change some of these files, so keep track of them and don’t close them off. Without further ado, here’s how you can move Valorant to another drive:
- Press Windows Key + R to open the Run dialog box
- Type “%programdata%” in the Run dialog box and press Enter
- Find the Riot Games folder and open it
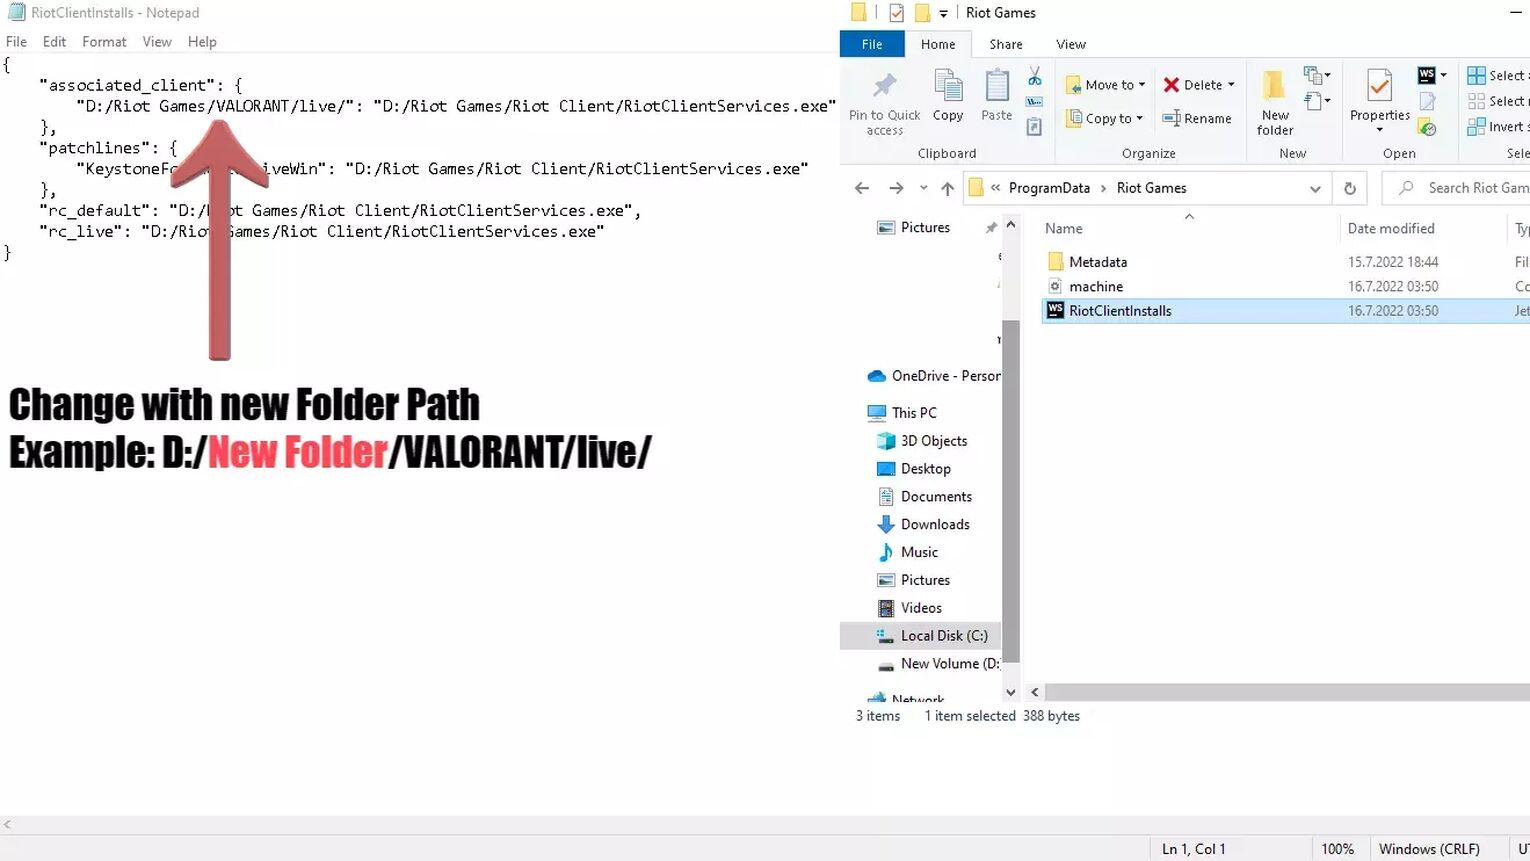
- Open the RiotClientInstalls.json file with Notepad
- On the top, there’s a section called “associated_client”. There are 2 folder paths, the first for Valorant and the second for the Riot Client folders
- Copy the first Valorant folder path, paste it into the Windows Explorer above, and hit Enter (in my case: "D:/Riot Games/VALORANT/live/")
- Go back to 2 folders (click on Riot Games on the Windows Explorer above)
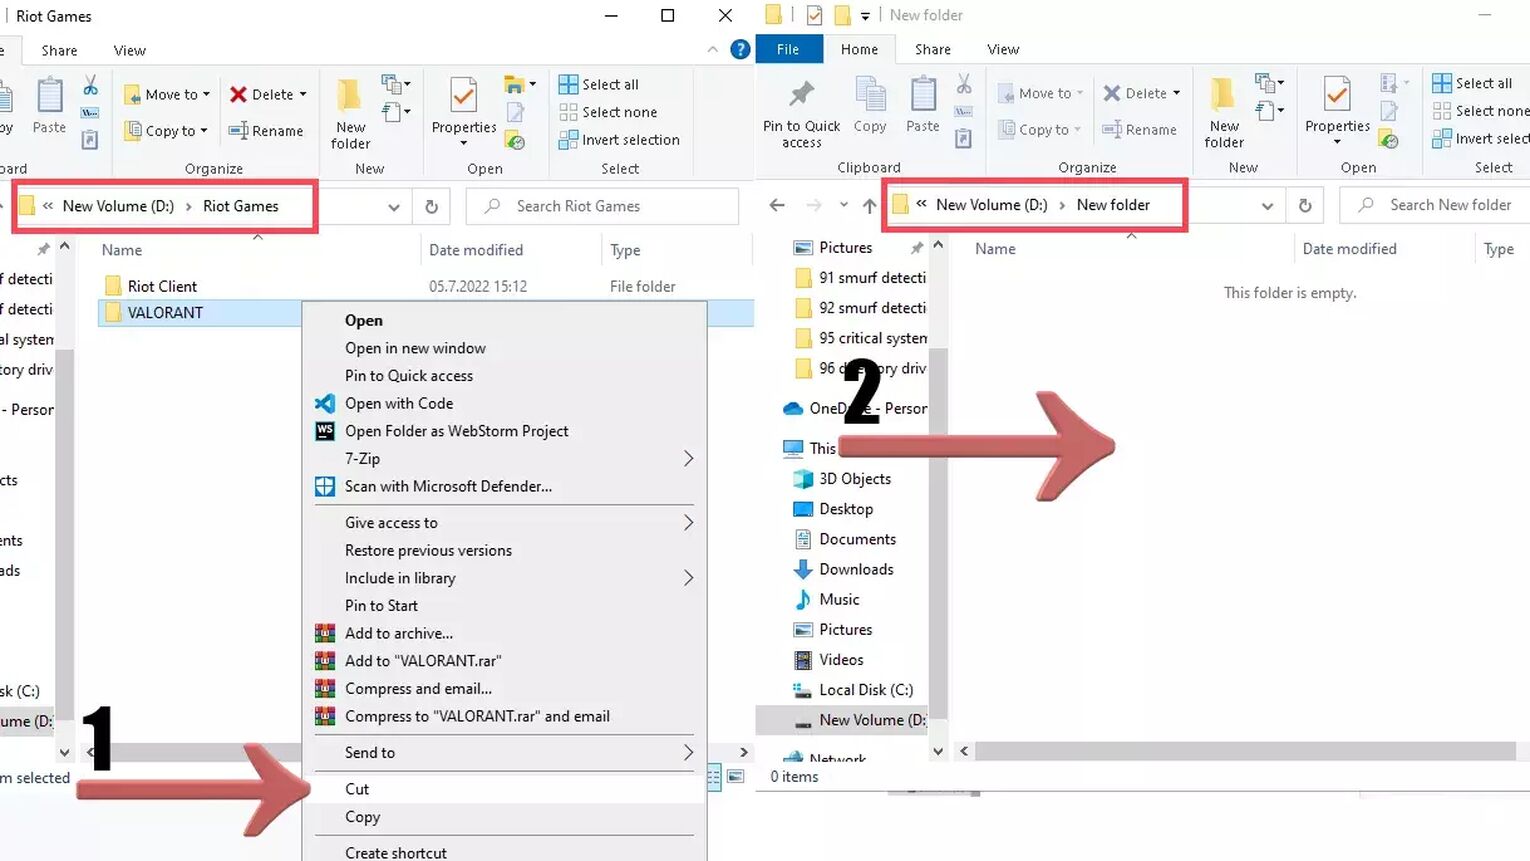
- Right-click the VALORANT folder and select Cut
- Go to the desired drive folder, right-click it and select Paste to move Valorant in the folder inside
- Wait until the entire game has been pasted into the new path

After you’ve successfully moved Valorant to another folder and drive, you’ll have to change the old location with the new one in the “RiotClientInstalls.json” we opened previously. Not only that, but you’ll also have to adapt the new location to other essential Riot Games Valorant files as well.
Change Riot Games Valorant File Settings with New Location
Next, you’ll see what files you’ll have to change with the new Valorant location so it can start running again. Though there is a format with the dashes (‘\’ and ‘/’) you’ll have to take care of within the files, so keep a close eye on them. With that said, here’s what file settings you’ll have to change after you move Valorant to a different drive:
- Open the VALORANT folder, then open the “live” folder
- Copy the new path of the Valorant folder above
- Paste it into the “.json” file we’ve opened before in the first folder path
- Make sure to change all the “\” into “/” in the file folder path (like “D:/New Folder/VALORANT/live/”)

There’s 1 more file you’ll have to change up with the new location. So next you’ll how to change the final file settings with the new Valorant location:
- Copy the new Valorant folder path again
- Open the “programdata” folder again from the Run dialog by pressing Windows Key + R, type “%programdata%” and hit Enter
- Double-click the Riot Games folder, then the Metadata folder
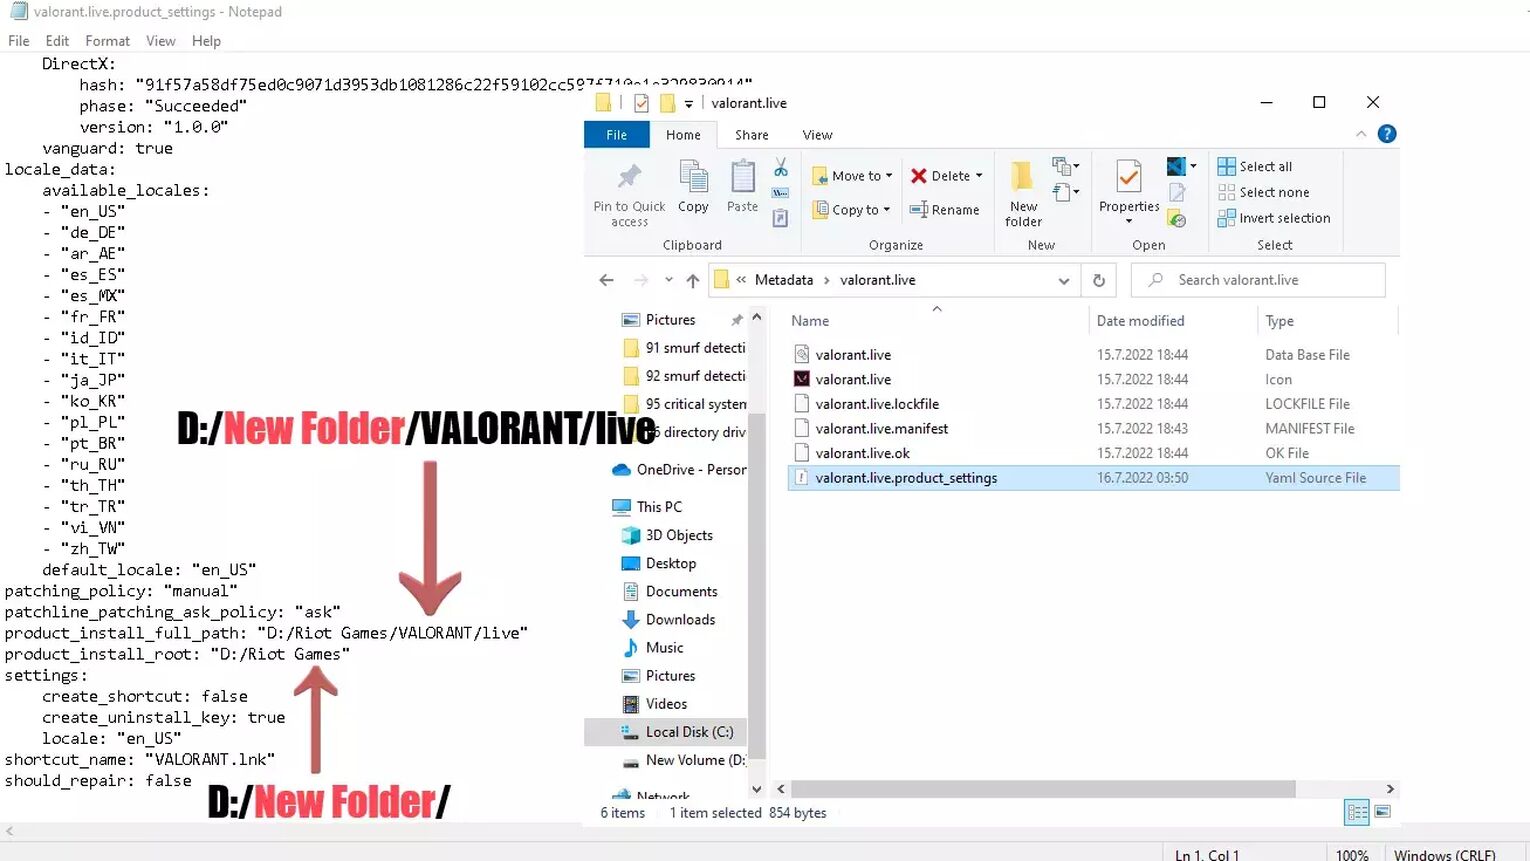
- Open the “valorant.live” folder, then open the Notepad file “valorant.live.product_settings.yaml”
- Scroll down to find “product_install_full_path”
- Delete the previous folder path, and paste the new Valorant game folder path (it should look like:”product_install_full_path: D:/New Folder/VALORANT/live”)
- Again change all the “\” into “/” in the file folder path
- Right below it you should find “product_install_root”
- Here paste in the folder path until the Riot Games/new root folder (it should look like:”product_install_root: D:/New Folder/”)
- Save the file to successfully move Valorant to a new drive

With this you will successfully transfer Valorant to a different drive and folder. There’s also the solution if you uninstall and reinstall Valorant in a different drive folder, but that takes more time and resources. You can move the Riot Client too, but it’s around 200MB and its only use is to start the game, so this is the only thing you’ll need to move Valorant to a different drive!


.svg)


![How Long is an Average Game in Valorant? [All Game Modes]](https://theglobalgaming.com/assets/images/_generated/thumbnails/58539/62c3362f6e880738fc55c46a_average20match20time20valorant201_03b5a9d7fb07984fa16e839d57c21b54.jpeg)
![How To Fix Valorant 1TB File Size Bug [Fast & Easy]](https://theglobalgaming.com/assets/images/_generated/thumbnails/407081/1TB-SIZE-FILE-FIX-VALORANT_03b5a9d7fb07984fa16e839d57c21b54.jpeg)

![Best Raze Lineups on Icebox [2024 Guide]](https://theglobalgaming.com/assets/images/_generated/thumbnails/58004/6248e15f44720bcdc407f796_best20raze20lineups20icebox20valorant_03b5a9d7fb07984fa16e839d57c21b54.jpeg)